Complete Corepunk Beginners Guide 2025 – Everything You Need to Know to Get Started
Corepunk is an immersive MMORPG packed with strategic combat, open-world exploration, and deep progression systems. Whether you're gearing up for PvP battles, dungeon raids, or crafting powerful gear, this beginner’s guide will walk you through everything you need to know. From choosing your hero and masteries to understanding combat, crafting, professions, and the Karma system, we’ve got you covered. Start your journey in Corepunk the right way!
Table of Contents
Corepunk Beginners Guide
Welcome to the Complete Corepunk Beginners Guide!
This guide is tailored for new players diving into the world of Corepunk, an immersive MMORPG filled with rich exploration, strategic combat, and endless possibilities. Our aim is to break down the key basics and essential details to help you get started effortlessly and enjoy your journey through this unique game.
Introduction
What is Corepunk?
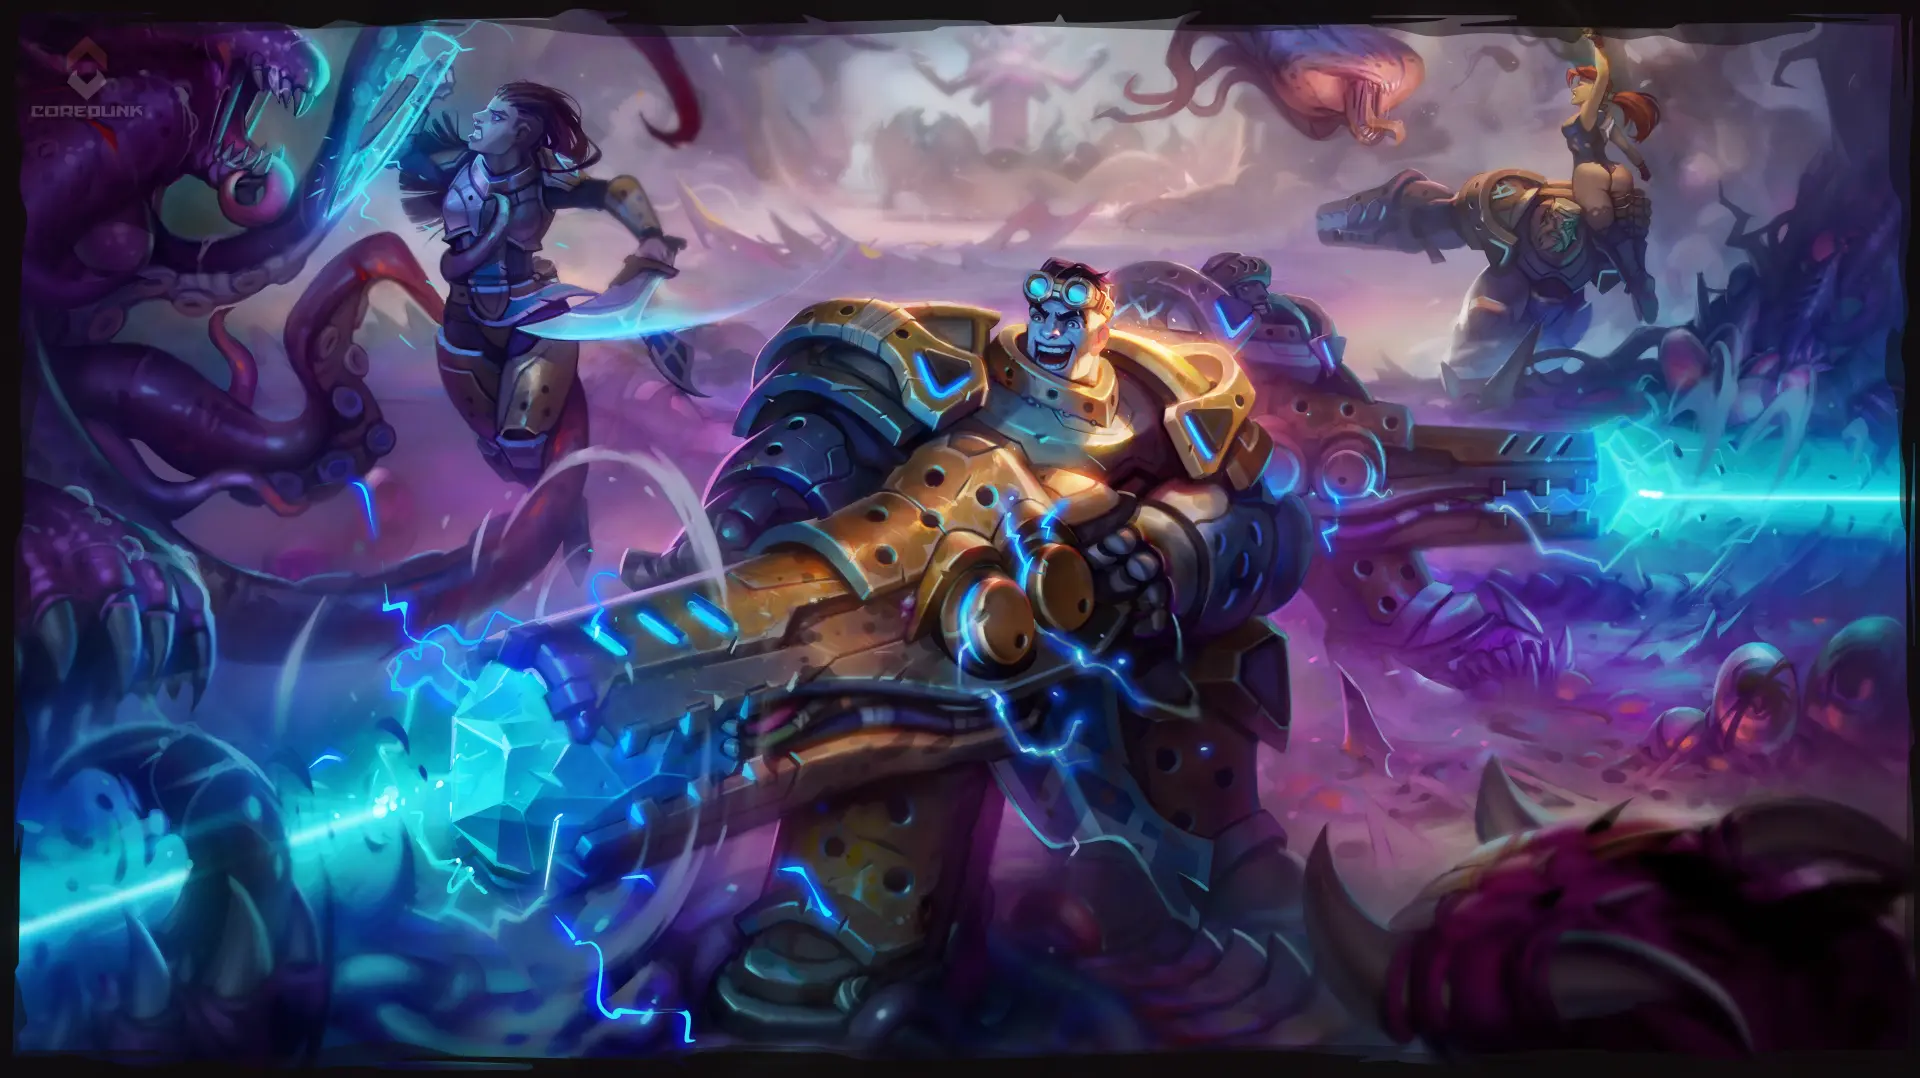
Corepunk is an MMORPG set in a seamless, open world, distinguished by its fog-of-war mechanic that encourages exploration and strategic gameplay. Players can engage in various activities, including questing, crafting, PvP battles, and dungeon exploration, all within a richly detailed environment. See more: Corepunk Review
Platforms you can play Corepunk on
Corepunk is currently only available on PC. You can also only access the game via the Corepunk Launcher, the game currently isn’t on Steam or other similar platforms.
Buying the game
Corepunk is a buy-to-play game, requiring a one-time purchase to access its content. You can do so via our Referral Link.
Monetisation
Corepunk follows a buy-to-play model with no pay-to-win elements. The game focuses on providing a fair and balanced experience for all players. The ingame store features cosmetic purchasable.
Installing Corepunk
To install you game you first need the Launcher from the Official Corepunk Website. Once that is installed you can then login and install the game. It’s a good idea to pin the launcher to your taskbar or create a desktop shortcut as this doesn’t happen automatically. To uninstall Corepunk you do this inside the launcher also.
Character Creation
Server Selection
Players can choose from servers located in various regions, including Iowa, Mumbai, the Netherlands, Oregon, São Paulo, Seoul, and Singapore. Selecting a server close to your location can reduce latency and improve gameplay experience.
Heroes (Classes)
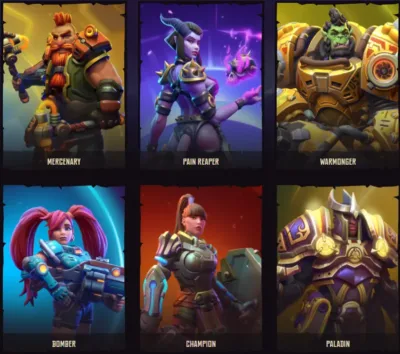
Corepunk offers six heroes, each with unique abilities and playstyle. Additional Heroes will be available after Early Access.
- Mercenary: A versatile combatant adept at both melee and ranged attacks, excelling in adaptability and resourcefulness on the battlefield.
- Pain Reaper: A formidable ranged damage dealer, harnessing dark energies to inflict significant harm upon enemies from a distance.
- Warmonger: A relentless melee fighter, thriving in the heat of battle with unparalleled aggression and strength.
- Bomber: Specialising in medium-range combat, the Bomber utilises explosives and crowd control tactics to disrupt and damage foes.
- Champion: A noble warrior embodying the classic fighter archetype, the Champion delivers powerful melee attacks and withstands substantial damage.
- Paladin: A hybrid hero combining offensive and supportive capabilities, the Paladin balances dealing damage with healing and protecting allies.
Changing Class / Hero
Your hero choice is permanent, so make sure to pick one that suits your playstyle! However, within each hero type, you can switch between their three available sub-classes. This allows for some flexibility in playstyle, but you cannot change to a completely different hero type once selected.
Race
Each hero belongs to a specific culture or faction each offering unique attributes and lore. These are locked and currently unchangeable. Be prepared for Orcs, Dwarves, Demons, Humans and more.
Masteries (Sub-classes)
Each hero has three unique weapon masteries, determining their skills and combat style. Masteries can be changed upon reaching level 40.
Mercenary:
- Berserker: A melee specialist wielding dual axes, excelling in close-quarters combat with high damage output.
- Engineer: Utilises mechanical devices and turrets to control the battlefield, providing both offensive and defensive support.
- Sniper: Focuses on long-range precision attacks, dealing significant damage from a distance.
Pain Reaper:
- Pyromancer: Harnesses fire magic to incinerate enemies, dealing area-of-effect damage.
- Soul Eater: Draws power from enemies’ souls, weakening foes while strengthening themselves.
- Warlock: Summons dark forces to curse and control enemies, offering versatile offensive capabilities.
Warmonger:
- Commando: Employs heavy weaponry and explosives for area denial and crowd control.
- Legionary: A frontline warrior with enhanced defensive skills, capable of withstanding significant damage.
- Shaman: Channels spiritual energies to heal allies and debilitate enemies, blending support and offense.
Bomber:
- Blast Medic: Combines explosive attacks with healing abilities, supporting allies while damaging foes.
- Grenadier: Specialises in throwing grenades to control enemy movement and deal burst damage.
- Infiltrator: Utilises stealth and traps to ambush enemies, excelling in surprise attacks.
Champion:
- Defender: A tank role with high durability, protecting allies and controlling enemy aggression.
- Destroyer: Focuses on dealing massive melee damage, breaking through enemy lines with brute force.
- Ranger: Combines ranged attacks with mobility, striking from a distance and evading retaliation.
Paladin:
- Cleric: Provides healing and support to allies, ensuring team sustainability in battles.
- Crusader: Balances offensive melee attacks with defensive capabilities, serving as a frontline combatant.
- Hand of the Light: Channels holy energy to smite enemies and bolster allies, blending damage and support.
Physical appearance
Players can customise their character’s appearance, including features like hair, facial attributes, and more, to create a unique avatar.
Starting the Game
Movement
Movement in Corepunk is primarily controlled by point-and-click or hold mechanics. Simply aim the mouse and press or hold the RMB (Right Mouse Button) to move. You can also move by using the RMB and pressing somewhere on the minimap
Camera Control
Corepunk utilises a top-down camera perspective. Players can adjust the camera’s zoom level to suit their preferences by rolling the scroll wheel to zoom in and out.
Unlinking Camera (L)
You can unlink the camera from your character, allowing you to move the camera independently. While doing this, you can use the arrow keys to adjust the camera position while continuing to move as usual with point-and-click controls.
Centring Camera (Tab)
To centre the camera while in free movement, simply press Tab.
Relinking Camera (L)
When the camera is in free mode, press L again to relink it to follow your character.
Fog of War
The fog-of-war mechanic obscures unexplored areas on your in-game map, encouraging exploration. It also limits your vision on the play screen, darkening areas that your character cannot naturally see due to obstacles or low light conditions.
Interacting with the World
Interacting with Objects
Players can interact with various containers in the environment to loot items and resources. When you hover your mouse over an object, it will appear with a white border if it’s interactable. Click on these objects with the RMB (Right Mouse Button) to interact.
Breaking and Looting Containers
Players can break containers in the environment to loot items and resources. These containers are highlighted with a yellow border when you hover the mouse over them. Use the RMB to interact, and your character will break the container using their weapon.
Picking Up Items
When enemies are killed or items are looted from containers, the items will fly into the air before landing on the ground. Use the RMB to pick them up. If you’re quick enough, you can click on the items mid-air to pick them up faster.
Finding Usable Objects (Left Alt)
Holding the Left Alt key highlights usable objects in the vicinity. This is particularly helpful for quests involving hard-to-find objects.
Discarding Items
Access your inventory by pressing I, then drag an unwanted item to the game screen to destroy it.
Splitting a Stack (Shift+LMB)
To split a stack of items, hold Shift and click the LMB (Left Mouse Button) on the item. Select the desired amount and place the new stack into an empty inventory slot.
Quest Items
Some quests require specific items that can only be obtained while the quest is active and are found in the areas mentioned in the quest dialogue. These items will appear in your inventory with a golden box around them, signifying their quest status, and are automatically removed when the quest is completed. Be sure to follow the dialogue or quest log carefully to locate and collect these items.
UI
User Interface
Corepunk’s UI is designed to provide quick access to essential game features and information.
The quest tracker is located in the top right corner, with an exclamation mark icon that allows you to open or close it to show more or less information about quest progression. The quickslot hotbar is on the right side of the screen, and its hotkeys can be customised in the settings.
The chat window is at the bottom left, with options for different chat channels. Above the chat box is a question mark icon that opens the help menu, providing quick tips for players. Next to the chat box is your hero’s portrait, which includes buttons underneath for viewing physical attack stats, spell attack stats, and armour stats.
In the centre of the screen, your health bar is displayed, with your mana bar directly underneath it. Below this are your skills, specific to your hero and sub-class, and the experience bar at the bottom. To the right of the skills, you’ll find the special ability tracker, which shows the progress and readiness of your special ability. Adjacent to this are your slotted weapons and artifacts, some of which may have usable skills. These can be swapped with items in your inventory, and their assigned hotkeys allow for quick use.
The mini-map is next to the artifact slots, allowing you to right-click for map walking, though it offers no additional functionality. Below the mini-map is your gold counter, displaying your current funds. The options menu is in the bottom right corner, represented by a cog icon.
Menu Overlay
Hovering over the cog icon in the bottom right opens the menu overlay. This includes:
- Map screen
- Weapon mastery
- Talents
- Inventory
- Hero screen
- Professions menu
Other Options
Clicking on the cog menu provides options such as exiting the game, returning to the lobby, and opening the settings menu. Within settings, you can customise options and reassign hotkeys to fit your preferences.
Levelling
Levelling Up
As players gain experience, they level up, unlocking new skills and abilities. Experience is gained through activities such as killing enemies, crafting, harvesting, and completing quests.
Level Cap
The current level cap in Corepunk is level 40.
Post Level Cap Levelling
After reaching level 40, you can take on a quest to unlock a new sub-class or weapon mastery. This allows you to begin levelling one of the other three possible sub-classes for your hero. Each subsequent sub-class becomes progressively harder to level up to max. Eventually, you’ll be able to level all three sub-class options, unlocking their abilities and making them available for use.
Joining a Culture
Upon reaching level 40, players can choose to join one of the game’s cultures:
- Elaniens
- Faidens
- Quaddari
- Yorners
Death
Death mechanics in Corepunk involve respawning at designated points, with penalties varying by zone:
- Green and Orange Zones: Players drop 1 random resource item from their inventory.
- Red Zones: Players drop 5 random items from their inventory.
- Criminals (low karma): Criminals drop all items upon death in both Green and Orange Zones.
Gear & Equipment
Character Stats (H)
To access your character stats screen, press H. Expand the stats panel by clicking the small arrow on the side to view all of your character stats, including buffs and benefits. This screen also shows your equipped gear, PvP Rank, and Karma Rank.
Health
Your health bar is displayed as an orange icon above your character’s head and a green bar at the bottom of the UI. The small lines on the orange health bar help indicate how much health you or someone else has, making it easier to identify targets with high health pools. Maintaining health is essential for survival and can be managed using snacks, campfires, and universal skills. Max health can be increased by equipping better artifacts.
Mana
Mana is required for all skills and abilities in Corepunk, as well as for profession activities like gathering. It is displayed as the blue bar beneath both of your health bars on the UI. Mana depletes over time as it is used and can be restored using snacks, campfires, or universal skills. Max mana can also be increased by equipping better artifacts.
Gear & Armor
All gear and armor in Corepunk are hero-specific, meaning they must match your character’s class. Pay attention when selecting quest rewards to ensure they are suitable for your hero. The gear visible on your character in the H menu is purely cosmetic and changes your appearance without affecting your stats.
Gearscore
Your gearscore is the primary measure of your character’s power, combining the stats from equipped items like weapons and artifacts. Although there is currently no place to view your total gearscore, items display individual gearscore values. Improving gearscore involves acquiring higher-tier and higher-quality items. Tiers are level-based, while rarity is indicated by the item’s outline colour, with rarer items providing better stats.
Weapons
Weapons are a critical component of your hero’s power and directly tied to the sub-class you chose. Your equipped weapon is displayed at the bottom of the UI. Hover over it to view details. To upgrade to a better weapon of the same type, acquire one through crafting, buying, or looting and drag it into the weapon slot. Switching to a completely different weapon type requires a specialisation change at level 40. Weapons can be improved by increasing their tier, gearscore, and rarity.
Chips
Weapons in Corepunk contain sockets that allow for chip integration, which provides benefits such as increased attack speed and damage. Chips scale with your character’s stats and come in Standard and Advanced types. The number of standard sockets on a weapon depends on its tier and quality. Each chip slot has a symbol, and matching it with a similar chip type maximises effectiveness. Chip slots can be rerolled using the Synth Machine. Chips can be purchased from NPCs, and to equip one, press CTRL+RMB on your weapon to open the integration menu, find the chip in your inventory, click on the empty chip slot
Artifacts
Artifacts function like gear and provide strong stat boosts or even new abilities. Passive artifacts offer continuous benefits, while active artifacts sacrifice stats to grant usable skills. You can equip up to six artifacts, displayed alongside your weapon at the bottom of the main UI. Artifacts come in various tiers and rarities, with higher-quality options offering better stats. They can be obtained through quests, NPCs, or crafted using the Construction profession.
Runes
Runes are similar to chips but are slotted into artifacts instead of weapons. They enhance your equipped artifacts and provide specific benefits triggered by events, such as gaining increased attack power after killing an enemy. Runes offer significant stat boosts and are an essential part of improving your character. To equip a rune right-click it then right-click on your artifact and it should be equipped.
Combat
Combat Style
Corepunk’s combat blends MOBA and ARPG elements.
Attacking Enemies
To attack, right-click an enemy to initiate combat, or your character will auto-attack if targeted by an enemy. Your character’s combat kit includes three skills, one ultimate ability, two potential universal skills, one special ability, and any additional abilities gained from equipped artifacts. All combat is directional, and abilities are cast based on the direction your character is facing.
Cancel Attack
Press S to stop your character from running to attack an enemy.
Melee Combat
Melee combat involves close-range attacks with weapons like swords, axes, or spears. Positioning is key in melee combat—circle around enemies to group them together, allowing you to hit multiple targets with area-of-effect (AoE) skills. Proper positioning ensures your abilities deal maximum damage.
Magic and Ranged Combat
Magic and ranged combat use spells or ranged weapons like bows, allowing players to attack enemies from a safe distance. Ranged combat offers strategic advantages, such as evading damage by moving around objects while still maintaining offensive pressure.
Skills and Abilities (Q, W, E)
Skills are tied to your chosen class and weapon mastery. While skills cannot be swapped out, they can be upgraded and enhanced through talents and weapon masteries. The first three skills are active abilities with short cooldowns, cast directionally based on your character’s facing.
Ultimate Ability (R)
The ultimate ability is your fourth skill and is typically a high-impact ability or character buff with a longer cooldown. Use this ability strategically during critical moments. The default key for casting this ability is R.
Special Ability (T)
Special abilities build up over time and often provide passive benefits. They charge through specific actions, such as auto-attacks or taking damage, and can be unleashed for a powerful effect when fully charged by pressing T.
Unlocking Skills
Initially, you start with one skill. As you level up, you unlock additional skills or upgrade existing ones. Click the + symbol beneath your skill bar in the main UI to unlock or upgrade skills.
Upgrading Skills
Each skill can be upgraded up to four times, enhancing its performance. Upgrades may increase mana cost, reduce cooldowns, and boost damage or effectiveness.
Skill Combos
While Corepunk doesn’t have traditional skill combos like some games, it’s important to consider the effects of your skills and use them in an optimal order. For example, if one skill applies a debuff, it’s often more effective to use it first before following up with other abilities to maximise damage or control. Experiment with your skill rotation to find the most effective combinations for your playstyle.
Talent Mastery (K)
Press K to open the talent menu. Assigning a mastery provides an initial buff and determines which talents you can unlock. For example, choosing the Tank mastery increases health and aggro generation while unlocking tank-specific passives. The first mastery is available immediately, the second at level 10, and the third at level 15. You can reset mastery and talent choices. Once satisfied with your choice, press the tick at the bottom to confirm.
Talent Points
You earn talent points as you level up. Assign five points to each mastery tree, selecting one of three talents per row. Some talents are better for early-game progression, while others are suited for group content or endgame. Carefully choose the most beneficial talents for your current needs, then confirm your choice by pressing the tick.
Universal Skills
Optional universal skills can be unlocked by visiting Skill Trainer Zara Thorne, west of Goldenfield Town near the Yoga House.
- The first universal skill is available at level 5, and the second at level 10.
- Each skill costs 20 gold and can be equipped by selecting a skill slot, purchasing the skill, and assigning it.
- Universal skills can be swapped out by revisiting Zara.
Weapon Mastery
Your sub-class determines your weapon type and mastery, which governs your skills. Open the Weapon Mastery menu by pressing K and selecting the Weapon Mastery tab.
- This screen displays your current weapon level and experience.
- Below this, three of your four sub-class-specific skills are listed (excluding your ultimate).
- Levelling up your weapon mastery earns points to enhance these skills with additional effects or boosts.
Levelling Weapon Mastery
Weapon Mastery is levelled using Weapon Mastery Flasks, which provide mastery experience. The maximum input for weapon mastery is currently 26 points.
Resetting Talents & Weapon Mastery
If you select the wrong talents or mastery, you can reset them using specific items. Both items can be obtained from quest rewards or by breaking containers in the world.
- Talent Renewal Cube resets talent points.
- Specialization Renewal Dodecahedron resets talent mastery choices.
Changing Sub-Class / Unlocking New Weapon Mastery
At level 40, you can reportedly unlock a new sub-class or weapon mastery by completing a quest from a specific NPC. Each additional sub-class takes longer to level up than the previous one. Once unlocked, you can switch freely between sub-classes, eventually gaining access to all three options for your hero.
Blocking, Crowd Control, and Interrupting
Blocking is not an active mechanic in Corepunk. Instead, survivability relies on stacking resistance, shields, health, and mitigation. Crowd control (CC) effects are tied to specific skills and weapon masteries. Interrupting enemy abilities requires precise timing with interrupt-capable skills.
Quickslots
Quickslots appear on the right side of your UI. Drag items from your inventory to the quickslot to assign them. Be cautious when dragging, as dropping items elsewhere on the screen will destroy them.
Consumables & Snacks
Consumable items, such as snacks, are essential for health and mana regeneration. Snacks can be crafted and consumed outside of combat, making them vital for survival during exploration. Buff consumables also provide temporary stat increases, such as enhanced critical chance.
Recovering Health & Mana
After exiting combat, your character receives a short regeneration boost. For sustained recovery, use snacks, campfires, or universal skills. Choosing the Pathfinder talent mastery unlocks passives that enhance health and mana regeneration.
Making and Using a Camp
Campfires allow you to regenerate health and mana when far from town. Craft campfires at a cooking station using matches and wood. Different types of camps offer varying benefits. To use a campfire, place it by right-clicking the item in your inventory, then click on the ground to deploy it. Right-click the campfire to sit and receive its benefits.
Map and Travel
Map (M)
Press M to access your in-game map. In the top-left corner, you can access map settings to filter what you want to display, such as NPCs, quests, or other points of interest.
Map Progress
When you first start, the map is covered by the Fog of War, and you must explore areas to uncover them. As you do, discovered locations and NPCs will appear on your map.
Setting a Custom Map Marker
To place a custom marker, press the arrow icon in the bottom-left corner of the screen to activate the marker tool. Click on the desired spot on the map, enter a name, and press Enter. This will place a marker that remains visible on your map. You can place multiple markers to track various locations. Pressing on the marker on your map lets you share the location to chat, delete, edit or recolour.
Auto Run (Z)
Press Z to activate auto-run, allowing your character to move forward automatically, making navigation more convenient.
Fast Travel
Corepunk does not currently have a fast travel system between multiple locations. However, players are given an item called the Returner when they start the game. This item allows you to teleport back to the last remembered location (usually Goldenfield Town) once every 30 minutes when you right-click it. The item also mentions assigning it to a receiving station, but this feature does not seem to be functional yet, you can speak to Martha and tell her “I want to stay here” to assign it to the town to your returner. Additionally, past trailers have hinted at a train system, which may be introduced in the future.
Mounts
Mounts are the primary means of faster travel in Corepunk. To acquire your first mount, you need to reach level 8 and save up 400 gold. Once you meet these requirements, head northeast from Goldenfield Town, through Ripplecrop Fields, and into Riverrise City. There, near the entrance, you’ll find Tor MacDrummond at his motorbike store.
EDIT: You can now also buy a Hoverboard for 250 Gold from Martin McMichael in Goldenfield Town
Purchase the motorbike, which increases your movement speed by 75%, and it will be added to your inventory. Right-click the motorbike in your inventory to use it, or assign it to a quickslot for easier access. Other mounts will also be available although we don’t currently know where from.
Quests
Quests
Quests are a vital part of Corepunk, providing significant experience, gold, items, and gear. They range from story-driven quests to task-based objectives, all fully voiced to enhance the narrative. Currently, there are over 350 quests available in the game.
Episodic Quests
Corepunk’s quest system follows an episodic model, delivering regular episodes and seasons of story content, much like a TV series. This ensures a steady stream of content for players. New episodes and seasons are already in development and will be released during Early Access and beyond.
Starting a Quest
To begin a quest, approach an NPC and right-click to start a conversation. If the NPC has a lifebuoy icon glowing orange, it means they have a quest available. During the dialogue, you can ask if they need help by selecting the appropriate option. You can listen to the fully voiced dialogue for clues about the quest or skip it, but paying attention is often helpful as it contains valuable information about the task. Players can have a maximum of 25 active quests at a time.
Quest Log (J)
Press J to access your quest log. This menu allows you to manage your quests:
- Eye icon: Show or hide quests from the main UI.
- Details: Click a quest for more information. While details can sometimes be vague, pressing the History button lets you review the NPC’s dialogue for additional clues.
- Location button: This usually shows the location of the NPC who gave the quest on your map.
- Additional Dialogue: On the main UI quest tracker, hover over a quest to see a play button. Clicking it will play a line of dialogue from the quest giver, though this is often not essential for completion.
Completing a Quest
Once all objectives are completed, the quest log will mark the task as complete by turning green. Locate the correct NPC by pressing the Location button in the quest log, then turn in the quest. Often, NPCs will provide additional dialogue upon completion and may offer a follow-up quest.
Choosing Quest Rewards (Carefully Selecting Correct Items for Your Hero)
At the end of a quest, a rewards window will appear. Use the small arrows at the bottom of the reward boxes to see all available options. Take your time when selecting rewards, as some items are hero-specific and cannot be used by your character. Hover over items to see detailed information. Items restricted to other heroes will display red text and indicate the incompatible hero type. Ensure you select items appropriate for your hero to maximise the benefits of your rewards.
Professions
Professions/Tradeskills (Y)
Corepunk offers a variety of professions, some focused on gathering and refining materials, while others specialise in crafting useful items. The more skilled you become in a profession by increasing mastery and efficiency, the better items you can gather and create. Press Y to open the professions menu.
Crafting Professions
Corepunk has five crafting professions:
- Mysticism: Crafts runes for enhancing artifacts.
- Weaponsmithing: Creates weapons for your hero.
- Construction: Crafts new artifacts for stat boosts or abilities.
- Alchemy: Produces buff consumables.
- Cooking: Prepares snacks and campfires for health and mana regeneration.
Gathering Professions
There are four gathering and refining professions:
- Mining: Extracts ore from nodes.
- Logging: Collects wood from trees.
- Herbalism: Harvests plants.
- Butchery: Skins animals for materials.
Each gathering profession has a refining component, where raw materials are processed into usable crafting components.
Finding and Gathering Materials
Material nodes are scattered throughout the world.
- Cooking nodes: Found early on in farmlands by opening boxes, bags, or running through crops that drop food items.
- Other nodes: Located in the wilderness. Forests are rich in logging materials, grassy areas contain herbs for herbalism, and mining nodes are spread throughout, with hotspots like north of Goldenfield Town.
Nodes with a white glow when hovered over are harvestable. Right-click to start harvesting. Your ability to gather materials depends on your mastery in that profession.
Failing
Crafting or harvesting may occasionally fail, causing materials or nodes to “break” and be lost. Increasing your efficiency reduces the chance of failure.
Refining Raw Materials
After gathering raw materials, they must be refined into usable crafting components at profession-specific stations.
- Logging and Mining Stations: Found west of Goldenfield Town.
- Butchery and Herbalism Stations: Located near the town center.
The types of crafting materials you can produce depend on your mastery level. Higher-tier materials require higher mastery to refine.
Creating New Items
To craft an item, you need the required materials and a learned recipe or plan.
- Recipes can be obtained from quests, purchased from NPCs, or looted from containers.
- Materials must be in your inventory (not your bank) to craft.
At the crafting station, select the item you want to create and press Create.
Mastery
Every time you gather, refine, or craft, you gain experience that increases your mastery in that profession. Higher mastery unlocks the ability to gather and craft higher-tier items.
Efficiency
Efficiency in Corepunk determines your success rate and potential bonuses for crafting and gathering professions. Each profession, except Cooking, has an efficiency percentage bar displayed below it. Efficiency is split into two categories: gathering and crafting. Initially, you start at 0%, and as you perform profession activities, your overall efficiency percentage grows until it reaches a total of 100%.
This 100% is distributed across four professions. The more you focus on a specific profession, the higher its efficiency percentage grows, but at the cost of reducing efficiency in others. If you actively use all four professions, your efficiency will be divided, whereas specialising in one allows you to gain higher-tier perks, such as reduced failure rates or access to crafting epic items.
You can manage your efficiency split by locking a profession’s percentage. To lock efficiency, hover over a profession icon and click the lock symbol, ensuring your chosen profession remains prioritised. Balancing or specialising is entirely up to you based on your gameplay style and goals.
Item Tier
Higher-tier items require higher mastery to gather or craft.
Item Rarity
Items have varying rarities indicated by the colour of their border. Higher-rarity items often have better stats and may require specific recipes or materials.
Synthesis Machine
The Synthesis Machine allows for crafting, modifying, and upgrading items.
- Accessing the Machine: Found at any crafting station under the Synthesis Machine tab.
- Modifying Items: Drag the item to modify into the machine, along with required materials (e.g., Reroll Main Values) and Synthesis Fuel. Press Create to make the changes.
- Increasing Rarity: Use the same process with materials that enhance item rarity.
- Crafting Items: Drag correct materials into the machine to craft specific items with enhanced stats.
Trading & Storage
Gold & In-Game Currency
Gold is the primary currency in Corepunk and is especially critical during the early stages of the game. You’ll need gold for essential purchases, such as obtaining your first mount, unlocking universal skills, buying crafting recipes, and upgrading your gear and attachments.
Trading with Players
Player trading is straightforward but requires precision to avoid accidental attacks. To trade, left-click on a player to select them (avoid right-clicking, as this initiates an attack). Once the player is highlighted at the top of the screen, click on their picture to bring up options, then select Exchange to invite them to trade. If the other player accepts, you can drag and drop items into the trade window to complete the exchange.
Trading with NPCs
Most NPCs in the game are trade-capable. To trade with an NPC, right-click on them and select the coin pile icon to open their shop. This brings up the shop window where you can buy items, use the buyout feature to buy back accidentally sold items, and sell items by right-clicking them in your inventory. Note that NPCs have a limited amount of gold, so they may run out if you sell too much.
Buying from NPCs
Early game progression often requires purchasing useful items from NPCs, including improved artifacts and crafting plans. Each NPC shop contains a unique set of items that rotate every 60 minutes, but shops only refresh if you speak to the NPC. If you’re searching for a specific item, you’ll need to visit multiple NPCs regularly to trigger their shop refreshes.
Using a Bank
To use the bank, find an NPC with the bank icon and speak to them. Select the bank icon to open your bank (or warehouse). Right-click on items to transfer them between your inventory and the bank. You can expand your available bank space by pressing the plus icon at the top of the bank page.
Community
Interacting with Other Players
Corepunk offers several ways to interact with other players, including Invite to Party, Preview, Exchange, Follow, Duel, Add Friend, and Ignore. To interact with another player, left-click on them to highlight their character, then right-click on their picture at the top of the screen to open the interaction menu. Most options are self-explanatory, but Preview allows you to see details about their hero, level, PvP Rank, Karma, and equipped cosmetic gear. You can also view their stats, but artifacts and weapons remain hidden.
Talking to Other Players
You can communicate with other players using the chat menu located in the bottom left corner of the screen. To start typing, press Enter, which activates the cursor in the chat window. Note that you cannot type and move simultaneously, as clicking the mouse to move will deactivate the chat window. Corepunk offers various chat channels, including system, area, global, looking for party, trading, and whisper.
How to Whisper
To whisper or direct message another player, type /w PlayerName followed by your message. If the player is active in chat, you can also right-click their name and select the whisper option to send a message directly.
Adding Friends (O)
Press O to access your friends list. From here, you can add friends directly by entering their name or by using the interaction menu mentioned earlier.
Guilds (G)
A guild system is planned for Corepunk, but it is not yet available in the current version of the game.
PvP
PvP Content
Corepunk offers diverse PvP options, including Open World PvP, Arenas, Battlegrounds, and high-risk, high-reward Extraction Instances. The fog of war mechanic adds a strategic and immersive layer to open-world PvP.
Peaceful Mode (P)
Players not interested in PvP can toggle Peaceful Mode by pressing P. This is enabled by default and can only be changed in non-safe zones.
Player Killing
Corepunk’s Karma System uses a colour outline to categorise players:
- Green: Party or raid members. Cannot be attacked.
- White: Neutral players 5+ levels below you. Killing them incurs a 500 Karma penalty.
- Yellow: Neutral players 2+ levels below you. Killing them adds Karma Points.
- Red: Criminals banned from cities, hostile to most NPCs, and drop random equipped items when killed. Their killer earns Honor Points.
Karma
Killing players in certain zones earns Karma Points, with penalties depending on level and gear differences. Accumulating enough Karma Points grants criminal status, restricting access to cities and causing players to lose equipped artifacts and weapons on death. Karma can be reduced by completing tasks or killing mobs.
Honor
Honor Points are earned by killing Criminal players, who have accrued excessive Karma Points by unjustly killing others.
PvP Zone Rules
- Green Zones (e.g., Goldenfield Town): Safe zones where no Honor is awarded for PvP, and killing players incurs a loss of 50 Karma, plus 50 per level difference (up to 250). Dead players drop one random resource, and criminals lose all equipped loot. Teleporting is unrestricted.
- Orange Zones (e.g., Windreach Woods): Similar to Green Zones, but outside the safe areas. Karma penalties and loot drops still apply. Teleporting is permitted.
- Red Zones (e.g., Ripplecrop Fields): High-risk PvP zones where players earn 10 Honor per kill without Karma penalties. Dying results in a loss of 5 Honor and 5 random items. Criminal status does not apply here, and teleporting is limited.
PvE
PvE Content
Corepunk offers a wide range of PvE activities for both solo players and groups. Players can explore solo dungeons, group dungeons for up to four people, and randomly generated dungeons. Other activities include raids, minibosses, world bosses, and wandering bosses. The game also features a camp system with advanced open-world AI that creates dynamic challenges. At its core, Corepunk focuses on delivering a rich and immersive world for players to explore.
Combat Roles: Tank, Healer, DPS
Corepunk embraces the traditional holy trinity of combat roles, allowing players to specialise in Tank, Healer, or DPS masteries. These roles are essential for optimising group content and will play a significant role in tackling endgame challenges. Specialised group setups ensure coordinated and efficient gameplay during more difficult encounters.
