


ESO Bal Sunnar Dungeon Tank Guide
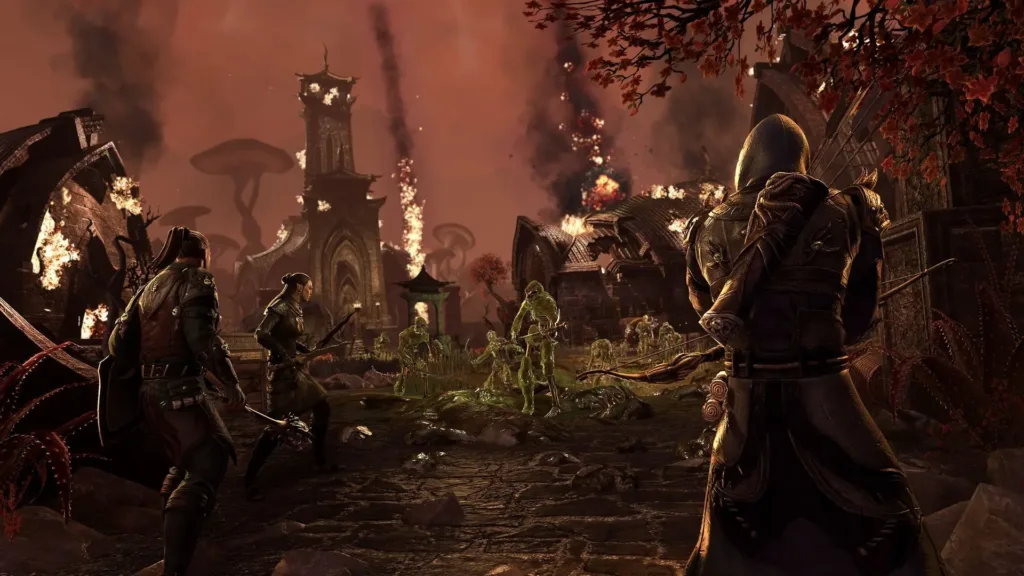
Bal Sunnar is one of Elder Scrolls Online’s most intricate dungeons, introduced in Scribes of Fate (March 2023). Located in the Stonefalls zone, this dungeon challenges players with three formidable bosses, each featuring unique mechanics, Hardmode variations, a tricky puzzle and dangerous add phases that demand strategic play.
As a Tank, your role is crucial—controlling enemy aggro, mitigating incoming damage, and positioning bosses to ensure your team avoids deadly mechanics. In this ultimate Bal Sunnar Tank Guide, we’ll break down each boss encounter, hard mode changes, and tanking responsibilities so you can confidently lead your team to victory.
✅ Want to improve your tanking across all dungeons? Check out our ESO Dungeon Tank Build Guide!

Kovan Giryon – Boss 1

Attacks to look out for:
- Teleport Strike Heavy Attack: Kovan raises his blade over his shoulder with the point facing somebody in the group, then teleports across the room to strike them. As long as he is taunted and you block, you and your group should be okay.
- Gap Glose AOE: If you get too far away from Kovan, an AOE will appear under his feet and he’ll start running towards you. It’s a gap closing move and doesn’t appear to occur if you stay close to him. If he does use it, a shade will appear where he started, and it will do the same move a few seconds after the first one lands.
- Strike from Above AOE: Boss will do a move where he appears to strike the ground. He’ll then teleport into the air and a large AOE circle will target someone in the group. This should be roll dodged. A shade will appear in the air, and about 8-10s later, it will strike the same location.
- Lingering Rectangle AOEs (first wave): The boss will flash to the outside of the room and will send out a rectangular AOE that goes across the entire room. He’ll then flash to another end of the room and send out a second AOE that is parallel to the location of the first one. The AOE will linger for 4s after the attack lands. Don’t stand in these. They kill you fast. After sending out the attack, Kovan will leave behind a shade in this location which can also send out rectangular AOEs throughout the fight. They never go away.
- Lingering Rectangle AOEs (second wave): Kovan will repeat the move just described later on in the fight, but he’ll send out these two perpendicular to the location of the first two. Once again, shades will appear that can also send these out for the duration of the fight. As a result, you’ll have 4 shades sending out these rectangle AOEs throughout the fight.
- Poison Circles: Boss will bring his arm towards the center of his body and then will raise his hand over his head. His hand will glow, and a poison AOE will appear underneath everyone. The damage from these stacks, so don’t overlap your circles.
Adds/Mini-bosses Notes:
- Primitive Nix-Ox (Mini Boss)
- Appears at 70%
- Conal AOE: as is usually the case, you’ll be tanking this so it is facing away from the group, so this shouldn’t be an issue
- Spinning AOE: Richard Nix-Ox throws a tantrum and sends AOEs in a circle around him. You can interrupt this. It is telegraphed like a heavy attack, so you can bash without a single one going out.
- Primitive Nix-Hound
- They attack your team. Chain them in.
- Primitive Kwama
- They explode when near death or upon death.
- Iron Atronach (Mini Boss)
- Appears at 45%
- Heavy attack + Lava Circle: It strikes the ground, leaving a lava AOE in its place. Don’t stand in the lava.
- Lava AOE (Channel): This sends flame AOEs out all over the arena. It’s just like the Nix-Ox’s spinning AOE and can be interrupted.
- Frontal Lava AOE: The Atronach sends out 5 AOE circles in a frontal attack
- Flame Salamanders
- They attack your team. Chain them in.
- Fire Shalks
- Mostly, they will perform AOE attacks around where they are standing. Chain them in.
Special Notes:
- After shadow phases end, be on the lookout for Kovan’s strike from above (it’ll hit in the exact spot it last hit before he left). Immediately range taunt him, as he will go into his teleport strike heavy attack right after he lands. If he isn’t taunted, he’ll often target somebody else, leading to a death from a group member who isn’t ready for it.
Kovan Giryon – Boss 1 Hardmode
Differences:
- Everything deals a lot more damage, including adds, so make sure you chain them in ASAP so they aggro to you and die in the cleave.
- The Primitive Kwama still explode when they are about to die, but they deal way more damage. To help your group, you can call out “block cast” so that your group members can block cast AOE abilities when they’re up to mitigate explosion damage
- The poison circle is the main threat, as it deals massive damage. It’s best to soft stack (healer and tank positioned on opposite sides from each other with Kovan in between, both DPS on the left and right of Kovan) to make it easier to heal. A damage shield and a self heal like Vigor give more room for error in stacking or healing.
Urvel Drath – Optional Boss
Attacks to look out for:
- Summon Pillars (Surround): The boss will put up pillars around himself. Mostly they’re just annoying.
- Summon Pillars (Linear): This is a long, telegraphed heavy attack. When it lands, it sends out lines of pillars.
- Cookies: The boss will put a red circle (cookie) above someone’s head. AOE circles will target that person. If you have a healer in the group, they aren’t really a threat.
- Other stuff: I bet the boss does other stuff too, but seriously, this boss doesn’t really need a write-up, so I didn’t consult my video when I wrote this and have no idea if anything else happens.
Mechanics tank is responsible for:
- Taunt and hold block.
Special Notes:
- At some point in the fight, this Argonian Behemoth uses “Hulk Smash” on Urvel Drath and knocks him into the ground, stunning him. I have no idea who this NPC is or why he’s here, but get wrecked, Urvel.
- For beating this guy, your group gets Ancestral Vitality, increasing Stamina and Magicka recovery by 30%.
Roksa the Warped – Boss 2
Attacks to look out for:
- Summon Darklight Orbs: This attack happens frequently. Roksa will throw her head into the air and send light out from it, summoning orbs to the outsides of the arena. These orbs will tether to each player, and as soon as the tether appears, a 6-second countdown timer will appear on your buff/debuff bar. The orbs can be destroyed by any player by interrupting them with a bash, crushing shock, or another interrupt ability. Two players can get all the interrupts relatively easily by slotting Crushing Shock. Healers with good situational awareness, two functioning eyes, and Crushing Shock can actually get all the interrupts from the centre of the room if they also slot Propelling Shield on their bars. (Propelling Shield is the morph of Siege Shield from the “Support” skill line, and it extends the range of ranged abilities by 7 meters, allowing Crushing Shock to span the required distance to interrupt the orbs).
- Fire Throw: If you are too far away from Roksa, she’ll shoot three beams of fire at you that leave lingering AOEs. Get up close and stay close. You mostly need to worry about this during the Darkness Phase where Roksa jumps across the room.
- Spinning AOE: This is the same attack that the Nix-Ox mini-boss does in the first fight, except it can’t be interrupted. It happens after the Darkness Phase where the boss stays.
Adds/Mini-bosses Notes:
- Nix-Ox: This mid sized Nix-Ox has a heavy attack that is fairly dangerous if not blocked. More importantly, it’ll kill your teammates, so grab them as soon as they appear, and don’t lose aggro.
- Larval Nix-Ox: Lots of these appear throughout the fight. Just taunt them and chain them in.
Mechanics tank is responsible for:
- Darkness Phase (Boss Stays): This occurs at 85%, 70%, and 25%. The NPC will say “Get to the Light” and Roksa will jump across the room. Two light spheres will appear, one by the NPC and one by Roksa. You take damage when you aren’t in one of the light spheres. The tank should get up to Roksa ASAP to avoid the fire throw attack.
- Darkness Phase (Boss Leaves): This occurs at 70% and 40%. The boss leaves the arena entirely, and the NPC will summon a single light sphere for everybody to stand in. A Nix-Ox and multiple Larval Nix-Oxen appear. Chain everything in. Once a certain number of adds die, the phase ends.
- After each shadow phase (70% and 40%) ends, whoever had aggro on Roksa will be targeted by the Nix-Ox on one of the outside ledges with a tether beam. The beam does damage, but not a ton. It will quickly damage and likely kill anybody who touches it, however, so make sure to shame anybody who runs through it. You can use it to kill adds if you want, though.
Roksa the Warped – Boss 2 Hardmode
Notes and Differences:
- After each shadow phase (70% and 40%) ends, there will be 3 tethers on the tank instead of 1. The damage ramps up pretty quickly, so the tank should be prepared with a damage shield and possibly Vigor to alleviate some stress on the healer.
- All the adds do significantly more damage, so it is imperative you chain them all ASAP. It is also important that group members (especially the healer) let you know if you missed any, as sometimes the group will be spread out.
- The Nix-Ox add is best left unkilled. It doesn’t pose much of a threat to you as the tank, as you’ll be blocking the whole time. You will never get two of these at the same time, but if it dies, another one will appear at a random spawn point in the room after a certain amount of time. This is dangerous, as it can easily kill your group members before you are in range to taunt it. To keep it alive, just stand between it and the boss so it is out of the cleave. That makes it much easier to keep aggro, and you don’t need to worry about finding a new one when it appears.
Matriarch Lladi Telvanni – Boss 3

Attacks to look out for:
- Staff Slam (Multi-Target AOE): Boss will slam her staff into the ground (the animation is like casting wall of elements) and an AOE circle will appear under each player. Don’t stand in it or try to block it (especially on hard mode). Just roll dodge it.
- Ranged Heavy Attack: Puts a heal check on you (your health bar goes white, and you can’t heal normally until you heal through the white bar; unlike many heal checks, you CAN self heal out of it). You can roll dodge this.
- Glide Across the Room (Multiple Linear AOE Circles): This move is telegraphed. The boss will face a direction other than the tank and an AOE circle will appear underneath her feet. The boss will glide across the room, leaving behind AOE circles in her wake. As soon as group members see this, they should move out of the way so they don’t get run over and killed.
- The Ipecac Challenge (conal AOE): A large cone of vomit. If you don’t block this, you will be locked out of using any abilities for several seconds, AND you will spew out your own vomit cone in whatever direction you are facing. Anybody who gets hit by your cone or the boss’s cone will be forced to relive one of my favorite scenes from Family Guy.
- Choking Pestilence (75% and 45%): The boss will move to the center of the room, go invulnerable, and put out an AOE that hits the entire arena. It will tick for damage every second and should be healed through. It lasts for 25 seconds. During this phase, 4 Peryite’s Blessed will be summoned.
- Summon Peryite’s Glory: The boss will place a single AOE circle on the ground and throw something on it. A Peryite’s Glory add will spawn in that location. This move will first begin after the first choking pestilence phase.
Adds/Mini-bosses Notes:
- Peryite’s Blessed: They should be chained so they are taunted and die in the cleave. They don’t look like wood elves, but they throw green mud balls at you. Breda would be proud.
- Peryite’s Glory: These green blobs should be taunted as soon as they are summoned by the boss. They will immobilize you and apply a debuff.
Special Notes:
- Time stop synergy: During the first choking pestilence phase and on, an AOE will appear that freezes time for all the adds. The best time to hit it is after all the adds are grouped up. Call out to someone in your group when you want this synergized, or hit it yourself if you’re close to it.
Matriarch Lladi Telvanni – Boss 3 Hardmode
Differences:
- Choking Pestilence (SUPER IMPORTANT): This AOE slaps really hard on hard mode. However, the damage you receive is based on a PERCENTAGE of your max health, and that percentage increases every tick. Therefore, it is best for you and your entire group to use food that DOES NOT give you extra health. (I ran around 32K health for this fight). I also recommend skipping the final buff, which increases everyone’s health by 3K. Your healer can much more easily top off your health between each tick if you have less health to heal. The popular strategy for this phase is to run a barrier rotation, where your healer and another group member alternate barriers. However, you won’t need a single barrier if your healer is competent, your group stays soft stacked, and nobody runs food that increases max health. If you feel like it, you can quick-slot two different consumables, one for this phase, and one for the other parts of the fight, although there isn’t a ton of danger that would require this.
- SKEEVERS: These bastards are the real hard mode. They come out constantly (several during choking pestilence), and mark a single group member with a red cookie above the head. If the skeever touches that person, they get a huge debuff, making all their abilities cost dramatically more resources. If one of these touches the healer during choking pestilence, good luck! These CANNOT be taunted, but they can be snared and immobilized. During choking pestilence, if you or another group member can run Caltrops, it can be dropped in the center of the room on the boss, and then all the healer (or anybody else who is targeted) needs to do is run to the opposite side of where the skeever spawned. Caltrops will snare the skeever, allowing it to quickly die in the cleave before it reaches the person.
- The Peryite’s Blessed are invulnerable until you hit the time stop synergy. Chain them in so they are grouped before telling somebody to hit the synergy. Once they are all grouped, ultimates should be released to get rid of them quickly.
- Peryite’s Glory: These hit really hard and will likely one-shot your DPS and healer. Look out for the ground AOE that summons them so you can taunt them immediately.