


ESO Shipwright’s Regret Dungeon Tank Guide
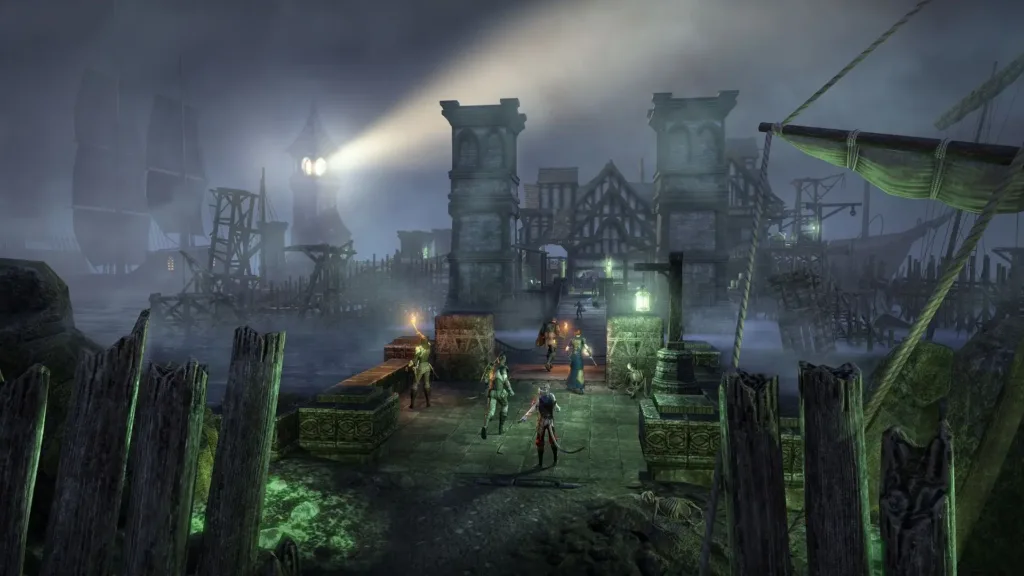
Welcome to Shipwright’s Regret, a ghostly, pirate-themed dungeon introduced in Ascending Tide (March 2022) and located in Rivenspire. This dungeon is known for its tough bosses, unpredictable adds, and high-mobility encounters, making it a true challenge for tanks.
As the tank, your role is critical—maintaining aggro, controlling haunting adds, positioning bosses correctly, and keeping your team alive through AoEs, kiting phases, and burst mechanics. This guide will break down each boss, explain hard mode mechanics, and give you proven strategies to handle everything Shipwright’s Regret throws at you.
Let’s set sail and tank this dungeon like a pro!
✅ Want to improve your tanking across all dungeons? Check out our ESO Dungeon Tank Build Guide!

Lost Maiden – Optional Boss 1
Attacks to look out for:
- Gaslighting- The true joy of this fight is the dialogue. Seriously, go into your menu and read it all when the fight is over. The Lost Maiden will make you feel like you just got out of the most dysfunctional relationship ever. It ended with you murdering her, though, so now you have to live with that.
- Ice Spikes: She impales you with ice spikes, right to the groin, probably. Sounds like something a vengeful spirit would you. Good thing you wore protection. Could you imagine having kids with her? Oh, I meant protection from the groin spikes. Anyway, just block these.
- Ice Conal: Face it away from the group, as usual. Sidestep it, roll dodge it, block it, or even do that thing where you accidentally jump backwards instead of rolling. You won’t die regardless. It’ll knock you back a little though.
- Hail: Small AOEs that I imagine feel like snowflakes get summoned down from the sky. I didn’t even notice these were a thing until I watched my own video.
- Heavy Attack: She throws a snowball at you or something. It hurts, so you’ll want to block this one.
Adds/Mini-bosses Notes:
- Right around 60%, boss will split into 3 mini versions of herself (as if one angry ex-lover wasn’t enough!). They all do the same attacks as the main one. DDs can take these down however they want. When all are taken care of, you’ll hook up with the main lady for one last honeymoon period because dysfunctional love is the hottest love. But again… this ends poorly… with murder, and it’s totally not worth it, even if it feels right at the time. Note that the minis will all continue attacking even after they are killed.
Mechanics tank is responsible for:
- Taunt all the minis so they don’t heavy attack your DDs or healer. One of them will probably die if this happens, and it totally won’t ruin a trifecta run or anything when it does. Promise.
Special Notes:
- You’ll get the “Maiden’s Protection” buff for completing this. That way, her love can stay with you for all eternity. It gives a 10% boost to Max Magicka and an emergency shield when your health drops below 10%.
Foreman Bradiggan – Boss 1
Attacks to look out for:
- Heavy Attack: Like most boss heavy attacks, you should block this. It hurts a lot more when you have a haunter on you, so feel free to roll it too.
- Charge and Summon Haunters: Tank the boss near the exit door. When the boss charges, it’ll just charge into the wall, and your group’s DOTs will all stay on the boss. One haunter will appear for each person alive in your group. During execute, this charge will happen at an annoyingly high rate, and you can no longer control its direction, so be prepared to chase this guy around as if he were your child running through traffic.
- Growing AOE: Boss sends out circles in multiple directions when AOE reaches maximum size. If it hits someone, it will stun him, and then that circle will split into multiple additional circles and be sent out in all directions. It’s not that big of a deal on non-hard mode, but it’s good practice for hard mode to avoid it. Roll dodge FORWARD through the attack to avoid it. Also, if you are tanking directly on the boss, this doesn’t need to be roll dodged at all. You can just take the hit without repercussions other than breaking free after it hits (note that the Slippery CP slottable is really nice here).
- Summon Flesh Colossus: Brad will disappear at 60% and again at 30%, calling up a Flesh Colossus to fight in his place while he uses Tinder from the bathroom. Now you know what’s taking him so long.
- Teleport: Not really an attack, but after the 2nd Flesh Colossus phase, the boss will teleport to the person farthest away. It’s best for everyone to stack closely that way the boss never teleports out of the group’s ground DOTs.
Adds/Mini-bosses Notes:
- Haunters: They tether to people and make them take way more damage from all sources. These should be killed right away. Everyone should group up so AOEs will take them all down more quickly.
- Flame Shapers: They light attack and do a channeled flame ability that sends fire at everyone. This can be interrupted, but it’s better if the tank chains them in because interrupt ruins the ability of the tank to chain them in
- Flesh Colossus: It will do a ground slam that creates a growing poison pool. The poison pool is definitely something everyone wants to swim in because everybody loves pools! Everyone will also get an AOE circle on them during this phase. Don’t stack the circles.
Mechanics tank is responsible for:
- Face boss towards wall
- Don’t spread the circle
- Chain in the flame shapers
Special Notes:
- Never trust anyone named Brad. Am I right, ladies?
- Auto-chain is your friend in this fight, especially for hard mode. You won’t need to worry about the flame shapers if they automatically get chained in. So, get yourself some Swarm Mother’s or be a Necro tank.
Foreman Bradiggan – Boss 1 Hardmode
Notes:
- Haunters: First round of haunters comes up when Brad charges the tank. They should be kept alive until Brad charges the tank the second time (only 4 can be active at a time, so this prevents having to deal with a second round of haunters). Then they can be killed. The tank needs to be really careful not to bar swap during a light attack when a haunter is on him. All haunters need to be dead before pushing boss to 60%
- Haunters Round 2: After the first flesh colossus dies, the first set of haunters can be burned immediately.
- Execute Phase Haunters: Ignore them.
- Growing AOE: Spreading this will likely get someone killed. As the tank, you can just eat it, as mentioned previously, but only if you are physically touching the boss. It won’t spread if you’re super close, but it’ll still stun you.
- HUGS Mechanic: Tank and Healer stack on opposite sides of the boss. One DPS is assigned to the tank (and stacks near the tank), and the other is assigned to the healer (and stacks near the healer). It is up to the DPS to move to their respective support player, not the other way around. The tank and healer just stay in their spots. For example, if DPS 1 is assigned to the tank and gets the HUGS mechanic, he goes to the tank. If the tank gets the HUGS mechanic, DPS 1 still goes to the tank.
- Two HUGS are Better than One Mechanic (execute): Same as above EXCEPT in cases where both the support player and his assigned DPS both get the mechanic simultaneously. Then “switch” is called out, and both DPS roll dodge through the boss to get to the other support player. Again, the tank and healer don’t move.
- Flame Shapers: These are extra deadly when the haunters are up. There is no need to interrupt them as long as the tank has on an auto-chain (e.g. Necro tank or Swarm Mother’s monster set). During the second flesh colossus phase, A LOT of these will spawn.
- Flesh Colossus: Has a lot more health. The second flesh colossus will enrage if you don’t kill it quickly. Stack and whack. Burn it quickly when it comes up. No need to move it around. Don’t stack the circles.
- Execute Phase: Drop ultimates on Brad when he comes back after the 2nd flesh colossus. Groups should stack closely to each other (just far enough away to avoid overlapping HUGS). This is because the boss will teleport to the furthest character at random, which is really annoying. If everyone is closely stacked, nobody will need to replace DOTs or whiff on an ultimate. Also, don’t worry about flame shapers (auto-chain will take care of it) or haunters. Just burn the boss.
Shrouded Axeman – Optional Boss 2
Attacks to look out for:
- Light Attacks: I don’t normally point these out, but can you imagine just standing there letting someone hit you with an axe and just shrugging it off?
- Heavy Attack: Block, per usual
- Summon 2 Wrath Hounds: The Axeman will put his arms out like he’s pretending to be an airplane, which somehow magically summons two dogs. Dogs like to explode in this game for some reason. They’ll charge and blow up. This should be blocked.
- Split + Ground AOEs: Boss will split into multiple shades. Each shade needs to be interrupted to end the phase. A bunch of ground AOEs will be placed on the arena every time they slam the ground, so interrupt quickly. When the boss comes back after getting all the interrupts, they’ll grow bigger than they originally appear to be and will then explode. In other words, don’t stand on the things that clearly look like you shouldn’t stand on them.
Adds/Mini-bosses Notes:
- Shrouded Axeman’s Hounds: These pups don’t explode! It’s a miracle! Healthy dogs are not allowed, though, so you’ll be left to watch sadly as your group slays them. Be sure to call your mates out as evil puppy abusers non-specifically named Ogden while you do, however. It’ll make you feel better because you have an axe to grind with this totally generic and nonspecific puppy abuser.
Special Notes:
- You’ll get “Shroud of the Axeman” for completing this boss. You, too, can now pretend to be an airplane. Also, you get 10% extra health, and, when you take a hit for over half your health, 100% extra healing done for 5s. Neat. Better start practicing your engine and propeller sounds.
Nazaray – Boss 2
Attacks to look out for:
- Wind Up Heavy: Classic heavy attack with a really long twirling wind up. Get used to timing this, because in hard mode, if the boss is empowered, this heavy will hurt a lot. Also, when the boss is blue/purple, the heavy attack will be accompanied by a couple blue/purple AOE circles that get sent out at the beginning of the attack and then two more that get sent out when the attack lands.
- Dramatic Arm Wave: Nazi will wave her racist arm and stick in big circles, summoning both large and small AOE plant meteors. Just keep blocking.
- Summon Exploding Dogs: Again? Why must all the dogs die? On non-hard mode, these literally barely do anything at all. Everyone should ignore them and the big, useless conals they put out. They don’t hurt very much at all, even if you are standing in the center of all of them.
- Blue/Purple Phase: When Nazaray turns bluish purple (around 60%), she will start putting empowering AOE circles on the ground. These greatly amplify her damage AND make her invulnerable. Tank needs to walk her out of the circles. HOWEVER, the tank should stay fairly close to her, as being too far away triggers a rapid light attack that will hit a BLOCKING tank for 35K to 50K damage depending on active defensive buffs. In other words, the tank will probably die. So, the tank should stay close enough to make her walk out of the circle but should be patient with it. If Nazaray is in the circle, heavy attacks should be rolled, as they hit incredibly hard when she is empowered.
- Circling Blue AOE: At some point in the fight, 2 blue/purple circle AOEs will spawn. They’ll just orbit around the arena for a while before exploding.
Adds/Mini-bosses Notes:
- Giant Body Snatcher Wasp: Two will be summoned at a time. You can taunt them. They probably sting you or something, but you packed your EpiPen®, so you’ll be fine.
Nazaray – Boss 2 Hardmode
Notes:
- Dog Phases: Boss will slam down staff sending out little red lines to the edges of the arena. One DPS goes to entrance. Other goes to exit. This is a DPS check. If the dogs don’t die, the group wipes.
- Lurchers: Tank needs to taunt them immediately. They can one-shot everyone else. They also do a wide angle conal that can be faced away from the group. When they do their shaky little dance, they put a big DOT on everyone, so everyone needs to stay close enough to the healer.
- Stranglers: There is a man who works for ZOS named “Strangler Guy.” He is in charge of making sure that stranglers are put into as much content as possible. He also is responsible for inventing new species of strangler. Anyway, there are stranglers in this fight now too.
- Blue/Purple Phase: Everything she does when in the empower circle hurts way more, even the light attacks. She won’t summon dogs for the dog phase if she is standing in the circle, so if your healer is bad, your group can kill the lurcher first when she is invulnerable so there isn’t the lurcher DOT during the dog phase. The drawback to doing this, of course, is that you’ll have to deal with harder hitting attacks and a longer fight, and you have other things to do with your life other than playing… wait, no you don’t, nevermind.
- All the Other Stuff: Everything just does more damage.
Storm-Cursed Sailor – Optional Boss 3
Attacks to look out for:
- Heavy Attack + Stun Knock Back- The heavy attack is a stun and knock back as well. I guess you can roll dodge this, but you aren’t really in danger of dying if you just block it and then break free.
- Humanoid Tesla Coil- He’ll target someone and put a lightning DOT on him. You can’t miss it. It turns the toon into a Tesla Coil.
- AOE Explosion- Although he’s not a dog, he will explode. The move is telegraphed by the fast growing AOE underneath him. You can just block this as usual.
- Teleport: The seaman will jump around the map, striking with “down B,” the special move he stole from Pikachu in Super Smash Brothers. Everyone should just block through this. If you have a healer in group, the normal HOTs should be more than enough to prevent death.
Mechanics tank is responsible for:
- I highly recommend reading the blocking tutorial. It’s a very useful skill for tanks.
Special Notes:
- For wasting your time on this boss, you’ll be rewarded with “Curse of the Storm,” which gives 10% extra stamina and makes your heavy attacks do some extra lightning damage. Yay.
Captain Numirril – Boss 3

Attacks to look out for:
- Kite Mechanic: Numirril will charge across the map. Then, he’ll start pumping his arms upward, and AOEs will spawn under everyone and explode for HUGE damage that will likely kill anyone hit. The tank can survive one hit as long as it isn’t hard mode. Team members should separate during this phase to avoid inadvertently killing their friends.
- Execute Kite Mechanic: Boss will not charge across the map first. He’ll just start dancing like a white girl. Tank should call this out so everyone can move away.
- Conal: Tank should face boss away from group.
- Boss Interrupt: Tank should interrupt boss when he gets the lines coming from his body. Otherwise the tank will get tossed in the air and stuck there for a few seconds. This can also be roll dodged.
- AOE Knock Back: Boss will have a growing AOE around his body. When it reaches max size, it’ll knock you back and stun you. You can roll out of it.
- Gap Close: If you get too far away from the boss, he’ll gap close you and knock you over if you don’t roll it.
- Summon First Drowned Hulk and Drowned Corpses (84% boss health): Boss will channel his inner Brad and leave the arena to “use the bathroom.” It’s hard for sailors to find love off the boat. Stop judging. Drowned corpses will spawn and will continue to spawn for the rest of the fight. After a short amount of time, a drowned hulk will appear in the corner.
- Green Blob Exploding Mechanic: Boss will start pumping arms downward which will cause the green blobs that the drowned corpses put out to explode. This can just be blocked.
- Surf’s Up: At the same time the first drowned hulk and corpses are summoned, tidal waves will also be put out onto the arena. These hit hard and knock you back if you aren’t blocking. If you are blocking, they still put a stacking DOT on you. They can be rolled through.
- Summon Second Drowned Hulk (40% boss health): Boss will leave the arena, but this time, the hulk will spawn instantly. So, it is best for the tank to bring the boss over to the corner before he disappears. Same strategy as above EXCEPT Numirril will come back before he dies.
Adds/Mini-bosses Notes:
- Drowned Corpses: They do two things. They have a channeled ability that puts green blobs out on the map. The blobs do AOE damage and snare you. This can be interrupted. The second thing they do is spit green balls at you. These hurt the DDs and healer a lot more than you. You CAN taunt them if you want. You can use one of two strategies for these guys.
- Strategy 1: Your group can completely ignore them. If you have a healer, this works great. This is the preferred strategy because they just keep spawning throughout the fight and reduce your time on target on the boss if you have to deal with them.
- Strategy 2: Kite the boss around the room so they die in the cleave. Range taunt the close ones so you get all the regular damage. Assign interrupt roles to minimize blobs. This strategy is a “no healer + low DPS” strategy and sucks because you’re the tank and can’t do anything about your group’s garbage DPS and lack of healing… well, except rage quit. That’s always an option… but be sure to put it in chat to let everyone know that they’re trash and that you’re rage quitting. It’s what all the cool tanks are doing.
- Drowned Hulk: The best strategy is to stack in the corner and burn them down. This works with 3 DPS strats and 2 DPS and a healer strats. Just stack around the green blobs (or in them if you have a healer). This strategy doesn’t work if you have poor group DPS and low healing, as mentioned above. In that case, kite it around to the corpses and be sad. Anyway, the Drowned Hulk has a lot of attacks, summarized here:
- Conals: It’s really not a cone because cone’s are 3D, but you get the idea. Just face it away from group as you always do. These occur FREQUENTLY but aren’t much to worry about in terms of damage.
- Hulk Smash: Big AOE circle that will stun you. Roll out of it, especially if you are in execute and the boss is out.
- Get Arm Stuck in Ground: This spawns green blobs.
- Gap Closer: If any group member is too far away from the hulk, it’ll charge at them. For as big as this guy is, he moves fast. This can be avoided by just stacking close, as is recommended.
Mechanics tank is responsible for:
- If you absolutely must… kite the boss and hulk around the arena to deal with the drowned corpses.
- Range taunt drowned corpses
- Calling out “Kite,” especially during execute.
Additional mechanics tank should be aware of:
- Interrupting drowned corpses: If you’re close to them, you can bash them. If you have room for Crushing Shock on your bar, you can use it. This doesn’t have to be your job, but you can do it if you want to feel extra important.
Special Notes:
- You see how with Bradiggan and Numirril, they put the gg and the rr near the end of their names? The guy in charge of naming these bros should win an award for his attention to detail.
Captain Numirril – Boss 3 Hardmode
Notes:
- Kite Mechanic and Execute Kite Mechanic: Hits extra hard and will likely kill you if you get hit by it. If you have a flex spot, Race Against Time is a great ability to slot to get out of the AOEs quickly, as it also removes the snares caused by the green blobs.
- Boss Interrupt: If this is not interrupted or rolled, there’s about a 99.9% chance you’ll die.
- First Drowned Hulk (84% boss health): Tank should taunt instantly. DDs and healer should stack on his ass against the fence that the tank isn’t on. The hulk will probably attack twice toward the middle of the arena before finally facing the tank. Everyone stays close to the hulk to prevent him from doing his charge attack. Healer can heal through all damage without issue. Everyone drops ults to burn him fast.
- Second Drowned Hulk (40% boss health): Boss will leave the arena, but this time, the hulk will spawn instantly. So, it is best for the tank to bring the boss over to the corner before he disappears. Same strategy as above EXCEPT Numirril will come back before he dies. It’s important to kill this hulk as fast as possible to prevent both his and the main boss’s mechanics from overwhelming the tank.
- The Sad Lonely Other Hulk: Technically a second hulk will appear in the adjacent corner. He just hangs out there and does nothing unless you get too close or accidentally hit him with something. In other words, ignore him.
- Execute Phase on Numirril: When Numirril comes back into the arena when everyone is stacked up killing the hulk, he is particularly dangerous. He will randomly do any of the following moves: charge the tank and knock him back (which will often lead to the tank getting smashed to pieces by the hulk), the thing that requires an interrupt (this sucks if he doesn’t charge in first because the tank will need to roll dodge forward to reach him in time), kite mechanic (explained above), exploding blob mechanic (explained above). It is very important for the tank to be aware of all these moves. The tank also needs to be careful because the hulk has a ground smash stun move. Getting stunned by the hulk will probably lead to Numirril killing the tank, so the first 10-15 seconds when Numirril comes back are crucial. After the hulk dies, it’s an easy clap.