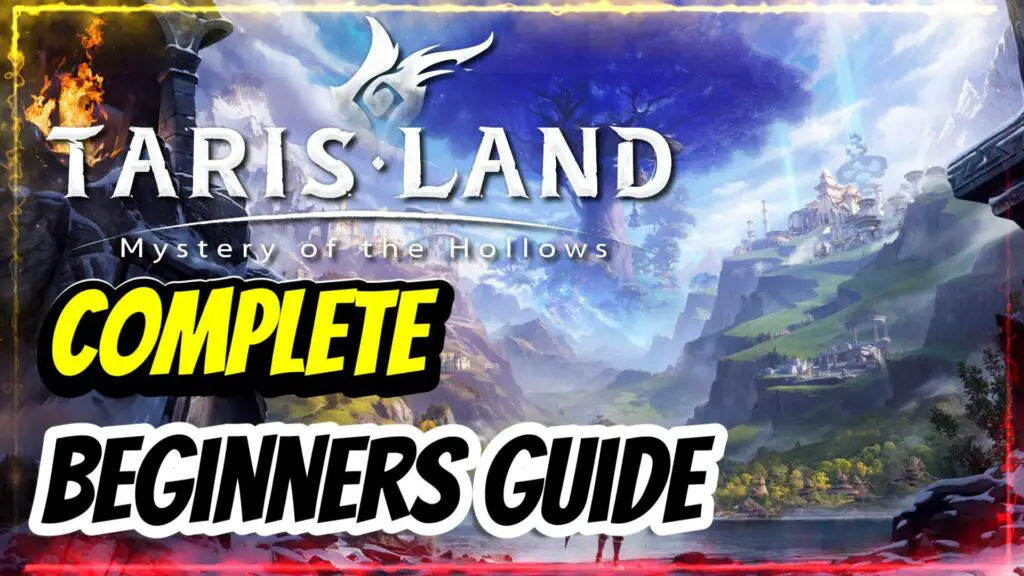
#1 Tarisland Complete Beginners Guide
Step into the world of Tarisland with this comprehensive beginner’s guide! Whether you're new to MMORPGs or a seasoned adventurer, this guide will help you get started with class selection, combat mechanics, crafting, dungeons, PvP, and progression systems. Learn essential tips to level up efficiently, build your character, and explore everything this fantasy world has to offer!
Table of Contents
Tarisland Complete Beginners Guide
Tarisland is a free-to-play MMORPG set in a fantastical world rich with adventure, magic, and mystery. Players explore diverse environments, engage in real-time combat, and choose from various customizable classes.
The game features robust crafting and gathering systems, and emphasizes multiplayer interactions through guilds, raids, dungeons, and PvP battles. With stunning graphics and immersive sound design, Tarisland offers a comprehensive and engaging experience for both MMORPG veterans and newcomers.
Getting Started in Tarisland
- Monetization
Tarisland is free to play, but some features can give paying players an edge. You can progress slightly faster at first and gain a few days’ advantage at certain points. The Adventure Association ticket offers 30% more XP, helping you unlock rewards sooner, and things like auto fishing, portable warehouse and Trade Centre benefits, but it doesn’t provide significant permanent benefits, mostly offers helpful economic and quality-of-life perks for $5 a month. Paid currency can be converted to gold, which can significantly enhance your gear compared to free-to-play players. The Battle Pass has a free and paid option which contains cosmetics, gold and other beneficial items for $25.
- Getting Started
The first thing you’ll need to do is visit the official website TARISLAND (tarisglobal.com) and click the Sign-Up button in the top right corner.
- Platforms
Tarisland is cross-platform, available on Windows, iOS, and Android. You can download it from the Tarisland website for PC, or access it on the relevant app store when playing on mobile.
- Choose a Server
Once you have downloaded the game, launch it, and the first step will be to choose a server. It’s best to pick one close to your location to ensure better latency and responsiveness, which is crucial for PvP and Elite content. Also, consider the time of day you usually play, as it might be more beneficial to join a server that is most active during your playtime.
- Character Creation
After selecting a server, you’ll begin creating your first character.
- Classes
Tarisland features 9 unique classes, each class is divided into two specializations with distinct skills and passives, allowing you to switch between roles for different content. Certain roles are locked to specific classes, so if you intend on playing as a Tank or Healer, you need to select a class that offers those options.
- Warrior – Melee Damage (Rage) / Tank (War Shield)
- Barbarian Fighter – Melee Damage (Thunder) / Tank (Frozen)
- Mage – Ranged Damage (Frost/Flame)
- Paladin – Melee Damage (Justice) / Tank (Guard)
- Priest – Ranged Damage (Faith) / Healer (Pray)
- Shadow Swordsman – Melee Damage (Cunning/Duel)
- Ranger – Ranged Damage (Tamed Beast/Hunting)
- Phantom Necro – Ranged Damage (Soul Snatch) / Healer (Soul Healing)
- Bard – Ranged Damage (Solo) / Healer (Harmony)
- Appearance
Once you’ve selected your class, you can customize your character’s appearance. The options vary depending on the class, including choices for haircut and colour, skin colour, eyebrow type and colour, eye type and colour, face makeup, and your character’s height, weight, and head size. These choices are not permanent; you can change your character’s appearance in-game at the SilverLit trading post by speaking to NPC Tony, who will charge you 500 silver for any changes.
- Starting the Game
Next, you’ll begin the game with a combined tutorial and main story quest. This segment cannot be skipped, even if you create a new character.
- Settings
Before proceeding further, it’s worth checking your settings. Pay special attention to your FPS settings, screen shake, graphics settings, and adjusting any keybinds to match your preferences.

Movement & UI
- Movement & Controls
Character movement is controlled using the WASD keys, while the camera is controlled by holding down the right mouse button and moving the mouse.
- Sprinting
While moving hold Left Shift to sprint.
- Attacking Enemies
To attack enemies, right-click on the enemy or press Tab to target the nearest enemy. You can customize your tabbing priority in the settings to make it more efficient for your needs. In addition to your basic auto-attack, you will progressively unlock skills assigned to keys 1 to 6 (unless you changed these or on mobile). You will gain a special Inscribed Stone Skill on key 7, and as you progress, you will have access to three “ultimate” abilities on Q, E, and R, which provide utility skills such as faster movement, break free, interrupt, stun, and more. You can also slot three items on ALT + 1, 2, & 3 for items like potions and fishing rods.
- Interacting with Items / NPCs
To interact with an NPC, simply approach them and press F. The same action applies to objects and items around the world that can be picked up or interacted with.
- Looting
Looting is mostly automatic. Occasionally, you will need to manually pick up items during quests or reputation events by pressing F when prompted. In dungeons, there will be a chest at the exit that one person in the group needs to interact with to distribute loot automatically to all other party members.
- Death
There is no death penalty. If you die, click the resurrect button to be teleported to the nearest resurrection location. In PvP battlegrounds, there is a short cooldown on resurrecting. In dungeons or raids, you’ll have to wait for the fight to end, or a healer can perform a combat resurrection. There are also items available for resurrecting others in raids and dungeons.
- Finding Items
When you click on an item or currency, you’ll see a “Source” section at the bottom of the tooltip. Pressing this will show you where to find each item/resource/currency. For example, pressing “Store” will take you directly to the store to find it. For certain materials, this will place a marker and pathing to guide you to the material location.
- UI
Much of your UI will unlock as you level up. To adjust your UI, click the cog in the bottom right corner and select “Customize.” This loads a movable UI where you can position elements as you like.
- The experience bar is along the bottom.
- The chat box and social buttons are at the bottom left.
- The character and health bar are at the middle left. When in a group this appears beneath your character.
- Quick access info (latency, photo mode, support, unstick, currencies, team up lobby) is at the top left.
- The skill and utility bar is at the bottom middle.
- Above this bar, you’ll see a symbol relating to your class, which is your energy meter (more info later).
- Menu buttons are at the bottom right.
- Active quest tracker is located middle right.
- Quick access buttons (trade post, shops, events, season pass) are at the top right, next to the mini map which shows the name of the current area.
- Line
Above your mini map, you’ll see the word “Line” with a number next to it. This indicates the channel or instance you’re currently in. You can switch channels by hovering over the green writing and left-clicking on a different line number. This is useful for grouping with friends or if your current channel is overcrowded.
- Menus
Tarisland has many menus, some of which unlock as you level up.
- Backpack (B): Shows your inventory.
- Crafting (N): Access your chosen crafting profession.
- Appearance (P): Change your outfit, mount, accessories, and pendants.
- Attributes (C): View your stats, level, equipped gear, and gear score. Change your title and view your reputation with various tribes.
- Development Menu:
- Skills (K): Upgrade skills, apply talents, change ultimate skills, apply recommended settings, and use the assist function.
- Inscribed Stone (I): Manage extra passives.
- Workshop (Y): Inlay gems and improve your gear.
- Military Rank (V): Promote your rank and gain additional PvP buffs.
- Gameplay Menu: Access dungeons, raids, PvP (Conqueror), and the solo time trial boss arena (Universal Hall).
- Exploration Menu: Access the quest log (L), achievements, and codex.
- Social Menu: Access your guild, team menu, friends list, mail, and elite leader program.
- System Menu: Access settings, customize UI, return to character screen, and quit game.
- Inventory
Press B to access your bag/inventory. Here, you’ll find all the items you’ve picked up. At the bottom, you’ll see your equipped bag, and you can equip multiple bags when you find them. This screen allows you to auto-sort items, repair gear, and sell items for silver, which is useful for clearing out junk. Pressing “Warehouse” will teleport you to the bank NPC in SilverLit to store items. The tabs at the top highlight specific items, while the “Others” tab includes currencies for buying upgrades and quest-specific items.
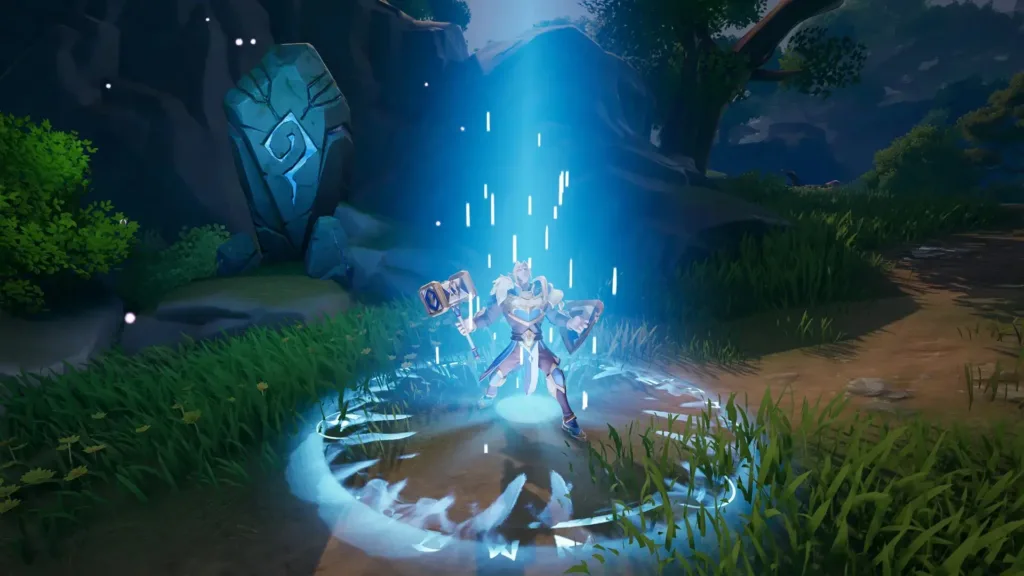
Gear & Skills
- Character Progression & Levels
There are three main aspects to character progression: levelling, skill improvements, and gear/gearscore. The current level cap in Tarisland is level 40. The best way to level up is by completing main quests, side quests, and tasks that appear in your quest log. Each time you level up, visit your skill menu to upgrade your skills, which will cost silver and improve their strength. You’ll also earn talent points for clearing content, which can be used to enhance your skills further. The Inscribed Stone system also plays a role in character improvement, and collecting better gear will boost your stats and gearscore.
- Equipment
To obtain equipment, complete quests to receive base gear, which will enable access to further content. One of the main ways to acquire better gear is through dungeons. Normal dungeons reward slightly upgraded gear, while elite dungeons offer even better gear. However, elite dungeons have limits on how many times you can earn rewards, so it might take some time. Completing elite dungeons also earns medals, which can be used to buy dungeon gear pieces from the store. You can access the store menu by pressing the icon at the top of the screen, going to the dungeon shop, and checking the elementary equipment section for elite dungeon gear. Superior gear can also be obtained from the Arcane Realm, raids, or crafted, though crafted versions don’t guarantee aptitude buffs.
- Armor Types
Although different gear can be crafted through Forging and Tailoring, there are no distinct gear types. Each class has unique armor, and both specializations of a class can use the same gear. Gear now switches between specializations, so a DPS spec with have different stats compared to when you switch to Tank, even though they use the same gear. Optimizing your gear long-term might require different pieces for each specialization. Utilize other systems within the game, such as gems, empowering, and tempering, to improve your gear with stats suited to specific roles like tanking or healing.
- Primary Attributes
Each class in Tarisland has a primary attribute—Strength, Intelligence, or Dexterity—that converts into Attack value, influencing the damage of their skills. Additionally, each class has a secondary attribute: Crit, Combo, or Glancing, which are tailored to their role.
Glancing: This stat is for tanks. It gives a chance to reduce incoming damage by 25%
Crit: Tarislands standard Crit Damage is 150% and by increasing Crit you improve your chance to deal extra damage with attacks.
Combo: A strong stat if you use DoTs or quick attacks as it gives most of your attacks a chance to deal an extra 45% of your Attack value, modified by your Combo Damage stat.
- Other Attributes
Focus: Increases armor for Tank, boosts healing for Healers and reduces enemies armor for Damage.
Hit: Reduces the enemy’s chance to dodge your attacks.
Resilience: Reduces your chance to be critically hit.
Omni: Increases your Effect Bonus, which multiplies your total damage output.
Cooldown: Decreases global cooldowns, reduces skill cooldowns, increases cast speed.
Resonance: Affects how quickly you gain Inscribed Stone Energy and increases the damage of Inscribed Stone skills.
Crit. DMG: Boosts the damage of your critical hits. Combos can also benefit from crits.
Combo DMG: Enhances the damage of your Combo attacks.
Effect Bonus: Provides a multiplicative increase to your total damage.
Haste Effect: Increases auto attack rate, cast speed, and decreases global cooldown.
Energy Saving: Gives a chance that a skill won’t go on cooldown after use.
Specialization: Adjusts your Crit, Combo, or Glancing chance based on your current spec.
- Item Quality
There are four item qualities: White, Green, Blue, and Purple. It’s not possible to upgrade existing items to higher qualities, so this system helps identify higher-level or more important items.
- Special Aptitude
Special Aptitudes are unique effects attached to your gear that enhance the skills in your build. Gear pieces with these special aptitudes can only be obtained from specific content, such as raids and the Arcane Realm.
- Gear Rolling
Gear Rolling refers to the process of obtaining gear, which will have random stats each time you acquire it. To get the best gear for your build, you need to roll the perfect stats. If you get desirable stats on a different piece of gear than your main set, you can use the tempering system to transfer those stats to your main gear. This process is crucial because having the best gear with optimal stats can significantly boost your character’s performance.
- Workshop (Y)
The workshop is where you can adjust and buff your gear and slot gems.
- Inlay & Gems
Gems and Inlaying are crucial as they significantly impact your build’s important stats, allowing you to customize which ones you use. Each gear piece can have up to three gem slots, each with a specific colour (red, blue, or yellow), and the gem must match the slot colour. Colourful gems can fit into any slot, but you can only have one of each type active at a time. Gems can be added and removed freely from your gear without any loss, making it easy to switch and optimize your setup.
- Empower
Empowering gear allows you to access additional bonuses on equipped gear pieces that cannot hold a gem. To empower a piece of gear, select the desired empowerment, gather the required materials, and apply it. This process enhances the gear slot itself rather than the individual gear piece, meaning the empowerment will remain active even when you equip new gear pieces in that slot.
- Tempering
This system lets you transfer enchanted attributes or special aptitudes from one piece of gear to another similar piece. When tempering, the gear being used for the transfer will be consumed. Farming high-level gear from content and then using this system combined with crafting gear to apply the perfect stats for your build will be crucial for making best-in-slot gear for the most difficult content.
- Skills
Skills in Tarisland cannot be changed; they are fixed. You can and should level them up with silver each time you level up. Your first skill is a spammable skill that charges up your specialization spectrum meter. The second and third skills are typically rotational skills enhanced when the meter is filled. Skill 4 is a high-damage skill with a long cooldown, Skill 5 is an AoE attack, and Skill 6 is usually a buff.
- Talents
You gain talent points by levelling up and completing content like dungeons and raids. These points can be used in the talent system to upgrade your skills. You’ll gain new core passive benefits automatically, but you can use your points to enhance your skills in various ways. If unsure, you can use the recommended tab, which provides two playstyle options. Select one and press enable to automatically allocate your talent points to match the playstyle.
- Ultimate Skills
Ultimates in MMORPGs are usually long cooldown, high DPS or beneficial abilities. In Tarisland, these are essentially your utility skills. As you level up, you’ll access more options, eventually having 8 possible ultimates unique to your class, from which you can choose 3. These include increased speed, break free, or enemy crowd control. Some boss mechanics require specific choices, like interrupting mechanics or add pulls needing a stun.
- Inscribed Stone Skill
This is similar to an ultimate skill. Your slot 7 skill needs to be charged with energy before it can be used, providing a unique class benefit.
- Inscribed Stone System
The Inscribed Stone System allows you to enhance your character by applying Inscribed Stone Energy, which you can earn from activities such as dark invasions and University Hall. You can accumulate up to 50,000 Inscribed Stone Energy, which can be inserted into various nodes to boost stats and provide additional character benefits.
A key feature of this system is the Fatuina Echo, a new buff that can be upgraded three times and works in conjunction with your special aptitudes and specialization. Prioritize upgrading your Fatuina Echo according to your build. Focus on selecting a node once out of three and progressing through the entire tree before stacking the second and third of each node, as this will grant you more attributes and buffs as you advance.
You can use the recommended build function to apply some optimized options for your specialization. Additionally, the system includes emblems, which you can unlock to gain benefits tailored to your spec.
- Emblems
Emblems are special items earned by completing various tasks and quests, often found in chests in your inventory. These emblems are stored in a hidden inventory. To access them, go to the Inscribed Stone menu, press on an emblem slot, and open the list of your emblems. If you have unlocked the emblem slot, you can slot one of the available emblems.
Emblems can be upgraded by leveling them up with less useful emblems and silver to increase their power. The type of emblems you use will vary between specializations and roles; for example, a damage spec might need more strength, while a tank might require more stamina. This flexibility allows you to switch emblems to suit your current role, providing a significant boost to the relevant stats. The maximum level of an emblem depends on its quality, with the highest quality (purple) emblems being able to be leveled up to 10.
- Specialisation Spectrum
This is the meter at the centre of the screen above your ability bar. Charge it by using your first skill. Once filled, you get an enchantment that enhances your second or third skill. The meter shows a progress bar that builds up to an enchantment, which will light up on the left or right side of the meter. A timer appears, indicating the time limit for using the enchantment. You can have two skill enchantments stacked up at once.
- Changing Specialisation
When you first created your character, classes could play two roles, such as the Paladin being Melee DPS and Tank. To switch roles, go to the skill menu (K). On the left, you’ll see two options with their roles. For a Paladin, “Justice” is damage, and below it is “Guard” for Tank. Press the enable button on the right side to switch roles. Adjust your talents or use the recommended feature and change your ultimate skills, as you’ll often need taunt skills for tanking. Switch talent pre-sets between roles to make this process faster in the future.
- Battle Assist
This feature helps mobile players by allowing them to set up a rotation of skills. These skills will cast in order if off cooldown when you press the first skill repeatedly.
- Item Quick Slots
You can place up to 3 items on your ability bar for quick use. To do so, find an item in your inventory (like potions, consumables, or fishing rods), left-click on it, and press equip to add it to your ability bar. To unequip, do the same but press unequip.
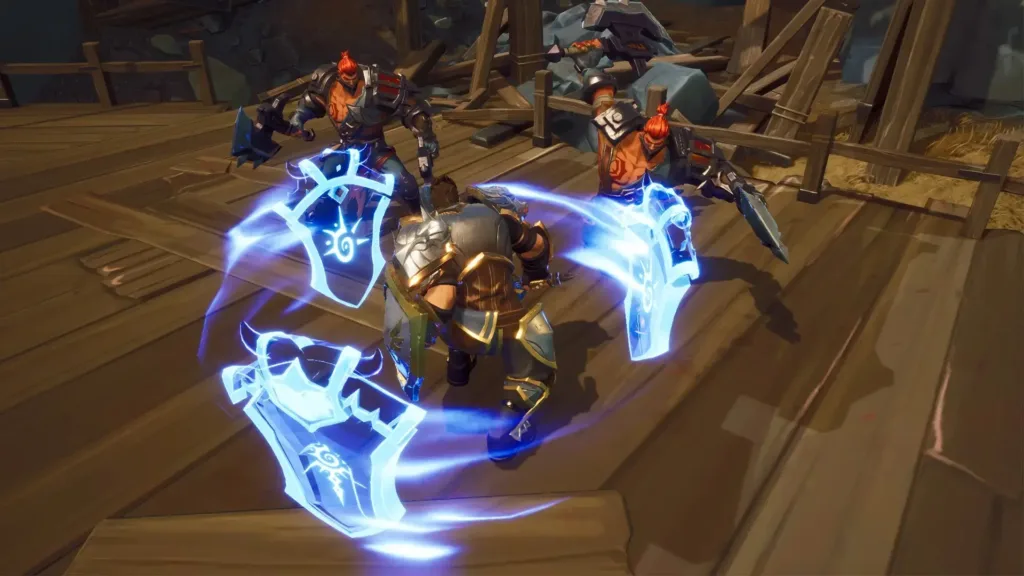
Stats & Combat
- Character Stats & Attributes (C)
This section provides a breakdown of your character’s equipped gear and how it affects their stats. At the top left, you’ll see a number representing your current gear score, which you need to increase by using better gear to join higher-level content. Below your level on the right side, you’ll see your current spec and a list of the stats you should focus on—this varies between specs and classes and helps you decide on the best gems to use and stats to focus on when gearing for your role. Basic attributes inform you about important details of your build, and you can hover over them to see what they do. Enchanted attributes are more complex and significantly impact your character, especially in harder content. You can dive deeper into these details by hovering over them and extending the menu at the bottom of the screen.
- Resources
The only resource in Tarisland is health. Skills run on cooldowns and don’t cost resources. Skills can be enchanted by building up the specialization spectrum.
- Military Rank
By completing PvP content, you’ll gain glory, which can be used to increase your PvP rank. This rank increase provides additional stats and benefits within PvP content.
- PvP Skills & Passives
By accessing your military rank page (V), you can go to the Warlike Talent screen. Here, you can choose 3 active talents, which are ultimate abilities for PvP, and drag them into the space at the side. You can also apply 3 passive talents. Additionally, you can upgrade your PvP skills separately from other skills by spending glory earned from PvP modes. This allows you to enhance your character for PvP content separately from your regular build.
- Combat
Combat in Tarisland is a tab-target style with basic auto attacks combined with castable skills that run on various cooldowns.
- Melee Combat
Specific classes are melee combat types, requiring you to be up close and personal with enemies. Tanks are also melee, as expected, due to their role in aggroing and controlling enemies.
- Magic & Ranged Combat
Some classes can be used as ranged damage dealers, and healers also count as ranged since they stay away from enemies to support the group and keep them alive.
- Combat Roles – Tank, Healer, Damage
Tarisland follows the holy trinity of roles: Tank, Healer, and Damage Dealer. Each role is crucial in PvE content as they focus primarily on their specific roles. For example, healers provide minimal DPS, with their abilities focused on healing, while tanks do output some damage but focus on aggro management and survival.
- Taunting, Threat & Aggro
By playing a tank spec, you’ll naturally gain more threat through your skills and passives. However, there are specific taunt skills located in your ultimate tab, which are especially helpful in raids and harder content, especially on tank switching mechanics.
- Interrupting & Crowd Control
Interrupts and crowd control abilities are primarily found in your ultimate ability options. It’s important to learn fight mechanics to be equipped to handle each fight properly. Some bosses, for example, will need to be interrupted for specific mechanics, while others cannot be. Some enemies can be stunned or crowd controlled, and others can’t.
- Consumables
There are various consumables in the game, such as fish, bombs, magic stairs, and horns. These items provide short-duration buffs or benefits. Fish, for example, act like food buffs, with durations varying from 30 seconds to 5 minutes. These items can usually be equipped to your skill bar for quick usage in combat.
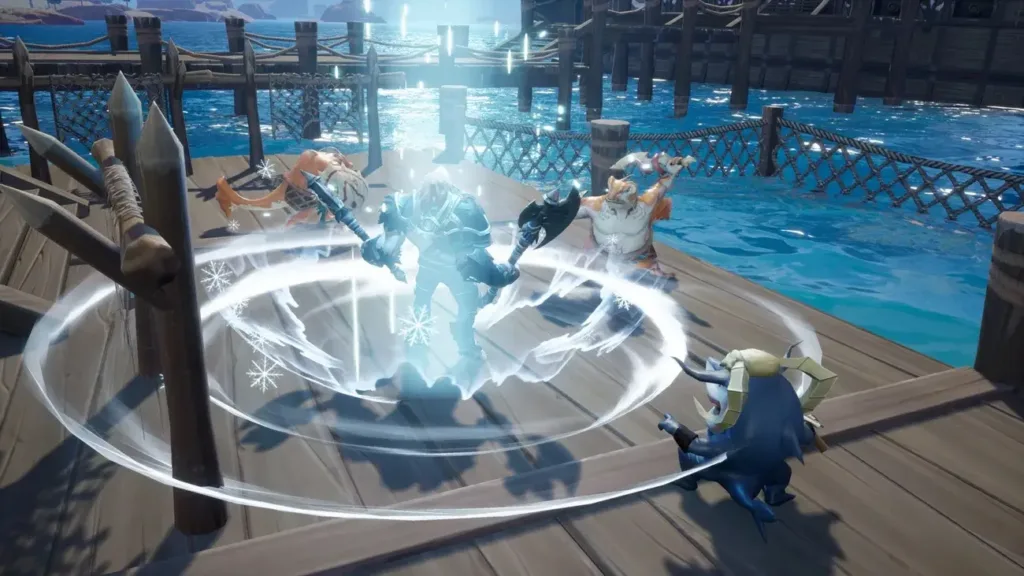
Quests, NPCs & Transport
- Gaining Experience & Levelling Up
Experience is gained primarily by killing enemies, but large amounts come from completing main quests and side quests. Levelling up unlocks new parts of the game, new content, and adds new tasks to your quest log.
- Reputation & Exploration
Each zone in Tarisland has its own reputation system. To increase your reputation in an area, you need to explore and unlock waypoints, collect fish, take photos at designated locations, find collectibles and codex entries, and complete reputation events. Occasionally, you’ll obtain items that can boost your reputation. Increasing your reputation unlocks rewards at different thresholds, grants access to new items in the unique reputation store of each area, and unlocks a chest in the top left corner of your map. Exploration rewards also include specialization points, essential for professions and crafting.
- Reputation Events
Reputation events appear on your quest tracker when you are near an active event. There are 6 events available daily, consisting of time-limited tasks like picking up items and returning them to an NPC or escorting and defending NPCs. Completing these events rewards you once the objective is achieved.
- Quest NPCs
Quest NPCs have a yellow or orange symbol above their heads. Speaking to them gives you the option to start a quest.
- Quests
There are two main types of quests: main quests and side quests. Other entries, such as dungeons and raids, will be added to your quest log automatically as you level up. You are encouraged to complete these and are rewarded for doing so the first time.
- Finding a Quest
Main quests are highlighted with an orange exclamation mark and side quests with a yellow exclamation mark. Look on your map to find quests and speak to NPCs with these markers above their heads to pick up the quest.
- Starting a Quest
Select the dialogue option with the exclamation symbol to start a quest. This will usually bring up a quest objective box.
- Quest Skipping
Many main story quests include dialogue and cutscenes. Press space to skip dialogue or ESC to skip cutscenes.
- Quest Tracking
When doing a quest, right-click the quest to get the option to teleport to a location near the quest point. If you are in the area, a sparkle trail will be placed on the ground for you to follow easily.
- Quest Items
Quest-specific items or interactable objects will always be visible by looking for sparkles on or around an item, similar to the quest trails you see. You’ll also see this for codex entries.
- Completing Quests
Most quests are straightforward, and you are guided through the majority of the way. The only ones that can sometimes be difficult are reputation events, as it’s not always completely clear what you have to do. You you have completed the objective follow the quest marker to the quest turn in location or NPC.
- Quest Reward Options
At the end of quests, you’ll be rewarded with experience and other items. Sometimes, you are given reward options, usually for gear. If your gear is better, take anything. If the gear is better than what you are wearing, select the relevant option for your spec. For example, if you are a Paladin Tank, look for gear with stamina as the primary stat, and for Paladin damage, take the Strength option. Refer to your attribute screen (C) to see which stats to focus on.
- Need Quest Help?
If you’re stuck on a quest, let me know in The Tank Club Discord, and I’ll try to help you out.
- Daily & Weekly Tasks
In Tarisland, completing daily and weekly tasks is crucial for gaining valuable rewards and resources. Daily tasks reward you for routine activities like quests or elite dungeons, while weekly tasks might involve clearing a raid or fishing multiple times. Additionally, the Manual of Destiny offers extra tasks that often overlap with your daily and weekly objectives. Completing these tasks earns you Destiny Tokens, which can be used to purchase emblem chests or gear.
- Season Rank
The Season Rank, found in the same menu as daily and weekly tasks and the Manual of Destiny but in a different tab, rewards you for earning season experience by completing similar tasks. The further your rank increases, the better the rewards you receive, offering more incentives to stay active and engaged in the game.
- Battle Pass
Tarisland offers both a free and a paid battle pass. You progress through the battle pass by completing daily activities to earn Battle Pass experience. The paid pass provides minor advantages, such as gold and lucky coins, but mainly offers cosmetic items.
- Bank NPCs
You’ll find the bank in SilverLit at the trading post area, or simply press the Warehouse button in your bag to fast teleport there. Here, you can store items you don’t immediately need to use, and you can also attach extra bags to increase storage capacity.
- Merchant NPCs
There are many NPCs located around the map, but most of them simply open menus you can already access on your UI. Most NPC interactions are for questing. The fishing NPC will open a unique shop, and some offer additional services. Speaking to the profession NPCs also offers different interactions.
- Travel & Transport
Traveling around the world can be done in a few different ways: teleport stones, mounts, flying mounts, and quest transport.
- Teleport Stones
These are located all over the map in prime locations to help you get around faster. Move close to them to unlock them. To use them, open your map and double click on the ones you’ve unlocked to travel there.
- Mounts
Mounts can be bought from various stores, such as the guild store, reputation store, or for real money. They can also be earned via achievements and other methods. You’ll get your first mount early on in the main story quest as you gain reputation and get a free mount.
- Equipping Mounts & Skills
Equip your mount on the appearance screen (P) under the mount tab. You can then mount up by pressing Z, which you can do instantly while moving. On the mount screen, you can also equip mount traits that you can earn and buy, and see the mount skill for each mount, which is used when you press X while riding your mount.
- Mount Speed
To increase the speed of your mount, you need to increase your reputation in each zone. Once your reputation is high enough, you’ll unlock a store item to increase mount speed.
- Flying Mounts
You can buy flying mounts, but they won’t fly until you reach reputation level 10 in each zone. Once you do, you can fly around in zones where you have level 10 reputation.
- Other Transport
During quests, you’ll often be given other transport options, usually with a skill on the 1 key to speed up, and they are automatically pathed.
- Auto-Pathing
In your reputation screen, you can unlock auto-pathing, which allows you to press to go somewhere, and it will automatically walk you there. This is regional, and you need to unlock it via your reputation for each zone.
Social & Market
- Talking to Other Players
To talk to other players, press Enter to activate the chat and then begin typing. You’ll initially be on the general world chat, but you can click the other boxes to switch to different chat channels.
- Friends List (O)
Access your friends list by pressing O. This will show your friends list, give you options to add and find friends, and check your mail.
- Adding Friends
To add friends, go to the add tab and either look at the recent teams or press add friends where you can perform a cross-server search. Additionally, you can right-click on people from your group in the group tab at the top left corner of the screen to add them as a friend. Once you add a friend, you currently can’t remove them. However, you can press the arrow to the side and click on track to find where they are so you can group up and do overland activities together.
- Grouping Up
To group up, invite people to team up via your friends list, guild list, or the team up lobby.
- Guilds (G)
Open the guild menu by pressing G, where you can join or create a guild. Pressing quick join will find a suitable guild where you meet the requirements. When you join a guild, you gain access to a guild screen where you can chat with guild members, view guild info, see a members list, manage members if you have the appropriate rank, view your perks and warehouse, and check the guild event list which shows recent joining members. To leave a guild, go to the manage tab and press exit guild.
- Marketplace
The market is represented by a gavel icon at the top right of your main UI. Here, you can buy and sell items to other players using the gold currency, which you earn from achievements, Tarisland chests, and more. In the trade centre, you can see items currently available on the market or search for a specific item.
- Selling on the Marketplace
Go to the listing tab, which will display all items in your inventory that are sellable on the market. Select the item and enter the amount of gold you want for it. It will display a recommended price which you can use as well. Select the quantity and then confirm everything, paying a silver fee to list the items.
- Orders
You can place orders for items on the market if they are not already listed or if they don’t meet your price requirements. You can only have one order listed at a time unless you buy a monthly ticket. You’ll pay a fee for the order and have to pay the cost of the items upfront.
Crafting & Professions
- Professions
There are 4 professions in Tarisland: Forging, Tailoring, Alchemy, and Jewellery Making. You can only learn one profession at a time. As you progress through the game, you’ll receive a quest to choose a profession. Travel to the SilverLit trading post area where all the profession NPCs are located, and speak to one to get a profession.
- Switching Professions
Since you can only have one profession selected at a time, you are able to switch them. Simply speak to a different NPC than the one of your current profession, and they will allow you to switch for a cost of 2000 silver. After switching, you’ll be on a cooldown for 2 hours.
- Vigor
Vigor is your crafting stamina. Each time you gather or craft an item, it will cost vigor points. Vigor regenerates every 15 minutes or can be restored by drinking vigor potions.
- Proficiency
As you gather and craft more items, you’ll gain proficiency, which unlocks more advanced crafted items.
- Gathering
The first part of crafting is gathering the materials you need. You can gather these yourself or buy them from the trade centre.
- Finding Materials
To find materials linked to your profession, go to the crafting menu (N), press on the item you want to craft, and it will show you the materials needed. Press on the item and click “source” to see where it’s from. Some items need to be refined first. You can see these in the “Finished Material” menu, which will show you the base materials needed for making crafted items. Click on the base material and press “source.” For example, if it says “Tailors collect hemp fibre,” this will send you directly to the location where the materials are and put a marker and quest path for you to follow. To gather materials, press F when standing next to the material. These materials respawn quickly, so you can stay in one location to gather items faster.
- Refining
Once you have the base materials, open the crafting menu, press “Finished Materials,” and refine the materials you collected. This will give you materials you can use to craft items and also increase your proficiency. You can mass craft if you’ve gathered a lot of materials, but be aware of your vigor.
- Crafting
You’ll need refined materials and often multiple items for crafting. Most of the time, these items can only be obtained via other professions. For example, making gear requires dyes from Alchemists and crystals from Jewellers. If you chose Tailoring, you’ll need to buy these items from the market.
- Profession Specialization
You’ll collect specialization points for crafting as you complete certain content. You can choose to focus more on gathering, refining, or crafting. These specializations usually provide vigor perks, such as increased recovery time and reduced cost for specific actions related to your choice. Spend your specialization points to increase these crafting perks.
- Fishing
You gain access to fishing as you level up and eventually receive a quest to speak with the fishing NPC. This quest will teach you how to set up fishing and give you a fishing rod and bait. Slot the fishing rod onto your item slot on the ability bar by going to your backpack, left-clicking on it, and pressing equip. Find suitable water for fishing, press the hotkey to access your fishing rod, and click on the water. You will be prompted to equip some bait before you can continue. Once you begin fishing, a new ability bar will appear. This displays your equipped bait and icons for reeling and exiting fishing. Once you hook a fish, spam the hook ability until the meter fills to catch the fish. Fishing is useful because different fish have different benefits that can be useful consumables during difficult fights. You can also gain other items from fishing and need to catch fish to complete the reputation for each zone.
Tarisland Content
- PvE Content
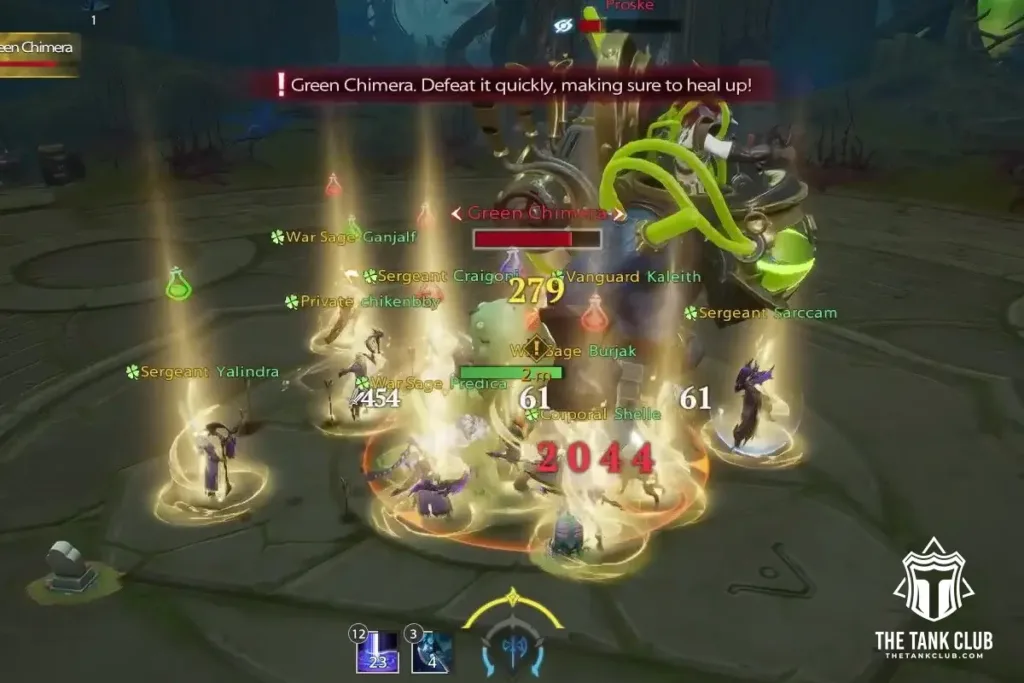
Tarisland offers a variety of content beyond overland and questing, including Dungeons, Elite Dungeons, Challenge Dungeons, Universal Hall, Raids, Elite Raids, Epic Raids, Dark Invasions, World Bosses, and the Arcane Realm.
- Dungeons
Dungeons are one of the first group activities you’ll encounter in Tarisland. Initially, you’ll complete a group dungeon as part of the main quest with NPC members. As you level up, you can participate in regular dungeons with other players. Each dungeon requires certain stats to ensure you’re capable of handling the content, indicated by a warning symbol next to the rewards. Normal dungeons are unlimited and provide fixed loot that is an improvement to quest rewards.
- Elite Dungeons
Elite Dungeons present a greater challenge compared to normal dungeons, requiring higher stats and gear scores. They offer better rewards, but loot drops are limited. Elite Dungeons have an entry cost and reward 3 items with randomized stats. You receive 2 new entries daily, which can accumulate up to 6, so it’s not necessary to complete dungeons daily. You can complete Elite Dungeons as often as you want, but you only receive loot if you have entries remaining.
- Challenge Dungeons
Challenge Dungeons are the top end-game dungeon content, rewarding players with a title upon completion. They feature the same dungeons as elite versions but with increased difficulty, including extra boss mechanics or affixes.
- Arcane Realm
The Arcane Realm is challenging, progressive group PvE content spread over 10 floors with unique mechanics, increased enemy health, and affixes to overcome. These are modified versions of existing dungeons, featuring familiar environments. This content becomes vital at level 40 for acquiring high-level gear.
- Queuing for Dungeons / Matchmaking
You cannot enter a dungeon solo; you must group up. On the dungeon screen, press “Enter Dungeon” to either find a group or use matchmaking. You can join a group via the team-up lobby or set up a group yourself. Matchmaking puts you in a queue to find others queued for the same dungeon.
- Team Up Lobby
In the team-up lobby, select the content you want to do from the drop-down menu. Use the quick apply to apply to all matching groups, or use the dungeon sign-up for specific dungeon groups. You can also create your own team, setting parameters for what your group is looking for. In the lobby, you can set your role by selecting the options in the Role Settings, allowing you to pick one or all roles that your class can play.
- NPC Players in Dungeons
If you can’t find enough people for a group through matchmaking, the game will place you into the dungeon with NPC AI characters. This system ensures you can always access content. The AI will attempt to handle mechanics and perform their roles, but they can be slow, often requiring you to wait for them. This system also applies to Elite Dungeons, but for harder fights, it’s recommended to use the team-up lobby.
- Raids
Raids are significant in Tarisland, requiring large cooperative groups for mechanical boss fights. You can use the team-up lobby or matchmaking for this content, but no AI NPCs will be provided. Raids are important as they give you gear that will include special aptitude and depending on the raid you’ll get a different piece of gear
- Universal Hall
This is a solo time trial arena where you fight bosses, progressing to harder difficulties by selecting your own debuffs and/or enemy buffs/affixes that you want to give it. Defeat the boss to earn emblem chests and inscribe dust. This content resets every 3 days.
- World Bosses
These are big overland bosses that reward you with a multicoloured gem if you defeat them, they also reset every 3 days.
- Dark Invasions
This content involve completing quests, closing portals, and defeating enemies to prevent them from taking over areas, rewarding you if you complete enough tasks in time.
- PvP Content
PvP content includes Battlegrounds for large group objective PvP, and Arenas, smaller scale 3v3 group PvP. Battlegrounds change daily for variety. PvP ranks, skills, and passives can be levelled up to enhance your PvP abilities, earning glory from participating in PvP modes, which can be spent on upgrades and items in the store.
- Achievements
Achievements offer additional rewards for completing various tasks, often granting silver and season pass XP. Some achievements reward new titles, mounts, and more, especially for more difficult tasks.
- Titles
Titles can be a way to show other players that you’ve completed challenging content, such as challenge mode dungeons. Equip a title from the character menu, which lists all your available titles.
- Events / Calendar
The horn icon at the top of the screen is your events menu. It shows current active events and your progress. A calendar at the top near the events menu provides a breakdown of daily content and events.
- Season Pass
The banner icon at the top of your UI is the season pass menu. It contains daily and seasonal tasks to complete for rewards and currency, which can be spent in the destiny shop.
- Weekly Calendar
See all of the upcoming content by going on the season pass then selecting the Gameplay Overview and the calendar is at the top of this page.
- Photo Mode
As you explore, you’ll find camera icons indicating photo locations. Taking pictures at these locations contributes to your zone reputation completion. Access photo mode from the top left of your UI.
- Reward of Destiny / Pray
The Pray system in Tarisland is a gacha-style reward mechanism where you use Stones of Prayer to receive random rewards from a prize pool. To access this feature, look for the coin pile icon on the main UI, which opens the Market. From there, click on “Go Now” under Reward of Destiny to start praying. While Stones of Prayer can be purchased with real money, you can also earn them for free by increasing your reputation and purchasing them from the reputation store using silver.

