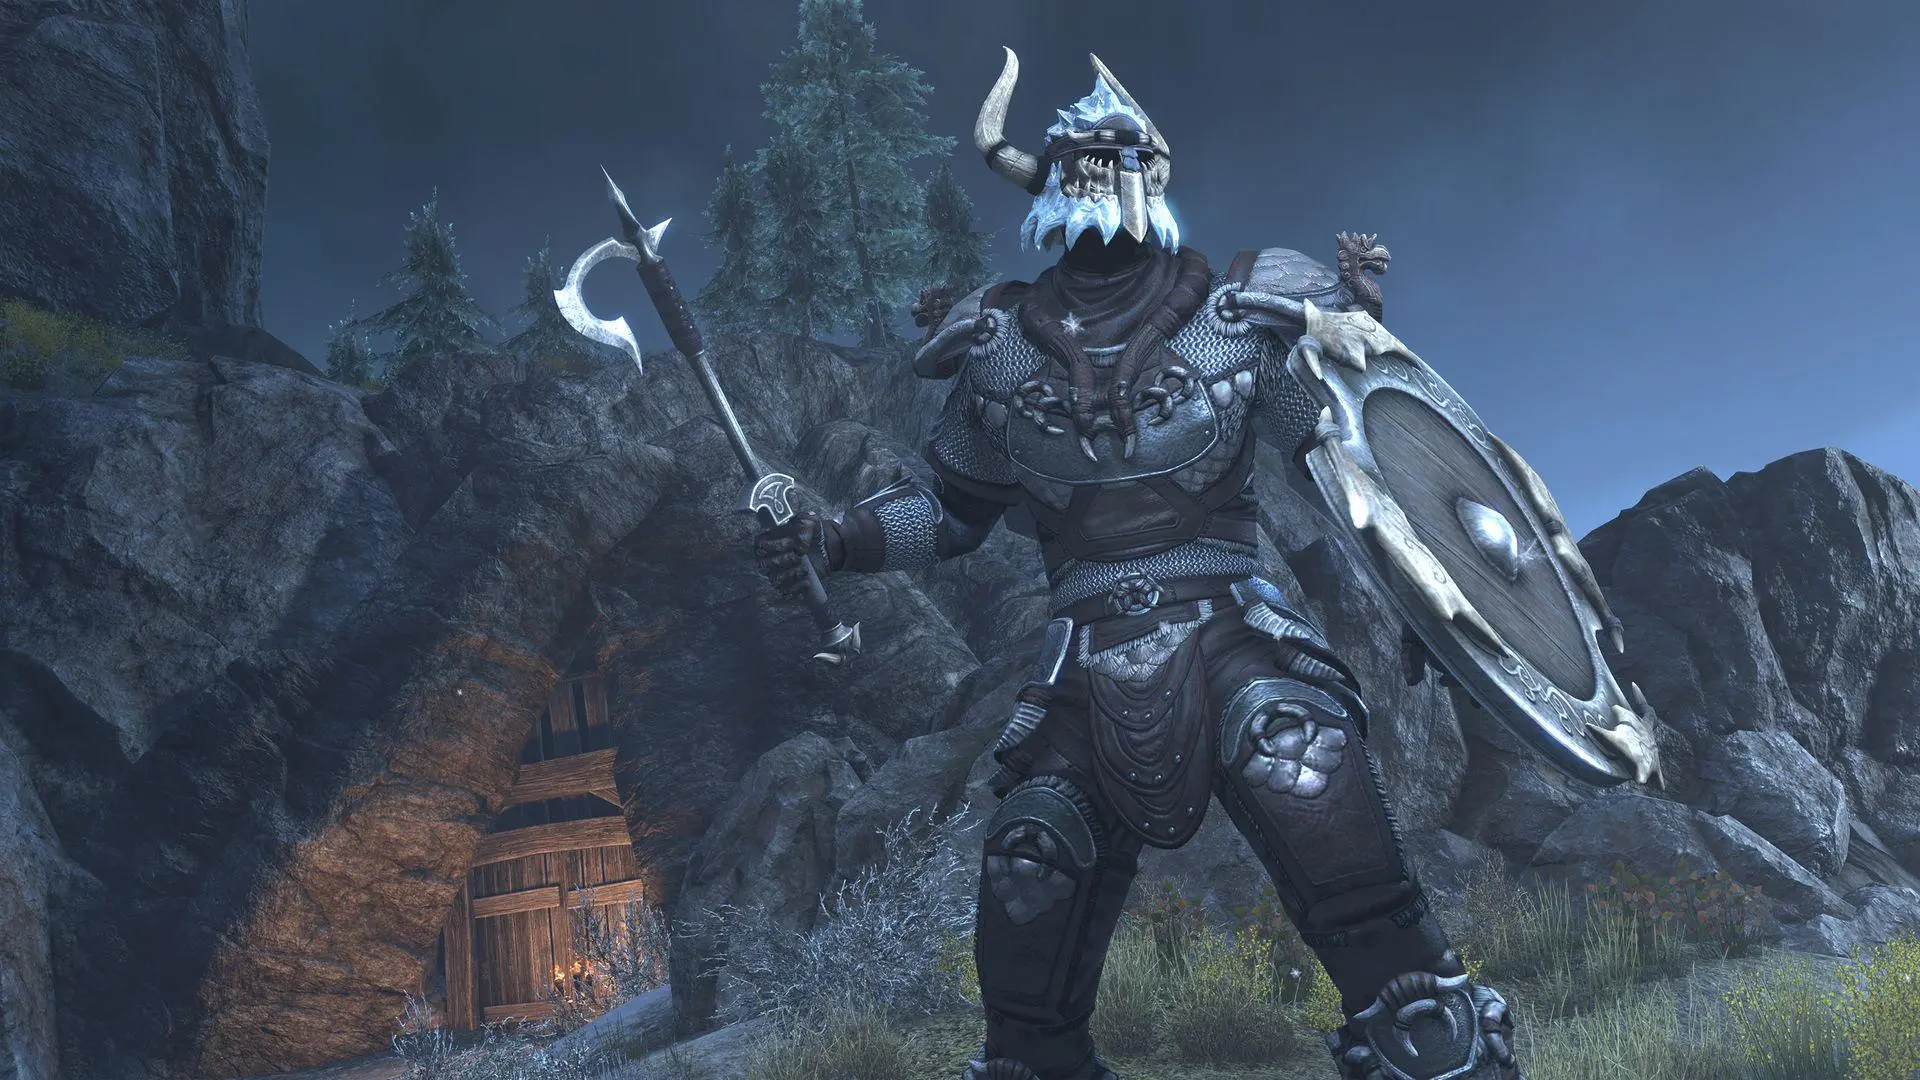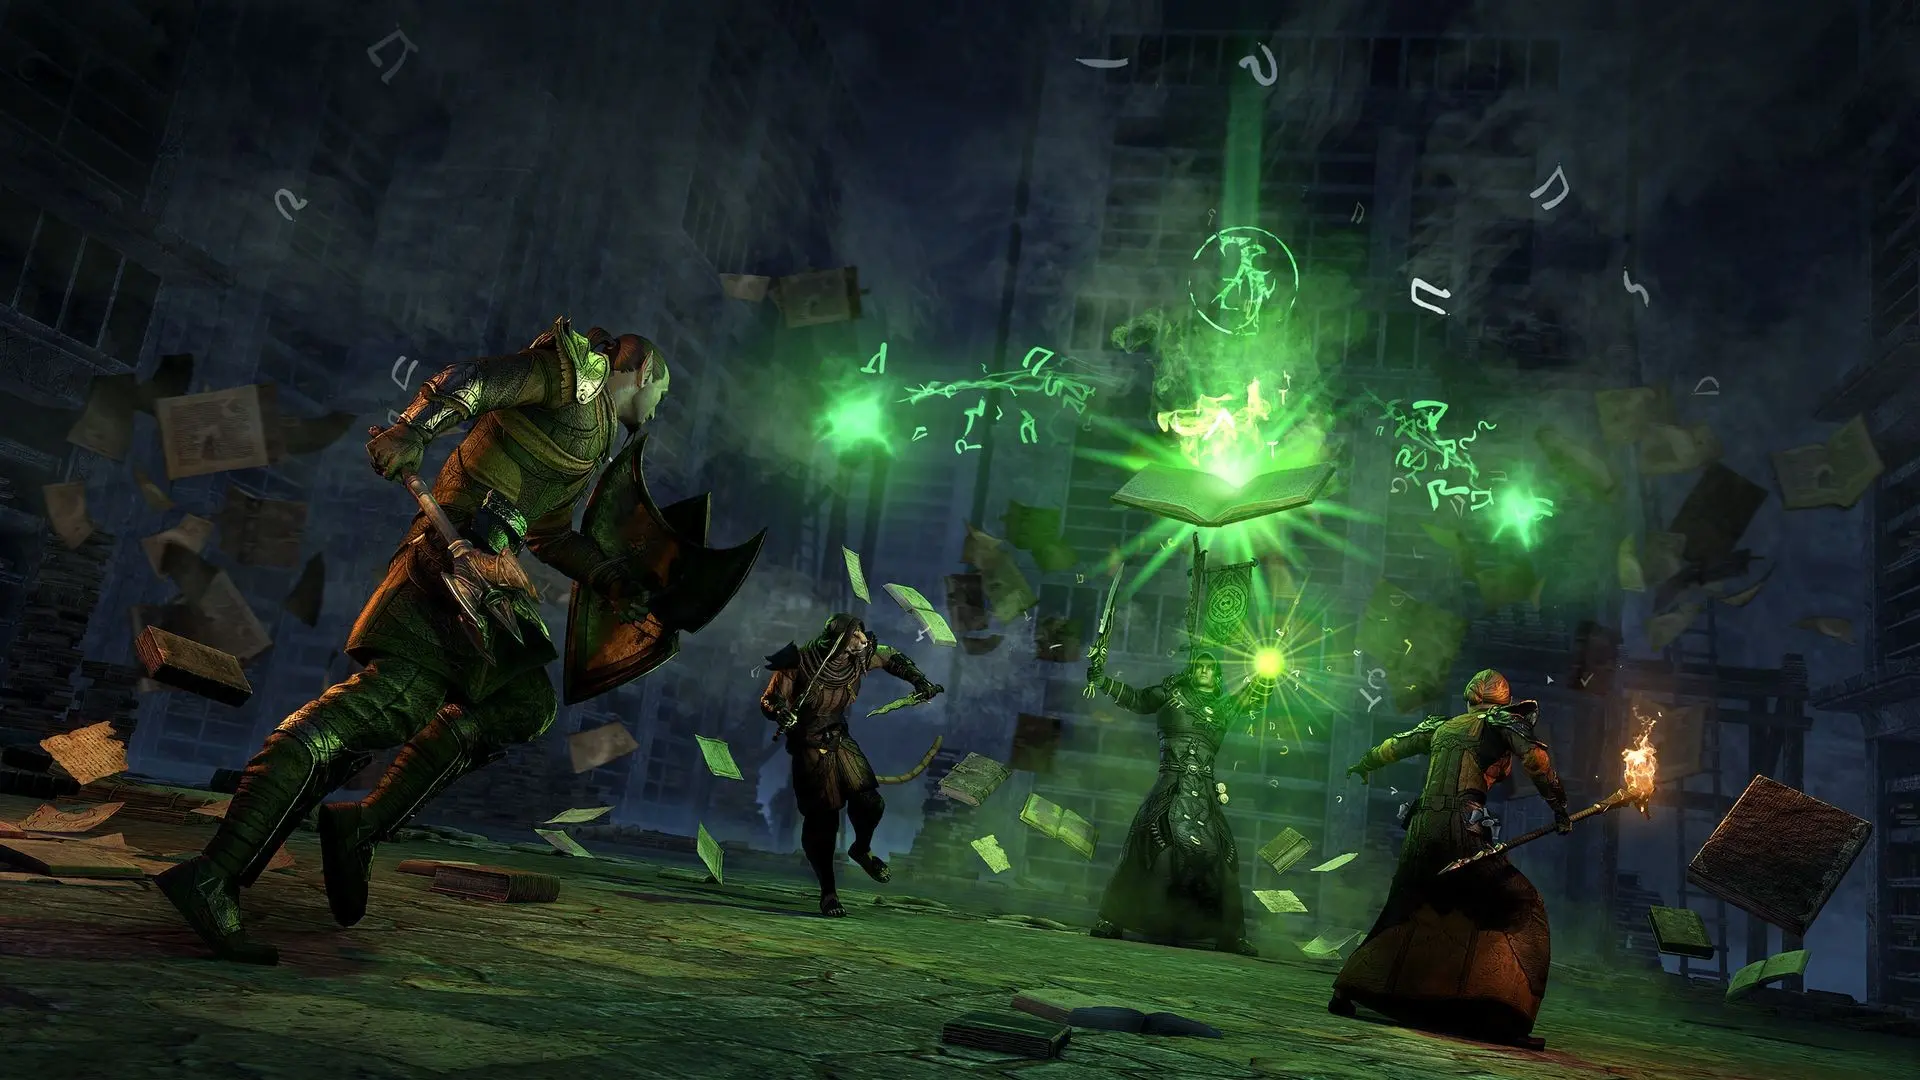










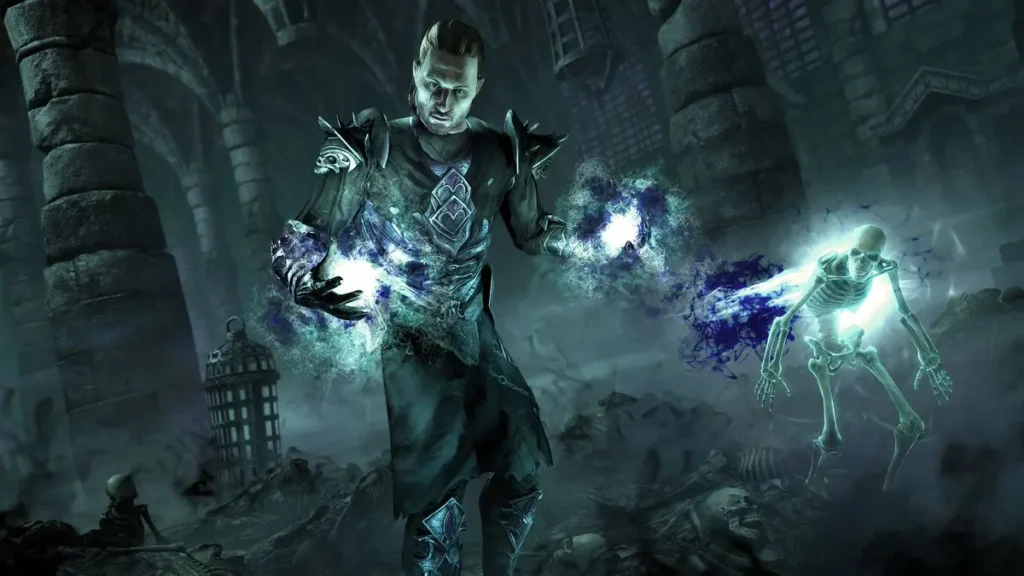
The ESO Necromancer Tank combines corpse-based Ultimate generation with damage-over-time mitigation and the ability to transfer some incoming damage to Spirit Guardian. These tools give it useful strengths in demanding encounters, although it is not currently among my top recommendations for general dungeon or trial tanking.
Its clearest group contribution is Major Vulnerability. Glacial Colossus applies the debuff, while Veil’s Forfeit extends its duration, allowing a Necromancer Tank to provide strong coverage when the group needs it. Necrotic Potency and corpse consumption help rebuild Ultimate, particularly during add pulls. However, other players or gear sets can cover Major Vulnerability, reducing the need to assign a tank specifically to this role.
Defensively, Spirit Guardian’s damage transfer and Disdain Harm’s reduced damage taken from damage-over-time abilities remain valuable. The class can handle dungeon, Main Tank and Off Tank assignments, but other classes often provide a smoother toolkit or more valuable group support. Warden Off Tanks are especially strong competition for a trial support position.
This guide provides Necromancer Tank setups for each role, explaining how to manage corpses, maintain debuffs and adapt your defensive tools to the encounter. Full-class builds retain their Class Mastery benefits, while Subclassing remains a situational option for combining Necromancer mitigation with other classes’ tools. Choose the Necromancer because you enjoy its playstyle or its strengths suit your group, rather than expecting it to be the strongest choice for every situation.
Not sure if this is the right Tank for you?
Compare all ESO Tank builds and find the class that fits your playstyle and group role.
Want My Best Builds Before Everyone Else?
Get builds before release, exclusive setups, and direct input on future content.
Quick-Start ESO Necromancer Tank Build
Quick Build Snapshot
Build Focus: Trials Off Tank
Difficulty: Intermediate – High Skill Ceiling
Playstyle: Ultimate-Driven, Corpse Management, Debuff Control
Best Content: Veteran Trials
Trial Role: Situational, depending on group composition
Patch: Update 51 (2026)
Necro Tank Strengths, Weaknesses & Group Benefits
Strengths
- Exceptional Ultimate generation when corpses are available
- Strongest class for Ultimate cycling in organised groups
- Access to Major Vulnerability through Colossus
- Excellent resistance to sustained damage-over-time pressure
- Reanimate provides powerful fight recovery in progression scenarios
- High impact in trial environments where coordinated burst windows matter
Weaknesses
- More complex playstyle requiring corpse management and positioning
- Sustain is less forgiving than Dragonknight or Arcanist
- Relies heavily on group coordination to maximise Ultimate value
- Fewer passive, always-on group buffs compared to some other tank classes
- Self-healing can feel weaker during transitional or low-corpse encounters
DK Group Benefits
- Colossus – Major Vulnerability
- Empowering Grasp – Major Maim & Empower
- Bone Totem – AoE Major Cowardice, Minor Protection & Group Synergy
- Unnerving Boneyard – AoE Major Breach, Minor Vulnerability & Group Synergy
- Ruinous Scythe – Hemorrhaging Status & Off Balance
- Reanimate – Resurrect 3 allies
- Spirit Mender – Heals lowest health ally
Core Essentials
Attributes
- 64 Health
Mundus Stone
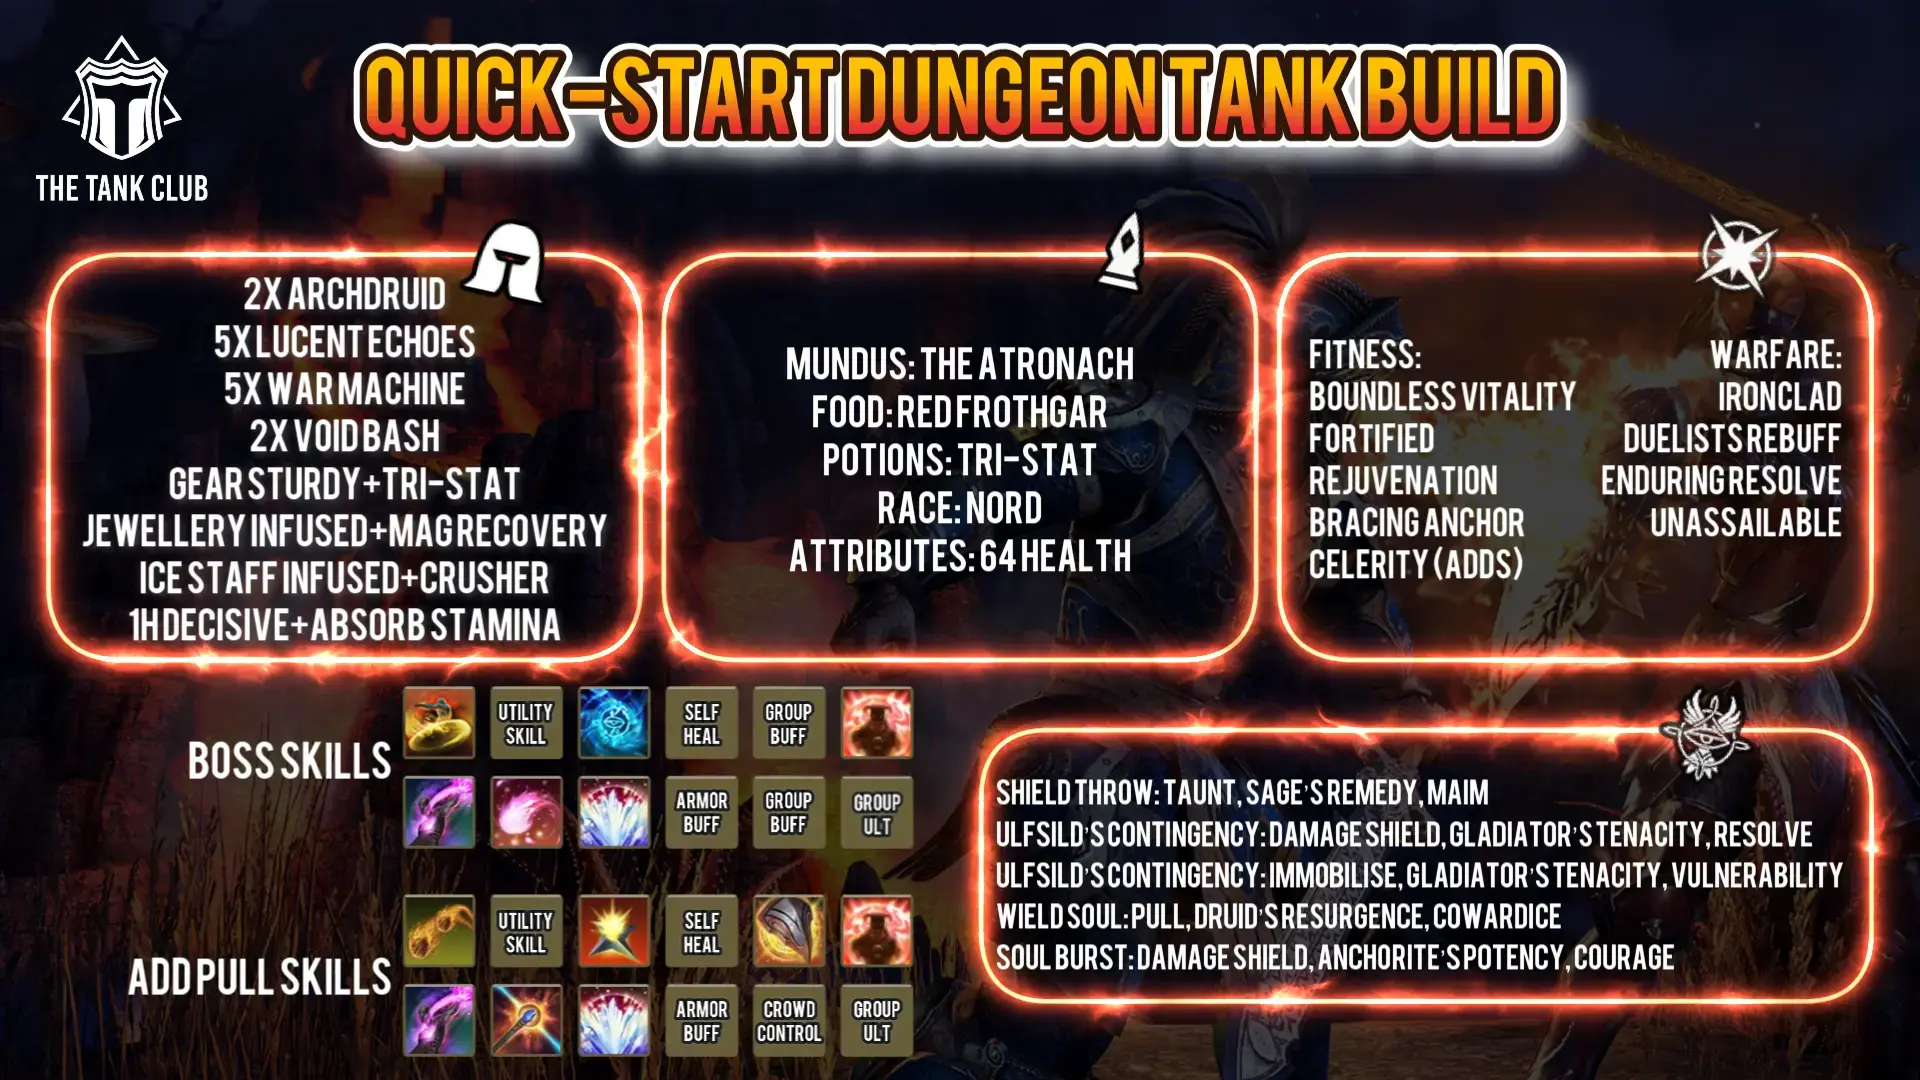
The Atronach Mundus Stone provides the most reliable value for Necromancer tanking by increasing Magicka Recovery. Maintaining skill uptime is one of the biggest challenges for Necromancers, especially in longer pulls and sustained boss fights, and additional Magicka Recovery allows you to cast key abilities consistently without over-relying on heavy attacks.
Food Options
Red Frothgar is the strongest all-round Necromancer tank food, offering increased Max Health alongside Magicka Recovery. This combination provides the most consistent survivability and skill uptime across all content types.
Smoked Bear Haunch, or the cheaper alternative Jewels of Misrule, trades some Max Health and Magicka Recovery compared to Red Frothgar, for additional Health and Stamina Recovery. These options are best suited to experienced tanks who block less frequently and are comfortable managing incoming damage.
Bewitched Sugar Skulls can be used situationally when additional Max Resources are needed, but it is generally less efficient for tanking compared to recovery-focused foods.
Potions
Essence of Health (Tri-Stat) potions are the default for dungeon tanking. Restoring Health, Magicka and Stamina together gives every class an emergency resource refill during difficult pulls or boss mechanics.
Race
Nord is a strong all-round choice for dungeon tanking. Its defensive bonuses and Ultimate generation are useful on every class, whether you are learning encounters or supporting an organised group.
Imperial provides Max Health, Max Stamina and reduced ability costs, making it a comfortable choice if you want easier resource management. Redguard offers Stamina sustain through its racial passives, which can help during longer fights.
Race has less impact than knowing the mechanics and managing your resources well. If you already have a tank of another race, there is no need to change it for this build. For a fuller comparison, see the ESO Tank Race guide.
Attributes
Put all 64 attribute points into Health. A larger Health pool helps you survive heavy hits and overlapping trial mechanics. It also strengthens the Max Health-scaling heals and damage shields used by many tank builds, improving your survivability in more than one way.
Recommended Stats (Fully Buffed)
These are practical starting points, not thresholds you must hit before entering a dungeon. Check your stats with your usual food, gear and self-buffs active, then adjust them based on the content and where your build runs out of resources.
40,000+ Health
A comfortable target for Veteran DLC dungeons and Hard Modes, where an unblocked hit or overlapping damage can quickly become dangerous. You can use less in easier content or when you know an encounter well, but having more will help a lot in harder hitting dungeons.
20,000+ Stamina
Gives you room to block, dodge, break free and use Stamina skills. If Stamina regularly runs out, look at how often you block and cast skills as well as your maximum pool.
Under 1,000 Block Cost
Aim to bring your block cost below 1,000 for a comfortable dungeon setup. Blocking repeated attacks, especially during large add pulls, can drain Stamina quickly if the cost is too high. A few Sturdy armor pieces or one Infused jewellery piece with a Bracing enchantment can help you reach this target. Check your final block cost before adding more reductions: once blocking feels sustainable, further investment offers less benefit. Releasing block when it is safe remains an important part of managing Stamina.
15,000+ Magicka
A useful baseline for casting tank skills. If you repeatedly run out during add pulls or boss fights, improve your sustain or increase your Magicka pool to suit your skill costs. A larger pool alone will not solve a long-term resource deficit.
25,000–33,100 Resistances
You do not need to reach the resistance cap for every dungeon. Around 25,000 fully buffed is a useful starting point for Veteran DLC content; moving closer to 30,000 or more can make demanding Hard Mode encounters more forgiving. In easier dungeons, prioritise taunting and controlling enemies over chasing a particular resistance number.
Skills, class passives, Major and Minor Resolve, Reinforced armor and a Defending weapon can all help raise your resistances. They remain useful against damage over time and hits you cannot block, even when you are comfortable blocking the most dangerous attacks.
2,000+ Magicka Recovery
A helpful target if your build casts Magicka skills frequently, especially in groups without a healer. It is not a requirement for every class: some tanks can maintain their skills with less through class abilities, heavy attacks, potions or other resource returns. Judge the number by whether you can keep your important skills active throughout a fight without exhausting your Magicka.
Subclassing
Subclassing allows the Necromancer to replace one or two of its less tank-focused skill lines with stronger defensive or group-support alternatives. The Necromancer’s core tanking identity sits firmly within Bone Tyrant, which provides its strongest passives and primary defensive tools.
Grave Lord is often taken purely for the Colossus Ultimate, while the remaining skill line can be swapped depending on content and group needs.
Because Necromancer does not naturally provide as many passive group buffs as some other classes, subclassing plays a major role in strengthening its overall utility.
Dungeon-Focused Subclassing
In dungeon content, Necromancers commonly benefit from:
- Arcanist – Soldier of Apocrypha: Adds a strong defensive backbone with increased resistances, recovery, layered mitigation, and Minor Evasion. This makes dungeon tanking feel significantly smoother and more stable.
- Warden – Winter’s Embrace: Provides Major Resolve to the group, applies Major Maim automatically, and adds block mitigation and defensive passives. Since other roles rarely use this line, it fits naturally into the tank role.
These combinations enhance survivability and reduce pressure in unpredictable 4-player content.
Trial Off Tank Subclassing
In organised trials, Necromancers are often positioned as Off Tanks, where their role shifts toward utility and Ultimate cycling. In these situations, stronger synergy comes from:
- Sorcerer – Daedric Summoning: Access to a Major Berserk Ultimate option, strong damage shields, reduced Ultimate cost, and incoming damage reduction.
- Nightblade – Siphoning: Increased Max Resources and additional Ultimate generation through potion synergy, supporting an Ultimate-driven playstyle.
- Templar – Restoring Light: Provides group healing, a cleanse synergy, and additional Ultimate support, offering a utility-focused alternative for coordinated groups.
These lines reinforce Necromancer’s strength as an Ultimate-focused Off Tank while compensating for its lack of passive group buffs.
Situational Alternative
- Dragonknight – Earthen Heart: Adds strong sustain tools and group utility. While not mandatory, it remains one of the most efficient support lines in organised trial environments.
Necro Tank Gear Setups
| Piece | Set | Weight | Trait | Enchantment |
|---|---|---|---|---|
| Head | Archdruid Devyric | Medium | Divines/Reinforced | Prismatic Defence |
| Shoulder | Archdruid Devyric | Light | Divines/Sturdy | Prismatic Defence |
| Chest | Lucent Echoes | Heavy | Divines/Reinforced | Prismatic Defence |
| Hands | Lucent Echoes | Heavy | Divines/Sturdy | Prismatic Defence |
| Waist | Lucent Echoes | Heavy | Divines/Sturdy | Prismatic Defence |
| Legs | Lucent Echoes | Heavy | Divines/Reinforced | Prismatic Defence |
| Feet | Lucent Echoes | Heavy | Divines/Sturdy | Prismatic Defence |
| Necklace | War Machine | Jewellery | Infused | Magicka Recovery |
| Ring | War Machine | Jewellery | Infused | Magicka Recovery |
| Ring | War Machine | Jewellery | Infused | Magicka Recovery |
| Main Hand | Void Bash | Any 1H | Decisive | Hardening |
| Off Hand | Void Bash | Shield | Divines/Sturdy | Prismatic Defence |
| Main Hand Backup | War Machine | Ice Staff | Infused | Crusher |
| Piece | Set | Weight | Trait | Enchantment |
|---|---|---|---|---|
| Head | Tremorscale | Medium | Divines/Sturdy | Prismatic Defence |
| Shoulder | Tremorscale | Light | Divines/Sturdy | Prismatic Defence |
| Chest | Lucent Echoes | Heavy | Reinforced | Prismatic Defence |
| Hands | Lucent Echoes | Heavy | Divines/Sturdy | Prismatic Defence |
| Waist | Lucent Echoes | Heavy | Divines/Sturdy | Prismatic Defence |
| Legs | Lucent Echoes | Heavy | Divines/Sturdy | Prismatic Defence |
| Feet | Lucent Echoes | Heavy | Divines/Sturdy | Prismatic Defence |
| Necklace | Pillager’s Profit | Jewellery | Harmony/Infused | Magicka Recovery |
| Ring | Pillager’s Profit | Jewellery | Harmony/Infused | Magicka Recovery |
| Ring | Pillager’s Profit | Jewellery | Harmony/Infused | Magicka Recovery |
| Main Hand | Armor of the Trainee | Any 1H | Decisive | Hardening |
| Off Hand | Druid’s Braid | Shield | Divines/Sturdy | Prismatic Defence |
| Main Hand Backup | Pillager’s Profit | Ice Staff | Infused | Crusher |
| Piece | Set | Weight | Trait | Enchantment |
|---|---|---|---|---|
| Head | Magma Incarnate / Baron Thirsk | Medium | Reinforced | Prismatic Defence |
| Shoulder | Spaulder of Ruin | Light | Divines/Sturdy | Prismatic Defence |
| Chest | Pearlescent Ward | Heavy | Reinforced | Prismatic Defence |
| Hands | Pearlescent Ward | Heavy | Divines/Sturdy | Prismatic Defence |
| Waist | Pearlescent Ward | Heavy | Divines/Sturdy | Prismatic Defence |
| Legs | Pearlescent Ward | Heavy | Reinforced | Prismatic Defence |
| Feet | Pearlescent Ward | Heavy | Divines/Sturdy | Prismatic Defence |
| Necklace | Xoryn’s Masterpiece | Jewellery | Infused | Prismatic Cost Reduction |
| Ring | Xoryn’s Masterpiece | Jewellery | Infused | Prismatic Cost Reduction |
| Ring | Xoryn’s Masterpiece | Jewellery | Infused | Prismatic Cost Reduction |
| Main Hand | Xoryn’s Masterpiece | Any 1H | Decisive | Weakening |
| Off Hand | Xoryn’s Masterpiece | Shield | Divines/Sturdy | Prismatic Defence |
| Main Hand Backup | Xoryn’s Masterpiece | Ice Staff | Infused | Crusher |
| Piece | Set | Weight | Trait | Enchantment |
|---|---|---|---|---|
| Head | Baron Zaudrus | Medium | Divines | Prismatic Defence |
| Shoulder | Baron Zaudrus | Light | Divines | Prismatic Defence |
| Chest | Arkasis’s Genius | Heavy | Divines | Prismatic Defence |
| Hands | Arkasis’s Genius | Heavy | Divines | Prismatic Defence |
| Waist | Arkasis’s Genius | Heavy | Divines | Prismatic Defence |
| Legs | Arkasis’s Genius | Heavy | Divines | Prismatic Defence |
| Feet | Arkasis’s Genius | Heavy | Divines | Prismatic Defence |
| Necklace | Hide of the Werewolf | Jewellery | Infused | Potion Cooldown |
| Ring | Hide of the Werewolf | Jewellery | Harmony | Potion Cooldown |
| Ring | Hide of the Werewolf | Jewellery | Harmony | Magicka Recovery |
| Main Hand | Hide of the Werewolf | Any 1H | Decisive | Hardening |
| Off Hand | Hide of the Werewolf | Shield | Divines | Prismatic Defence |
| Main Hand Backup | Hide of the Werewolf | Ice Staff | Infused | Crusher |
Default Recommendation:
If you prefer a single, reliable setup, use the Dungeon gear configuration. It offers strong group utility, consistent survivability, and adapts well to both dungeon and trial environments.
For a full breakdown of tank gear in The Elder Scrolls Online, including traits, enchantments, and optimisation strategies, see the ESO Tank Gear Guide.
Gear Information
Armor Traits
- Divines – Default choice for improved Magicka Recovery
- Reinforced – Useful in difficult Veteran Hardmodes if resistance cap is hard to reach
- Sturdy – Viable for tanks with strong sustain or heavy block usage
Jewellery
- Harmony + Magicka Recovery – Best overall performance
- Prismatic Cost Reduction – Useful for Stamina-heavy setups
- Infused – Strong when synergies are less frequent
- Swift – Situationally valuable for add pulls when using gear-swap addons
Weapons
- One-Hand & Shield
- Decisive + Hardening – Strong all-round option
- Infused + Weakening – Ideal when running without a healer
- Absorb Stamina – Adds minor sustain when needed
- Ice Staff
- Charged – Best for add pulls, reliably applying Chilled
- Infused + Crusher – Mandatory for bosses to maintain maximum debuff uptime
Dungeon Gear
Lucent Echoes is worn on the body, so its five-piece effect remains active on both bars. While you are above 50% Health, it increases nearby group members’ Critical Damage and Critical Healing. If your Health falls to 50% or below, that group bonus switches to damage reduction for you instead. This gives the setup useful protection during difficult pulls, although keeping yourself healthy is also how you maintain its offensive benefit.
War Machine is active only on the back bar, where the three jewellery pieces combine with the ice staff to complete the set. Cast your Ultimate from that bar to grant Major Slayer to yourself and the closest five group members. That is enough to cover your entire dungeon group, and the duration increases with the Ultimate spent. Try to cast when your damage dealers can make use of the buff, particularly during a boss damage window. An Ultimate cast on the Void Bash bar will not activate War Machine.
Archdruid Devyric applies Major Vulnerability after you damage an enemy with a Heavy Attack. Use it on bosses or priority enemies when the group is ready to deal damage. Its effect covers a small area, so enemy positioning matters. If another player is already providing strong Major Vulnerability uptime, this monster set becomes a flexible slot rather than an automatic choice.
Trials Main Tank Gear
Monster Set — Nazaray, Tremorscale, Archdruid Devyric, Encratis’s Behemoth or Baron Zaudrus
There is no single Monster Set that every trial Main Tank should wear. Choose one based on the buffs and debuffs your group needs:
- Nazaray extends existing Major and Minor debuffs on nearby enemies when you use an Ultimate. It is a strong general option if your group has valuable debuffs to extend and nobody else is wearing it.
- Tremorscale reduces enemy Armor when you taunt. Use it when the group needs more penetration, after accounting for sources such as Alkosh and Crimson Oath’s Rive. It contributes to reaching the 18,200 penetration target; it does not cover the whole gap by itself.
- Archdruid Devyric applies Major Vulnerability to several enemies after a Heavy Attack. It is useful when your group needs another source of the debuff, but its value falls if Necromancer Colossus or other sources already provide enough uptime.
- Encratis’s Behemoth increases Flame Damage taken by nearby enemies and reduces Flame Damage taken by nearby group members. Choose it when your group deals substantial Flame Damage or the encounter makes its defensive effect valuable.
- Baron Zaudrus generates additional Ultimate when you repeatedly apply status effects. It is an option when the other Monster Set effects are already covered and your setup can trigger it consistently.
5-Piece Set — Lucent Echoes
Lucent Echoes increases nearby group members’ Critical Damage and Critical Healing while you are above 50% Health. At 50% Health or below, that group bonus switches off and you gain damage reduction against monsters instead. It offers strong group value during normal play and a defensive buffer when you come under pressure, although it cannot prevent a hit that kills you outright.
If your damage dealers are already at the Critical Damage cap, consider a set that fills a different need. Pearlescent Ward provides group Weapon and Spell Damage while the group is alive, Turning Tide offers Major Vulnerability, and Claw of Yolnahkriin supplies Minor Courage. Check those effects against your group’s existing coverage before swapping.
5-Piece Set — Pillager’s Profit or a Group Utility Alternative
Pillager’s Profit shares Ultimate with nearby group members when you cast an Ultimate, with the amount scaling from the Ultimate spent. A Main Tank who generates Ultimate quickly can make good use of it, particularly when planning casts around the group’s damage windows.
First check whether a healer is already wearing Pillager’s Profit and how your group is maintaining Major Force. Aggressive Horn can still be valuable when that buff is not covered reliably; other groups may get it from an Arcanist’s Class Mastery.
If Pillager’s Profit is covered, your second set can address another gap: Crimson Oath’s Rive for enemy Armor reduction, Claw of Yolnahkriin for Minor Courage, Xoryn’s Masterpiece for group Max Magicka and Stamina, The Morag Tong for a group Poison Damage buff or Serpent’s Disdain on a Warden Main Tank to extend the duration of the Major Brittle debuff.
Armor of the Trainee & Druid’s Braid
The front-bar sword and shield each provide a separate one-piece Max Health bonus. These require no activation and give you additional Health while using that bar.
The extra Health is lost when you switch to the ice staff. Keep this difference in mind when checking your stats and taking heavy damage on the back bar.
Trials Off Tank
Pearlescent Ward
Pearlescent Ward is a heavy armor set worn on the body, keeping its five-piece effect active on both bars. It provides group Weapon and Spell Damage while players are alive, with increasing damage reduction from non-player enemies as group members die.
There is no skill or proc to maintain. This makes it a useful foundation when your attention needs to stay on add control, movement and mechanics. Its defensive effect can help stabilise a difficult pull, though it cannot replace handling mechanics correctly.
Xoryn’s Masterpiece
Xoryn’s Masterpiece is completed through the jewellery and weapons on both bars. It increases Max Magicka and Max Stamina by 1,667 for you and up to 11 group members within 28 metres.
The effect is passive, so positioning is its main requirement. Stay within range of the group whenever possible. These are larger resource pools rather than ongoing resource restoration, and the additional offensive resources can also benefit your damage dealers DPS.
Keep Xoryn’s active on both bars as shown; replacing the front-bar weapons would remove its five-piece effect whenever you switch to that bar.
Spaulder of Ruin
Crouch once to activate Spaulder’s aura, then stand up and continue tanking. Up to six group members within 12 metres receive 260 Weapon and Spell Damage while the aura remains active.
The range makes this most useful when you can work close to the damage dealers. An Off Tank stationed far from the group will provide less consistent coverage.
Spaulder reduces your Health, Magicka and Stamina Recovery by 70 for each ally benefiting. With six recipients, that is a substantial recovery penalty, so make sure your sustain can support it.
One-Piece Magma Incarnate or Baron Thirsk
Either option provides Magicka and Stamina Recovery without needing to activate anything. This helps compensate for Spaulder’s recovery penalty, but does not cancel it completely. Only the one-piece bonus is used; you do not gain the monster set’s two-piece effect.
Skills for Necromancer Tanks
Necromancer Skills


Bosses

Adds


Bosses
Adds

Bosses
Adds


Bosses


Adds
Necromancer Passives
- Grave Lord: Reusable Parts
- Bone Tyrant: Death Gleaning, Disdain Harm, Health Avarice, Last Grasp
- Living Death: Curative Curse, Near-Death Experience, Corpse Consumption, Undead Confederate
- One Hand and Shield: Fortress, Sword and Board, Deadly Bash, Deflect Bolts, Battlefield Mobility
- Destruction Staff: Elemental Force, Ancient Knowledge, Destruction Expert
- Light Armor: Light Armor Bonuses, Light Armor Penalties
Grace, Evocation, Spell Warding - Medium Armor: Medium Armor Bonuses
Dexterity, Wind Walker, Athletics - Heavy Armor: Heavy Armor Bonuses, Heavy Armor Penalties
Resolve, Constitution, Juggernaut, Revitalize, Rapid Mending. - Fighters Guild: Intimidating Presence
- Mages Guild: Mage Adept, Everlasting Magic, Magicka Controller
- Undaunted: Banish the Wicked, Undaunted Mettle
- Support: Magicka Aid
- Racial: All
- Alchemy: Medicinal Use
- Arcanist Solider of Apocrypha: Aegis of the Unseen, Wellspring of the Abyss, Circumvented Fate, Implacable Outcome
- Warden Winter’s Embrace: Glacial Presence, Frozen Armor, Icy Aura, Piercing Cold
- Dragonknight Ardent Flame: Combustion, Warmth, Searing Heat, World in Ruin
- Dragonknight Earthen Heart: Eternal Mountain, Battle Roar, Mountain’s Blessing, Helping Hands
- Necromancer Grave Lord: Reusable Parts
- Necromancer Bone Tyrant: Death Gleaning, Disdain Harm, Health Avarice, Last Grasp
- Nightblade Siphoning: Catalyst, Magicka Flood, Soul Siphoner, Transfer
- Templar Restoring Light: Mending, Sacred Ground, Light Weaver, Master Ritualist
- Sorcerer Daedric Summoning: Rebate, Power Stone, Daedric Protection, Expert Summoner
Class Mastery Information
Veil’s Forfeit
Extends the Major Vulnerability you apply by 50%, making Glacial Colossus more effective at supporting group damage. It also creates additional corpse-consumption opportunities: directly healing yourself or an ally below 66% Health in combat allows you to use a corpse-consuming ability on that target within ten seconds. Hungry Scythe’s burst heal can activate this on yourself, helping you use Necrotic Potency even when no enemies have died.
Pound of Flesh
Provides reactive healing and Stamina sustain when you take damage. Each hit has a chance to heal you based on Max Health and restore 5% of your missing Stamina, once per second, with the chance increasing as your Health falls. It activates naturally while tanking and provides resource returns during blocking, but its chance-based effect supports your sustain rather than replacing other resource-management tools.
General Skill Information
- Elemental Susceptibility – Your primary single-target source of Major Breach. While active, it repeatedly applies Burning, Chilled, and Concussed, helping maintain Minor Maim and Minor Vulnerability. Chilled can also provide Minor Brittle when applied under the right Frost Staff conditions, while Frost Blockade applies Minor Breach to Chilled enemies. It now has a Magicka cost, so let its duration run before refreshing it.
- Elemental Blockade – Place this under the boss or your add stack to keep your back-bar Infused Crusher enchant working. With a Frost Staff, it snares enemies, applies Minor Breach to Chilled targets, and provides damage shields against projectiles. Refresh it as the wall expires; casting it repeatedly adds unnecessary Magicka pressure.
- Power Slam – Used during add pulls to activate the Void Bash weapon set. Damage a central enemy with Power Slam and Void Bash pulls nearby enemies towards you, making it easier to immobilise and debuff the pack. The pull does not replace taunting dangerous enemies individually.
- Inner Rage – A Magicka-based ranged taunt for picking up priority enemies before they reach the group. It also gives up to three allies a Radiate synergy that deals Flame damage to the target and nearby enemies, adding damage during large pulls.
- Razor Caltrops – Covers a large ground area and applies Major Breach to enemies damaged by it. Place it where you intend to stack the pull so enemies arrive already debuffed and slowed. It is most valuable against packs; Elemental Susceptibility provides the longer-lasting single-target application for bosses.
- Pulsar – An add-pull skill that applies Minor Mangle to non-boss enemies, reducing their Max Health. Frost Pulsar also grants Minor Protection and, especially with a Charged Frost Staff, is a strong way to apply Chilled across a pack. Those Chilled targets can then receive Minor Breach from Frost Blockade. Pulsar increases the chance of applying a status effect; it does not guarantee Chilled on every enemy.
- Revealing Flare – Slotted mainly for Major Protection, reducing the damage you take without requiring another skill cast. As a Support ability, it also increases your Magicka Recovery on that bar through Magicka Aid. You do not cast it in dungeon fights. This is a personal defensive choice, so it can be replaced when an encounter needs a different skill.
- Defensive Stance – While slotted on your one hand and shield bar, increases block mitigation and reduces Block Cost. Useful when your role involves sustained blocking or several hard-hitting enemies. Casting it also provides a Max Health-scaling shield and reflects an eligible direct-damage projectile, but the passive bonuses are the main reason to slot it.
- Crushing Shock – Interrupts enemy casts from range, letting you handle an assigned interrupt without leaving your position to Bash. Slot it when a trial mechanic requires reliable ranged interrupts. Its damage and potential status effects are secondary benefits.
- Resolving Vigor – Provides a self-heal over time and grants Minor Resolve, increasing your resistances. Useful when you lack Minor Resolve.
- Race Against Time – Provides a short Major Expedition speed boost, removes snares and immobilisations, and briefly grants immunity to them. Useful for reaching add spawns, moving between positions or handling movement mechanics when your class lacks a suitable speed skill. Its Minor Force is a secondary benefit for a tank.
Ultimates
- Aggressive Horn – Increases the group’s Max Magicka and Stamina and grants Major Force for a short damage window. It remains useful when the group has no reliable Major Force source. An Arcanist using Ink-Scribe’s Verve can cover Major Force through healing and overhealing, but check its actual uptime before removing Horn from a setup.
- Replenishing Barrier – A defensive Ultimate that shields you and nearby allies during dangerous mechanics or recovery moments. This morph restores Magicka as its wards expire. It can also be slotted without intending to cast it: the Support passive Magicka Aid increases Magicka Recovery while a Support ability is on that bar.
- Temporal Guard – Primarily a passive defensive slot. While it is slotted, you gain Minor Protection on that bar. You normally preserve your Ultimate for a stronger group or defensive effect rather than cast Temporal Guard.
Necromancer Dungeon Tank Skill Information
Necrotic Potency – Consumes nearby corpses to generate Ultimate and give you a Max Health-scaling heal over time. It also reduces your damage taken while slotted on the active bar. In add pulls, use it after enemies die to turn the pack into Ultimate for the next fight. On bosses, Summoner’s Armor and the eventual corpse from Spirit Guardian give you opportunities to use it without waiting for an add. Consuming a corpse can also trigger Corpse Consumption for extra Ultimate.
Hungry Scythe – Your reliable self-heal when an enemy is within reach. It heals on hit, gains additional healing from other enemies struck, and then provides a heal over time. Both parts of the healing scale with Max Health, making it particularly comfortable during large pulls. Face the enemies you want to hit before casting it; unlike a conventional burst heal, it cannot help when there is no target in front of you. With Veil’s Forfeit selected, directly healing yourself while below its Health threshold can also make you a valid target for a corpse-consuming ability.
Agony Totem – Place it at your feet where the boss or dangerous adds will remain. It grants nearby allies Minor Protection and applies Major Cowardice to enemies in its area, reducing their damage output. After a short delay it repeatedly fears susceptible enemies, and its synergy gives an ally another way to damage the pack. It is useful for holding an area under pressure, but its fear will not control a boss and the group must be close enough to benefit from its protection.
Summoner’s Armor – Maintains both Major Resolve and Minor Resolve, giving the Necromancer a substantial amount of Armor from one skill. While active, it also reduces the cost of Spirit Guardian and other Necromancer summons. More importantly for this setup, casting it in combat periodically allows you to use a corpse-consuming ability on yourself. This helps feed Necrotic Potency during boss fights where actual enemy corpses may be scarce. Keeping a Bone Tyrant ability active also enables Disdain Harm’s damage-over-time reduction.
Spirit Guardian – Summons a spirit that heals you or a low-Health ally and takes a portion of the damage you would otherwise receive. While it is active, Undead Confederate improves your Health, Magicka, and Stamina Recovery. When the spirit expires in combat, it leaves a corpse that can feed Necrotic Potency. Keep it active for the healing, mitigation, and recovery.
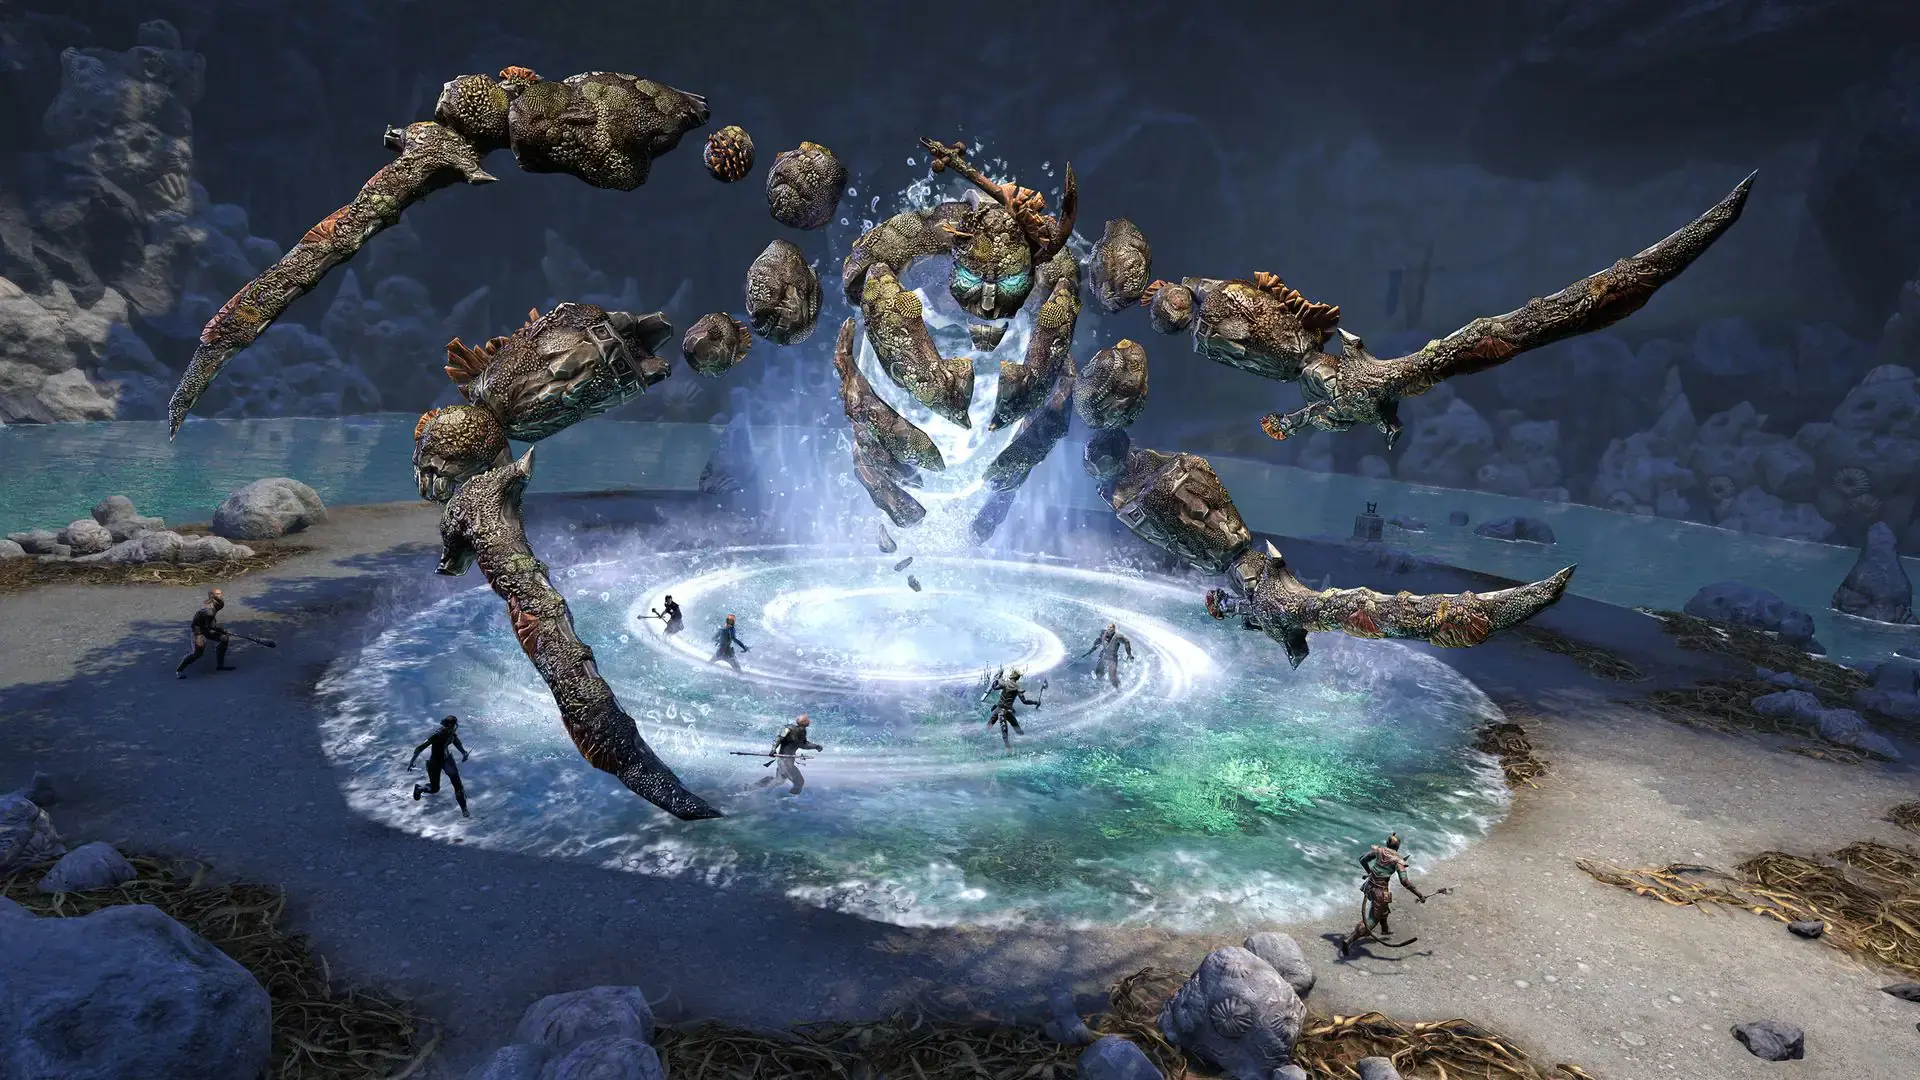
Glacial Colossus – Your group damage Ultimate. Its hits apply Major Vulnerability, increasing the damage enemies take, and its final hit stuns enemies that can be controlled. With Veil’s Forfeit selected, the Major Vulnerability you apply lasts longer, making each cast more valuable. Check whether your monster set, gear, or another player already supplies Major Vulnerability before committing Ultimate solely for that debuff.
Key passive and Class Mastery interactions: Necrotic Potency consumes corpses for healing and Ultimate, making it especially effective as add pulls die; Summoner’s Armor and Spirit Guardian help make corpses available during longer fights. Veil’s Forfeit gives you another opportunity to use a corpse-consuming ability after directly healing a target below 66% Health, and it extends the Major Vulnerability you apply with Glacial Colossus. Pound of Flesh adds a chance to heal and restore a portion of your missing Stamina when you take damage, with a higher chance as your Health falls. It provides useful support under pressure, though its chance-based return is not something to rely on as your main sustain tool.
Necromancer Main Tank Skill Information
Necrotic Potency – Converts nearby corpses into Ultimate and a Max Health–scaling heal over time, while reducing damage taken by 3% when slotted. Use it after enemies die, when Spirit Guardian leaves a corpse, or when your armor skill or Mastery enables another consumption opportunity. This helps rebuild Glacial Colossus between group damage windows. Consuming a corpse also activates Corpse Consumption for additional Ultimate, subject to that passive’s cooldown.
Hungry Scythe – Your main burst heal, with additional healing for each extra enemy hit and a heal over time afterwards. All of its healing scales with Max Health, making it particularly effective when holding several adds. You must damage an enemy to receive the healing, so keep a target within reach. With Veil’s Forfeit, its direct self-heal can also enable corpse consumption when you heal yourself below the Mastery’s Health threshold.
Agony Totem – Provides nearby allies with Minor Protection, applies Major Cowardice to enemies inside its area and periodically fears susceptible enemies in place. Place it within your established add stack to reduce incoming damage and help keep enemies controlled. Against bosses, its defensive effects remain useful even when the fear cannot affect them. The Pure Agony synergy adds group damage and gives allies another synergy to activate.
Summoner’s Armor – Maintains Major and Minor Resolve, helping you reach the resistance cap without depending on another player’s buffs. Keep it active while holding bosses or priority enemies; it also maintains Disdain Harm’s damage-over-time reduction and reduces Spirit Guardian’s cost. Casting it in combat enables corpse consumption on yourself, once every ten seconds, providing another opportunity to use Necrotic Potency even when no enemies have died.
Spirit Guardian – Transfers 10% of your incoming damage to the spirit and regularly heals you or a nearby low-Health ally. Keep it active during sustained boss pressure rather than waiting until your Health drops. While active, it also enables Undead Confederate for additional recovery and leaves a consumable corpse when it expires in combat, which you can consume with Necrotic Potency.
Glacial Colossus – Your main group damage Ultimate, applying Major Vulnerability to enemies hit and stunning susceptible enemies with its final smash. This morph provides a longer debuff than Pestilent Colossus, making it better suited to maintaining coverage. Veil’s Forfeit extends its seventeen-second Major Vulnerability to 25.5 seconds, with subsequent smashes refreshing the application. Coordinate casts around group damage windows and other sources of Major Vulnerability; high uptime depends on rebuilding Ultimate quickly enough between casts.
Key passive and Class Mastery interactions:
- Veil’s Forfeit – Extends the Major Vulnerability you apply by 50%. Directly healing a target below 66% Health in combat also allows you to use a corpse-consuming ability against them within ten seconds. This creates consumption opportunities without requiring an enemy to die, helping support Necrotic Potency and your Ultimate generation.
- Pound of Flesh – Taking damage has a chance to heal you and restore a percentage of your missing Stamina, with the chance increasing as your Health falls. Its healing scales with Max Health. This is useful under sustained pressure, but treat it as supporting sustain rather than a guaranteed resource return.
- Corpse Consumption – Consuming a corpse grants ten additional Ultimate on a sixteen-second cooldown. This works alongside Necrotic Potency’s own Ultimate return, making regular consumption valuable even during encounters with few enemy deaths.
- Disdain Harm & Last Gasp – Keeping a Bone Tyrant ability active reduces damage taken from damage-over-time abilities by 15%. Maintaining Summoner’s Armor provides reliable coverage while tanking bosses or adds. Last Gasp increases Max Health, improving your survival buffer and the strength of your Health-scaling heals.
- Death Gleaning & Health Avarice – With a Bone Tyrant skill slotted, nearby enemy deaths restore Magicka and Stamina. Each Bone Tyrant skill on your active bar also increases healing received, making your front bar particularly comfortable when managing damage.
- Undead Confederate & Near-Death Experience – An active Spirit Guardian increases Health, Magicka and Stamina Recovery, although Stamina Recovery remains paused while blocking. Slotting it also enables Near-Death Experience on that bar, increasing healing Critical Chance against wounded targets.
Necromancer Off Tank Skill Information
Necrotic Potency – Converts nearby corpses into Ultimate and a Max Health–scaling heal over time, while reducing damage taken by 3% when slotted. Use it after enemies die, when Spirit Guardian leaves a corpse, or when your armor skill or Mastery enables another consumption opportunity. This helps rebuild Glacial Colossus between group damage windows. Consuming a corpse also activates Corpse Consumption for additional Ultimate, subject to that passive’s cooldown.
Hungry Scythe – Your main burst heal, with additional healing for each extra enemy hit and a heal over time afterwards. All of its healing scales with Max Health, making it particularly effective when holding several adds. You must damage an enemy to receive the healing, so keep a target within reach. With Veil’s Forfeit, its direct self-heal can also enable corpse consumption when you heal yourself below the Mastery’s Health threshold.
Agony Totem – Provides nearby allies with Minor Protection, applies Major Cowardice to enemies inside its area and periodically fears susceptible enemies in place. Place it within your established add stack to reduce incoming damage and help keep enemies controlled. Against bosses, its defensive effects remain useful even when the fear cannot affect them. The Pure Agony synergy adds group damage and gives allies another synergy to activate.
Summoner’s Armor – Maintains both Major and Minor Resolve, giving you reliable resistance buffs when your role takes you away from the group. It also reduces Spirit Guardian’s cost. Casting it in combat enables you to use a corpse-consuming ability on yourself, with a ten-second cooldown on that effect, providing another opportunity for Necrotic Potency.
Spirit Guardian – Provides regular healing and transfers 10% of your incoming damage to the spirit, making it valuable when holding a secondary boss or dangerous adds. While active, it also enables Undead Confederate for additional recovery. It leaves a corpse when it expires in combat, which you can consume with Necrotic Potency.
Glacial Colossus – Your main group damage Ultimate, applying Major Vulnerability to enemies hit and stunning susceptible enemies with its final smash. This morph provides a longer debuff than Pestilent Colossus, making it better suited to maintaining coverage. Veil’s Forfeit extends its seventeen-second Major Vulnerability to 25.5 seconds, with subsequent smashes refreshing the application. Coordinate casts around group damage windows and other sources of Major Vulnerability; high uptime depends on rebuilding Ultimate quickly enough between casts.
Key passive and Class Mastery interactions:
- Veil’s Forfeit – Extends the Major Vulnerability you apply by 50%. Directly healing a target below 66% Health in combat also allows you to use a corpse-consuming ability against them within ten seconds. This creates consumption opportunities without requiring an enemy to die, helping support Necrotic Potency and your Ultimate generation.
- Pound of Flesh – Taking damage has a chance to heal you and restore a percentage of your missing Stamina, with the chance increasing as your Health falls. Its healing scales with Max Health. This is useful under sustained pressure, but treat it as supporting sustain rather than a guaranteed resource return.
- Corpse Consumption – Consuming a corpse grants ten additional Ultimate on a sixteen-second cooldown. This works alongside Necrotic Potency’s own Ultimate return, making regular consumption valuable even during encounters with few enemy deaths.
- Disdain Harm & Last Gasp – Keeping a Bone Tyrant ability active reduces damage taken from damage-over-time abilities by 15%, while Last Gasp increases Max Health. These benefits are particularly useful for Off Tanking persistent damage and also support your Health-scaling heals.
- Death Gleaning & Health Avarice – With a Bone Tyrant skill slotted, nearby enemy deaths restore Magicka and Stamina. Each Bone Tyrant skill on your active bar also increases healing received, making your front bar particularly comfortable when managing damage.
- Undead Confederate & Near-Death Experience – An active Spirit Guardian increases Health, Magicka and Stamina Recovery. Having it slotted also enables increased healing Critical Chance against wounded targets through Near-Death Experience.
How to Play the Souleater Build
Souleater is a high–Ultimate generation Necromancer Tank variant built for fun, aggressive Warhorn uptime, and dungeon-focused gameplay. This is not a meta progression build and is not recommended for Veteran Trial optimisation.
Instead, Souleater shines in: veteran dungeons, arenas, normal trials and coordinated casual groups.
It trades some defensive consistency for extremely high Ultimate cycling and group damage windows.
Souleater is an Ultimate engine built from stacked sources that all feed into each other:
Gear sources
- Baron Zaudrus generates Ultimate through frequent status effect application or by simply spamming Elemental Susceptibility.
- Arkasis’s Genius adds a large Ultimate spike whenever you drink a potion, and potion cooldown enchants help you line potion usage up cleanly with Arkasis’ internal cooldown.
- Hide of the Werewolf adds steady Ultimate simply from taking damage during real fights.
Subclass passive sources
- Nightblade – Siphoning (Catalyst) adds additional Ultimate every time you drink a potion, stacking perfectly with Arkasis. Make this a Heroism Potion to also gain Minor Heroism.
- Nightblade – Siphoning (Transfer) adds further Ultimate gain just from casting Siphoning abilities during combat, which fits naturally into your rotation via skills like Siphoning Attacks.
- Dragonknight – Earthen Heart (Mountain’s Blessing) adds extra Ultimate generation when you cast Earthen Heart abilities, meaning Igneous Shield becomes part of your Ultimate engine rather than “just a shield”.
- Dragonknight – Earthen Heart (Battle Roar) refunds resources when you cast an Ultimate, which helps stabilise sustain because this build is designed to Ultimate constantly.
Skill sources
- Chilling Trample (Major Heroism) adds consistent passive Ultimate generation while also doubling as mobility/control value.
- Warding Burst converts Soul Gems into additional Ultimate, which is why it becomes especially spicy in organised “Ultimate spam” compositions.
- Necrotic Potency converts corpses into Ultimate and remains one of your biggest “burst” levers when bodies are available.
Put simply: you’re generating Ultimate from status effects + potions + damage taken + passive triggers + heroism, then converting it into nonstop Warhorn/defensive Ultimate uptime.
Taunt with Goading Throw, pull with Leashing Soul, maintain Elemental Blockade and Beckoning Armor, and keep your buffs/debuffs rolling. Cast your Siphoning and Earthen Heart tools on cooldown to trigger passive Ultimate gain, drink potions on cooldown to double-dip Arkasis + Catalyst, and use your Ultimate as often as possible.
Healing is sufficient for dungeon and arena content even without a classic burst heal. Goading Throw provides Max Health-scaling healing, Necrotic Potency offers additional healing through corpse usage, and Siphoning Attacks helps you recover health through dealing damage. Survivability is reinforced through large Max Health-scaling shields from Igneous Shield and Warding Burst, which is usually enough to comfortably cover dungeon pressure.
Necromancer Tank Skills Explained
Grave Lord
Frozen Colossus
(Vital)
This Ultimate is a primary reason for using a Necro Tank, as it provides Major Vulnerability to your group. While not as crucial due to sets like Turning Tide and Archdruid Devyric, using Necros with Colossus allows for different gear sets. This morph is preferred for its longer duration.
Flame Skull
(Not Needed)
Blighted Blastbones → Morph of Sacrificial Bones
(Situational)
Use this skill for “farming” corpses. Due to changes to Stalking Blastbones, this morph must be used, despite its Stamina cost. It creates a corpse that can be absorbed with Necrotic Potency, accelerating Ultimate generation. This is crucial for setups focused on rapid Ultimate gain.
Avid Boneyard → Morph of Boneyard
(Situational)
This morph creates a synergy that you can use yourself, making it beneficial if you need to be able to do this.
Unnerving Boneyard → Morph of Boneyard
(Vital)
This morph applies Major Breach and Minor Vulnerability as an AoE and provides a group synergy that damages enemies. It’s ideal for trash fights.
Skeletal Mage
(Situational)
Used similarly to Blastbones for creating corpses to absorb with Necrotic Potency, speeding up Ultimate gain. Either morph can be used. Provides additional DPS, useful for a hybrid setup. Casting it halfway through its duration generates a corpse without waiting for it to die.
Mystic Siphon → Morph of Mystic Siphon
(Situational)
Provides additional recovery but may be considered a wasted skill slot for just 150 of each recovery. Can be used with Elemental Catalyst as a source of Shock Damage, though using EC is generally not advised for a Tank.
Reusable Parts
(Situational)
This passive in the Grave Lord skill line is useful for Tanks only if you’re using Blastbones, Spirit Mender, or Skeletal Mage. The 50% cost reduction provides significant sustain savings.
Death Knell, Dismember & Rapid Rot
(All Unnecessary)
These passives are damage-focused and not essential for tanking. However, if you have spare skill points, pick them up for a small damage increase.
Bone Tyrant
Bone Goliath Transformation
(Unnecessary)
Primarily a PvP skill, it’s not typically used in PvE. In desperate situations, it could be used, but Colossus, Aggressive Horn, Barrier or Renewing Animation are better options for PvE.
Hungry Scythe → Morph of Death Scythe
(Vital)
This is the Necro Tank’s main heal. It’s a Magicka damage ability that heals based on the number of targets hit and provides a heal over time, scaling with Max Health. It offers a large heal when dealing with multiple targets. However, you must hit a target to get healed, which can be challenging in transitional fights or when out of range.
Ruinous Scythe → Morph of Death Scythe
(Optional)
This is the Stamina morph and is generally not used. It offers a potential group buff with Off Balance, but it’s only worth considering if your damage dealers use the Exploiter Champion Point passive. Otherwise, it’s not worth using.
Beckoning Armor → Morph of Bone Armor
(Vital)
This armor buff grants Major and Minor Resolve and pulls in one ranged enemy attacking you every 2 seconds, applying a 15-second taunt if they aren’t already taunted. You can pull in enemies faster by recasting the ability, resetting the pull-in timer to every second. While not as reliable as instant pull abilities and utilizing sets like Void Bash is superior, this skill works well for pulling enemies that Void Bash misses.
Summoner’s Armor → Morph of Bone Armor
(Situational)
This morph is useful for gaining Ultimate faster by summoning and absorbing corpses. It reduces the cost of your summoning skills and allows you to “consume” it every 10 seconds with Necrotic Potency. It won’t pull or taunt enemies but still provides Major and Minor Resolve.
Necrotic Potency → Morph of Bitter Harvest
(Vital)
This skill is excellent for a tank, providing healing, damage reduction, and 6 Ultimate per corpse consumed. It’s especially useful in 4-player content with many adds and in trials with numerous add phases, allowing for frequent Ultimate use. You can enhance its effectiveness by slotting summoning skills to create and absorb corpses, gaining substantial Ultimate in almost any fight. The other morph, Deaden Pain, is less valuable since Revealing Flare offers more consistent Major Protection if needed.
Agony Totem → Morph of Bone Totem
(Useful)
This skill aids in add control and provides a beneficial group synergy. It grants Minor Protection to the group and applies an AoE Major Cowardice debuff, decreasing enemies Weapon and Spell damage. The crowd control effect is Fear, which means it won’t affect pulled or chained enemies, making it less useful than an immobilization.
Empowering Grasp → Morph of Grave Grasp
(Optional)
Previously a key reason for using a Necro Tank in group content, but less useful now due to changes to Empower. It summons 3 patches of skeletal claws in front of you, snaring, applying Minor Maim, and immobilizing enemies. This crowd control is limited, as it only affects a narrow area in front of the caster. It also grants Empower to up to 6 group members standing in the patches, but this now buffs heavy attacks, making it generally less effective since the highest DPS comes from light attacks.
Death Gleaning
(Vital)
A very useful sustain passive that benefits you just by being near enemies.
Disdain Harm
(Vital)
Essential for DoT-heavy fights. This passive significantly reduces DoT damage, making Necro Tanks unmatched in this regard and a top choice for the hardest content.
Health Avarice
(Vital)
With at least one Bone Tyrant skill slotted, and often multiple, this passive provides a healing boost.
Last Gasp
(Vital)
Increases Max Health, making it easier to reach the necessary levels for comfortably surviving as a tank.
Living Death
Renewing Animation → Morph of Reanimate
(Optional)
This skill is useful for tanking in progression or pick-up groups, allowing you to quickly resurrect up to 3 players. It also activates the Near-Death Experience passive, enhancing self-healing in high-damage situations. It’s effective in both dungeon content, where you can revive your entire group, and in trials, where it can prevent wipes and allow the fight to continue.
Render Flesh
(Not Needed)
Expunge
(Optional)
Purges negative effects from you. The Expunge and Modify morph grants resources each time you remove negative effects, while Hexproof removes more negative effects. Both morphs reduce ability cost when slotted. This skill is useful in purge and sustain-heavy fights but is generally not prioritized over Efficient Purge, which also assists the group.
Life amid Death
(Not Needed)
Spirit Guardian → Morph of Spirit Mender
(Vital)
This heal-over-time ability also takes 10% of your incoming damage which includes damage over time (DoTs). While it can heal other players, making it unreliable for self-healing unless you are away from the group or consistently the lowest health, it is still worth using. It links to the player with the lowest health, helping to keep them alive. It is most useful in high-damage situations, transferring some damage off you onto the spirit, which can absorb up to 30,000 damage. Additionally, it increases Magicka Recovery through the Undead Confederate passive and provides an extra corpse for Necrotic Potency.
Mortal Coil → Morph of Restoring Tether
(Optional)
Use this on a corpse to heal yourself and allies. While the heal isn’t significant for a tank, it restores Magicka and Stamina every 2 seconds, providing a bit of extra sustain. It also offers a slight increase in healing done. If you have sustain issues on a Necro Tank, this might help, but it may not be strong enough to justify taking up a skill slot.
Curative Curse
(Vital)
This passive increases healing done when you have a negative effect on you, which is common in many PvE situations.
Near-Death Experience
(Vital)
Requires a Living Death ability slotted. It increases critical healing based on how low your health is, potentially saving your life in critical moments.
Corpse Consumption
(Vital)
Despite its long cooldown, this passive is crucial for additional Ultimate generation, especially effective when used with Necrotic Potency.
Undead Confederate
(Vital)
Necro Tanks benefit greatly from summoning, particularly Spirit Guardian. This passive increases Magicka Recovery, and also boosts Stamina and Health recovery, enhancing sustain.
Key Scribed Skills for ESO Necromancer Tanks
Scribing allows Necromancer Tanks to fill gaps in their base toolkit, particularly in areas like ranged taunts, crowd control, group utility, and Ultimate generation. While the Necromancer class script increases Max stats based on nearby corpses, this is generally less valuable for tanks, as corpses are often better reserved for Necrotic Potency and other class tools.
Below are the most effective scribed options for dungeon and trial tanking.
- Wield Soul
- Pull
- Druid’s Resurgence
- Cowardice
A highly efficient multi-purpose skill. Primarily used to chain in smaller adds while applying a taunt, it also functions as a strong sustain tool by restoring both Magicka and Stamina when cast. When used on bosses, it applies Major Cowardice, reducing enemy damage output.
- Shield Throw
- Taunt
- Sage’s Remedy
- Maim
A compact ranged taunt that scales with Max Health to provide a self-heal. It also applies Major Maim, reducing boss damage dealt. With Major and Minor Breach typically covered elsewhere, this skill allows you to replace traditional options like Pierce Armor or Frost Clench with a more efficient multi-use alternative.
- Trample
- Frost Damage
- Assassin’s Misery
- Heroism
Primarily used for Major Heroism, significantly increasing Ultimate generation. The added Frost Damage helps maintain Chilled on enemies, contributing to Minor Brittle and related debuffs, while Assassin’s Misery increases status effect application.
- Soul Burst
- Damage Shield
- Anchorite’s Potency
- Courage
Provides a Max Health-scaling group damage shield while granting Minor Courage, increasing group Weapon and Spell Damage. It also consumes a Soul Gem every five seconds to generate additional Ultimate, making it an extremely strong option in Ultimate-driven trial compositions.
- Ulfsild’s Contingency
- Immobilize
- Growing Impact
- Vulnerability
Provides reliable crowd control through immobilisation while applying an AoE Vulnerability debuff to increase group damage during add pulls.
- Ulfsild’s Contingency
- Damage Shield
- Gladiator’s Tenacity
- Intellect and Endurance
Provides a Max Health-scaling group damage shield while granting Minor Intellect and Minor Endurance for improved sustain. For the Main Tank, it also grants an additional 8% damage reduction, making it both a group utility tool and a personal survivability boost.
Champion Points
Slottable Champion Points (use 4)
- Ironclad
- Duelist’s Rebuff
- Bulwark
- Enduring Resolve (DoT damage fights)
- Unassailable (AoE damage fights)
Slottable Champion Points (use 4)
- Boundless Vitality
- Fortified
- Rejuvenation
- Bracing Anchor (Boss Fights)
- Celerity (Add Pulls)
Playing as a Necromancer Tank in ESO
Necromancer tanking works best when you make deliberate use of its strengths: generating Ultimate through corpse consumption, maintaining Major Vulnerability and using Spirit Guardian alongside your defensive buffs to manage incoming damage. Keep priority enemies controlled, position carefully for Hungry Scythe and take safe opportunities to recover resources.
The Necromancer can handle dungeons and trial tanking, even though other classes are often stronger recommendations. Its value depends on the encounter and your group’s needs, particularly whether its debuff coverage and defensive tools fill a useful gap.
Use the setups in this guide as a foundation, then adjust your gear and skills around your assignment. If you enjoy the Necromancer’s playstyle, focus on consistent positioning, reliable support coverage and purposeful Ultimate use. Those habits will contribute more to successful clears than following a fixed setup without understanding why it works.
Take Your Tanking Further
🔹 Try Another Class → Explore all ESO Tank Builds
🔹 New to the Role? Start with the Beginner Guide
🔹 Optimising Gear? Read the Tank Gear Guide
🔹 More ESO Content → Visit the ESO Hub
🔹 Playing on Console? See the Best MMORPGs for 2026
Want My Best Tank Builds Before Everyone Else?
Get early access builds, exclusive setups, and direct input on future content.