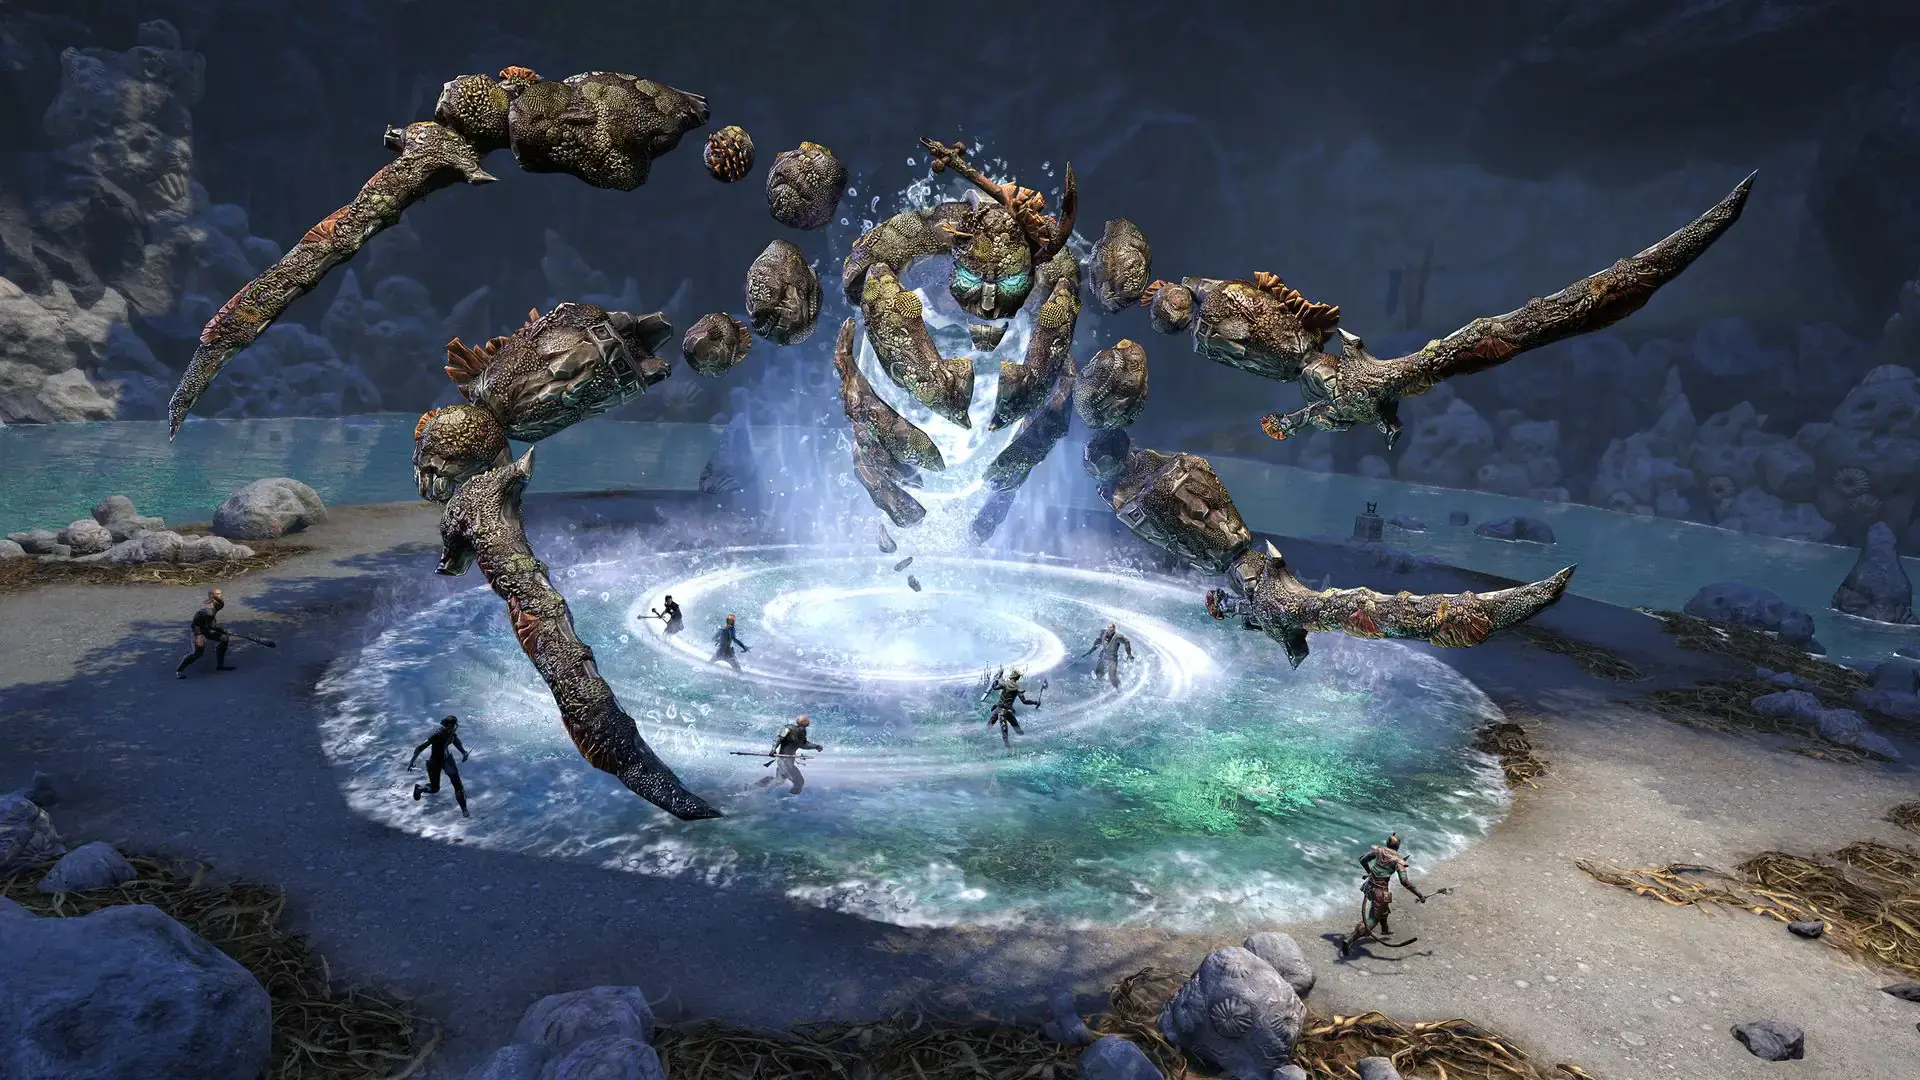












This ESO Arena Tank Build covers Veteran Dragonstar Arena and Blackrose Prison, with setups for every tank class and fixed skill bars you can use throughout each arena. The focus is on controlling enemies, supporting group damage and maintaining enough healing and defence to handle dangerous rounds without constant skill changes.
Dragonstar Arena generally allows a more offensive approach, with its older encounters placing fewer demands on a modern tank setup. Blackrose Prison requires more attention to positioning, interrupts and incoming damage, with several punishing mechanics that can still challenge an unfamiliar group. In both arenas, clean stacking and reliable debuffs help your damage dealers clear waves quickly and safely.
These setups are designed around three damage dealers or two damage dealers and a healer who also contributes damage. Gear choices reflect that approach with the tank providing offensive support. Adjust your support coverage around the group, while retaining the defensive tools needed for the arena’s hardest moments.
Not sure if this is the right Tank for you?
Compare all ESO Tank builds and find the class that fits your playstyle and group role.
Want My Best Builds Before Everyone Else?
Get builds before release, exclusive setups, and direct input on future content.
Core Essentials
Attributes
- 64 Health
Mundus Stone
The Atronach increases Magicka Recovery, helping you maintain buffs, debuffs, healing and crowd control through successive waves. It is particularly useful when running with three damage dealers and managing more of your own healing and utility.
→ See more: ESO Tank Mundus Stones
Food Options
Orzorga’s Red Frothgar is the recommended default. Its Max Health and Magicka Recovery support both survival and frequent skill casting without the expense of Smoked Bear Haunch.
Jewels of Misrule or Orzorga’s Smoked Bear Haunch are alternatives if you regularly release block and benefit from Stamina Recovery. Stamina Recovery stops while blocking, so these foods offer less value during prolonged block phases.
Bewitched Sugar Skulls can help when you need larger maximum resource pools and already have comfortable sustain, but it provides neither Magicka nor Stamina Recovery.
Potions
Essence of Health (Tri-Stat) potions restore Health, Magicka and Stamina, making them a dependable choice throughout both arenas. Use them before resources become critically low, while keeping their recovery buffs active where possible.
Race
Nord is a strong default thanks to its resistances, Max Stamina and Ultimate generation. Imperial offers additional maximum resources and reduced ability costs, while Redguard provides useful Stamina sustain.
However, a dedicated tank race is not essential for either arena. Every race can complete this content, and positioning, mechanics and resource management matter far more than racial optimisation. Use your existing character confidently rather than changing race specifically for this build.
→ See more: ESO Tank Race
Attributes
Put all 64 attribute points into Health. This provides room to survive overlapping attacks and strengthens the Max Health–scaling heals and shields used by many tank setups.
If you need more Magicka or Stamina, adjust your enchantments or food while retaining this Health allocation.
Recommended Stats (Fully Buffed)
These are comfortable starting targets, rather than entry requirements. Check them with your usual food and defensive buffs active, and account for differences between your two bars.
40,000+ Health
Provides a forgiving survival baseline, particularly for Blackrose Prison’s more demanding rounds and groups without a dedicated healer. Experienced tanks can use less, but additional Health also strengthens relevant heals and shields.
18,000+ Stamina
Gives you room to block, dodge, break free and use Stamina-based skills. If you regularly run out, review unnecessary blocking and repeated casts alongside your maximum pool.
Under 1,000 Block Cost
A useful target when holding several enemies at once. Sturdy armor or an Infused jewellery piece with a Bracing enchantment can help. Once blocking feels sustainable, balance further reductions against recovery and other useful stats.
15,000+ Magicka
A practical baseline for defensive skills, crowd control and Purge. Cleansing and emergency healing can create sudden demand, so preserve enough Magicka to respond rather than spending everything on routine buffs.
25,000–33,100 Resistances
Around 25,000 fully buffed is a useful starting point, with higher resistances making dangerous rounds more forgiving. For learning Blackrose Prison or handling heavy pressure without a healer, moving towards the resistance cap is sensible. Dragonstar Arena generally allows more flexibility once you know its encounters.
2,000+ Magicka Recovery
A helpful target for frequent casting, especially when you handle healing and cleansing yourself. Some classes can comfortably use less through direct resource returns. Judge your sustain by whether you can maintain essential skills through a demanding wave.
Subclassing
I recommend staying with your full class for these setups. Class Masteries provide valuable defensive and group benefits, and every class can handle both arenas with the tools available in this guide.
Subclassing remains a capable alternative if you want a particular combination. For example, combining Winter’s Embrace, Soldier of Apocrypha and Siphoning brings together frost control and healing, Arcanist shielding and Nightblade sustain. However, you give up full-class Masteries, so the additional skills need to justify that trade-off.
Choose Subclassing for a specific playstyle rather than treating it as necessary for arena clears.
→ See more: ESO Tank Subclassing Guide
Best Class for Arena Tanking
Every tank class can comfortably complete Veteran Dragonstar Arena and Blackrose Prison. Neither arena requires a particular class, and familiarity with your character is more useful than switching to follow a ranking.
Arcanist is a convenient option because its skills combine shielding, healing, crowd control and group buffs in relatively few slots. Nightblade offers excellent sustain and Ultimate generation. Other classes bring their own useful strengths, including projectile protection, cleansing and damage reduction.
For an organised group, choose classes that complement each other’s buffs, healing and damage. For general clears, play the class you enjoy and focus on controlling waves, surviving dangerous mechanics and keeping your group’s damage efficient.
→ See more: ESO Best Tank Class
Class Masteries
Recommended Class Masteries
These pairings balance personal survival with group support. Check whether another player already covers their group effects.
- Arcanist — Erudite’s Rigor + Ink-Scribe’s Verve: With Cruxweaver Armor active, taking damage enables additional defensive support, Minor Cowardice and Ultimate generation. Healing or overhealing a combined 100,000 Health in combat activates Verve, granting group Major Force for ten seconds. Use Runeward’s Crux healing, Tidal Chakram and Glyphic to contribute.
- Dragonknight — Lead from the Front + Resolute Defense: Casting an Ultimate activates The Storm Voice and grants nearby group members Major Berserk and Major Protection, with duration based on Ultimate spent. Resolute Defense builds block mitigation while blocking and gives blocked attacks a chance to return Stamina.
- Necromancer — Veil’s Forfeit + Pound of Flesh: Veil’s Forfeit extends your Major Vulnerability applications by 50%, improving Colossus and Archdruid coverage. Direct healing below 66% Health also creates opportunities for corpse-consuming skills if equipped. Pound of Flesh provides a chance to heal and recover missing Stamina when taking damage.
- Nightblade — Cutthroat’s Focus + Share the Spoils: Casting a Nightblade skill while blocking creates a brief dodge window; successfully dodging increases that attacker’s damage taken by 5%. Share the Spoils adds group resources and Ultimate whenever Transfer activates, making regular Siphoning Attacks casts valuable.
- Sorcerer — Conservation of Energy + Calculated Defense: Eligible resource-costing casts activate Blood Magic and additional resource returns. Beginning a Sorcerer skill or an ability with a cast time also creates a brief shield; if it survives, nearby group members gain 6% Weapon and Spell Damage.
- Templar — Bright Harbinger + Steadfast Candescence: Dawn’s Wrath casts maintain Illuminate’s group armor bonus and add 300 Weapon and Spell Damage for allies. Steadfast Candescence maintains Sacred Ground while blocking and strengthens stationary block mitigation.
- Warden — Tundra’s Maw + Bountiful Harvest: Applying Chilled also applies Major Brittle, increasing the target’s Critical Damage taken. Green Balance overhealing activates Nature’s Gift, with Bountiful Harvest adding group resources and Major Heroism. Maintain Budding Seeds for this interaction; Polar Wind does not activate it.
Arena Tank Gear
| Piece | Set | Weight | Trait | Enchantment |
|---|---|---|---|---|
| Head | Archdruid Devyric | Medium | Divines/Sturdy | Prismatic Defence |
| Shoulder | Archdruid Devyric | Light | Divines/Sturdy | Prismatic Defence |
| Chest | Pearlescent Ward | Heavy | Divines/Sturdy | Prismatic Defence |
| Hands | Pearlescent Ward | Heavy | Divines/Sturdy | Prismatic Defence |
| Waist | Pearlescent Ward | Heavy | Divines/Sturdy | Prismatic Defence |
| Legs | Pearlescent Ward | Heavy | Divines/Sturdy | Prismatic Defence |
| Feet | Pearlescent Ward | Heavy | Divines/Sturdy | Prismatic Defence |
| Necklace | Powerful Assault | Jewellery | Harmony | Magicka Recovery |
| Ring | Powerful Assault | Jewellery | Harmony | Magicka Recovery |
| Ring | Powerful Assault | Jewellery | Harmony | Magicka Recovery |
| Main Hand | Armor of the Trainee | Any 1H | Infused | Absorb Stamina |
| Off Hand | Druid’s Braid | Shield | Divines/Sturdy | Prismatic Defence |
| Main Hand Backup | Powerful Assault | Ice Staff | Infused | Crusher |
| Piece | Set | Weight | Trait | Enchantment |
|---|---|---|---|---|
| Head | Archdruid Devyric | Heavy | Reinforced | Prismatic Defence |
| Shoulder | Archdruid Devyric | Light | Divines/Sturdy | Prismatic Defence |
| Chest | Powerful Assault | Medium | Reinforced | Prismatic Defence |
| Hands | Powerful Assault | Medium | Divines/Sturdy | Prismatic Defence |
| Waist | Powerful Assault | Medium | Divines/Sturdy | Prismatic Defence |
| Legs | Powerful Assault | Medium | Reinforced | Prismatic Defence |
| Feet | Powerful Assault | Medium | Divines/Sturdy | Prismatic Defence |
| Necklace | War Machine | Jewellery | Harmony | Magicka Recovery |
| Ring | War Machine | Jewellery | Harmony | Magicka Recovery |
| Ring | War Machine | Jewellery | Harmony | Magicka Recovery |
| Main Hand | Armor of the Trainee | Any 1H | Infused | Absorb Stamina |
| Off Hand | Druid’s Braid | Shield | Divines/Sturdy | Prismatic Defence |
| Main Hand Backup | War Machine | Ice Staff | Infused | Crusher |
| Piece | Set | Weight | Trait | Enchantment |
|---|---|---|---|---|
| Head | Archdruid Devyric | Heavy | Reinforced | Prismatic Defence |
| Shoulder | Archdruid Devyric | Light | Divines/Sturdy | Prismatic Defence |
| Chest | Powerful Assault | Medium | Reinforced | Prismatic Defence |
| Hands | Powerful Assault | Medium | Divines/Sturdy | Prismatic Defence |
| Waist | Powerful Assault | Medium | Divines/Sturdy | Prismatic Defence |
| Legs | Powerful Assault | Medium | Reinforced | Prismatic Defence |
| Feet | Powerful Assault | Medium | Divines/Sturdy | Prismatic Defence |
| Necklace | Vestment of Olorime | Jewellery | Harmony | Magicka Recovery |
| Ring | Vestment of Olorime | Jewellery | Harmony | Magicka Recovery |
| Ring | Vestment of Olorime | Jewellery | Harmony | Magicka Recovery |
| Main Hand | Armor of the Trainee | Any 1H | Decisive | Absorb Stamina |
| Off Hand | Druid’s Braid | Shield | Divines/Sturdy | Prismatic Defence |
| Main Hand Backup | Vestment of Olorime | Ice Staff | Infused | Crusher |
Gear Information
Armor Weights
- 5 Medium / 1 Heavy / 1 Light: An option for confident tanks using the offensive setups. Medium Armor improves Stamina efficiency and reduces block and dodge costs. Reinforced pieces help compensate for its lower armor, but check your fully buffed resistances on both bars.
- 5 Heavy / 1 Medium / 1 Light: The more forgiving option for learning encounters or handling sustained pressure. Use the defensive setup if the Medium Armor versions leave you struggling to survive.
Armor Traits
- Sturdy: Reduces block cost, helping when several enemies attack together. Medium Armor already provides some block cost reduction, so choose the amount of Sturdy around your final cost and actual sustain.
- Divines: Strengthens The Atronach’s Magicka Recovery, supporting repeated healing, shielding and utility casts.
- Reinforced: Increases the armor provided by that piece. Particularly useful on the Heavy head and larger Medium pieces when raising resistances.
Armor Enchants
- Prismatic Defence: Adds Max Health, Magicka and Stamina, giving a larger combined resource total than single-stat glyphs. A single-stat glyph still provides more of its chosen resource on an individual piece.
- For budget gearing, start with affordable single-stat glyphs and upgrade gradually. Prioritise the chest, legs, head and shield, which receive the full enchantment value.
Jewellery
- Harmony + Magicka Recovery: Useful when you can regularly activate synergies. Harmony supplies resources on activation, while the enchantments provide steady Magicka sustain.
- Infused + Magicka Recovery: A dependable alternative when synergies are limited, particularly in three-DD groups. Choose this if Harmony is not giving you consistent returns.
One-Hand & Shield
- Infused + Absorb Stamina: Strengthens the enchantment and reduces its cooldown, improving its Stamina return when you trigger it. Its Physical Damage can also apply Sundered for Minor Breach, but should not be treated as guaranteed coverage.
- Decisive + Absorb Stamina: Trades the stronger enchantment for a chance to gain additional Ultimate. Useful when frequent Ultimate casts support your class buffs or War Machine.
Frost Staff
- Infused + Crusher: Strengthens Crusher’s armor reduction and reduces its cooldown. Maintain Elemental Blockade under the enemies to continue triggering the enchantment after switching bars, keeping the priority target within the wall.
Defensive Setup
Pearlescent Ward + Powerful Assault
Use this setup when learning the arenas, managing difficult Blackrose Prison rounds or wanting more protection without giving up group damage support.
Pearlescent Ward is worn on the body, keeping it active on both bars. It provides group Weapon and Spell Damage while players are alive, with increasing damage reduction as group members die. No skill activation is required. Its Heavy Armor, Max Health and defensive bonuses make this the more forgiving setup, although its strongest group damage benefit depends on keeping everyone alive.
Powerful Assault is completed by your jewellery and back-bar Frost Staff. Cast Razor Caltrops from that bar while in combat to grant nearby group members 307 Weapon and Spell Damage for 15 seconds. The buff continues after switching bars. Stay within 12 metres of your allies when activating it, and refresh before it expires during ongoing combat.
Two Damage Dealers + One Healer Setup
Powerful Assault + War Machine
Use this setup when the healer already maintains Major Courage and you can comfortably tank in Medium Armor. Check that the healer is not also wearing Powerful Assault.
Powerful Assault is worn on the body, so it remains active on both bars. Your regular Caltrops casts maintain its group damage buff, provided allies are nearby when you cast. Medium Armor also reduces Stamina skill, dodge and block costs, helping with the movement and repeated utility casts common in arena waves.
War Machine is completed on the back bar. Cast your Ultimate from that bar while in combat to grant Major Slayer to nearby group members. Its duration is one second for every ten Ultimate spent. Time it for a boss damage window or a dangerous wave that the group can quickly burn down, rather than spending it as the last enemies die.
Casting an Ultimate from your front bar does not activate War Machine. You can still use front-bar Barrier when survival requires it, but it will not provide the set’s damage buff.
Three Damage Dealer Setup
Powerful Assault + Olorime
Use this setup when the group has no healer supplying Major Courage. It combines two separate Weapon and Spell Damage bonuses while leaving your skills responsible for personal healing, shielding and cleansing.
Powerful Assault remains active on both bars through the body pieces. Maintain its buff with Caltrops while staying close enough to include your damage dealers.
Vestment of Olorime is completed on the back bar. Casting an eligible ground-effect ability in combat creates a circle that grants Major Courage to players who enter it. The circle lasts five seconds, while the buff lasts 20 seconds, so allies do not need to remain inside it.
Use Elemental Blockade or Razor Caltrops to place the circle where your damage dealers can safely collect the buff. Watch Olorime’s ten-second cooldown so your next activation appears somewhere useful rather than under an isolated enemy. Major Courage remains after you switch bars.
If another player already maintains Major Courage, choose a different support set rather than duplicating it.
Monster Set & Weapons
Archdruid Devyric
Archdruid Devyric activates when you damage an enemy with a Heavy Attack. After a short delay, it applies Major Vulnerability to up to six enemies in an area around the target, increasing their damage taken by 10% for seven seconds. The set has a 15-second cooldown.
Heavy attack a boss or a priority enemy once the wave is stacked, allowing several targets to receive the debuff together. Time your attack safely and aim to activate it while your damage dealers can make use of the effect. It requires no bar-specific activation.
If your group already maintains strong Major Vulnerability coverage, Archdruid becomes a flexible slot.
Front-Bar Sets — Armor of the Trainee + Druid’s Braid
The sword and shield each provide a separate one-piece Max Health bonus, giving you additional Health without an activation requirement. This helps personal survival and strengthens skills that scale with Max Health.
Both bonuses are active only on the sword-and-shield bar. Check your back-bar Health separately, particularly when handling dangerous attacks while refreshing ground effects.
Skill Bars by Class


Arcanist Skill Information
- Runic Sunder – Your ranged taunt for securing bosses and dangerous adds. Its additional armor reduction supports group damage, while generating Crux for your defensive skills.
- Tidal Chakram – Shields nearby allies and adds healing when consuming Crux. Useful in groups without a dedicated healer and for building healing towards Ink-Scribe’s Verve.
- Impervious Runeward – Your main personal shield, with Crux-based healing. Cast just before dangerous attacks to benefit from its stronger initial shield, rather than repeatedly casting without need.
- Runeguard of Still Waters – Immobilises enemies once you have stacked them. Also supplies defensive buffs and an automatic emergency heal, combining control and survival in one slot.
- Zenas’ Empowering Disc – Maintains group Minor Courage and recovery buffs. Place it where allies can collect the effects; the buffs briefly persist after leaving.
- Gibbering Shelter – Primarily slotted for additional recovery through Wellspring of the Abyss. Cast it when dangerous waves require stronger personal and nearby group shielding.
- Leashing Soul – Pulls ranged enemies into the stack while returning resources. Major Cowardice also makes it useful against bosses that cannot be pulled.
- Razor Caltrops – Applies Major Breach across the wave and activates Powerful Assault. Place it usually in the centre of the room under the intended stack, with allies nearby when casting to receive the set buff.
- Elemental Blockade – Maintains Crusher through your Frost Staff, including after switching bars. Place it under priority enemies; it also inflicts Minor Breach on Chilled targets and projectile shielding.
- Cruxweaver Armor – Maintain your resistance buff and inflicts Minor Breach on attacking enemies. Incoming attacks generate Crux and activate Erudite’s Rigor, adding group defensive support and Ultimate generation.
- Efficient Purge – Removes purgeable harmful effects from you and nearby group members. Keep resources available for dangerous debuffs rather than casting it routinely when nothing needs cleansing.
- Resonating Glyphic – Adds group healing and Weapon and Spell Damage during demanding waves or boss damage windows. Place it where allies can damage the glyphic and benefit from its area.
Dragonknight Skill Information
- Goading Throw – Your ranged taunt for securing bosses and dangerous adds. Its healing supports personal survival, while Major Maim reduces the target’s damage.
- Hearth and Home – Provides ongoing healing and Minor Heroism for players inside, alongside personal Major Protection. Place it around your tanking position, overlapping allies where practical.
- Protect the Brood – Reduces projectile damage for you and nearby allies, making it valuable during ranged-heavy waves. Its speed boost also helps collect enemies and reposition.
- Blood of the Elder Dragon – Provides reactive healing and group Minor Courage. Heal nearby allies to maintain their buffs.
- Binding Contingency – Immobilises enemies and applies AoE Minor Vulnerability. Arm it once enemies are grouped, then trigger it with another resource-costing skill to keep them inside group damage.
- Replenishing Barrier – An emergency group shield for dangerous waves or recovery moments. Also improves front-bar Magicka Recovery through Magicka Aid and restores Magicka as its wards dissolve.
- Leashing Soul – Pulls smaller ranged enemies into the stack while returning resources. Major Cowardice also makes it useful against bosses that cannot be pulled.
- Razor Caltrops – Applies Major Breach across the wave and activates Powerful Assault. Place it usually in the centre of the room under the intended stack, with allies nearby when casting to receive the set buff.
- Elemental Blockade – Maintains Crusher through your Frost Staff, including after switching bars. Place it under priority enemies; it also inflicts Minor Breach on Chilled targets and projectile shielding.
- Earthshield Mantle – Maintains Major Resolve and adds a personal shield. Its Earthen Heart cast also contributes to Ultimate generation through Blessing at the Peak.
- Efficient Purge – Removes purgeable harmful effects from you and nearby group members. Keep resources available for dangerous debuffs rather than casting it routinely when nothing needs cleansing.
- Standard of Might – Combines group damage support with protection while players remain inside. Cast during useful damage windows, restoring resources through The Storm Voice and activating Lead from the Front.
Necromancer Skill Information
- Goading Throw – Your ranged taunt for securing bosses and dangerous adds. Its healing supports personal survival, while Major Maim reduces the target’s damage.
- Warding Burst – Shields you and nearby allies while maintaining Minor Courage. Its Soul Gem–powered Ultimate generation helps rebuild your next support Ultimate; keep Soul Gems stocked.
- Necrotic Potency – Converts corpses left by defeated enemies into healing and Ultimate. Use it during and after waves, with additional consumption opportunities provided by Beckoning Armor and Veil’s Forfeit.
- Hungry Scythe – Your main self-heal when enemies are within reach. Hitting several stacked enemies strengthens its healing, making it particularly useful under pressure during crowded waves.
- Binding Contingency – Immobilises enemies and applies AoE Minor Vulnerability. Arm it once enemies are grouped, then trigger it with another resource-costing skill to keep them inside group damage.
- Replenishing Barrier – An emergency group shield for dangerous waves or recovery moments. Also improves front-bar Magicka Recovery through Magicka Aid and restores Magicka as its wards dissolve.
- Leashing Soul – Pulls smaller ranged enemies into the stack while returning resources. Major Cowardice also makes it useful against bosses that cannot be pulled.
- Razor Caltrops – Applies Major Breach across the wave and activates Powerful Assault. Place it usually in the centre of the room under the intended stack, with allies nearby when casting to receive the set buff.
- Elemental Blockade – Maintains Crusher through your Frost Staff, including after switching bars. Place it under priority enemies; it also inflicts Minor Breach on Chilled targets and projectile shielding.
- Beckoning Armor – Maintains Major and Minor Resolve while automatically collecting ranged attackers. Casting it in combat also enables a self-consumption opportunity for Necrotic Potency; manually pull anything it misses.
- Efficient Purge – Removes purgeable harmful effects from you and nearby group members. Keep resources available for dangerous debuffs rather than casting it routinely when nothing needs cleansing.
- Glacial Colossus – Applies Major Vulnerability to stacked enemies or bosses, with longer coverage through Veil’s Forfeit. Coordinate it with Archdruid to extend coverage rather than unnecessarily overlap applications.
Nightblade Skill Information
- Goading Throw – Your ranged taunt for securing bosses and dangerous adds. Its healing supports personal survival, while Major Maim reduces the target’s damage.
- Warding Burst – Shields you and nearby allies while maintaining Minor Courage. Its Soul Gem–powered Ultimate generation helps rebuild your next support Ultimate; keep Soul Gems stocked.
- Siphoning Attacks – Maintains personal sustain through ongoing damage and offers an active resource refill. Safe casts also activate Transfer and Share the Spoils, supporting group resources and Ultimate.
- Dark Cloak – Your main healing-over-time skill during sustained pressure. Casting it maintains Major Resolve through Shadow Barrier and can activate Cutthroat’s Focus when timed while blocking.
- Binding Contingency – Immobilises enemies and applies AoE Minor Vulnerability. Arm it once enemies are grouped, then trigger it with another resource-costing skill to keep them inside group damage.
- Soul Harvest – Primarily slotted for additional Ultimate from your killing blows during waves. It also enables front-bar Assassination passive interactions; preserve Ultimate for Horn.
- Leashing Soul – Pulls ranged enemies into the stack while returning resources. Major Cowardice also makes it useful against bosses that cannot be pulled.
- Razor Caltrops – Applies Major Breach across the wave and activates Powerful Assault. Place it usually in the centre of the room under the intended stack, with allies nearby when casting to receive the set buff.
- Elemental Blockade – Maintains Crusher through your Frost Staff, including after switching bars. Place it under priority enemies; it also inflicts Minor Breach on Chilled targets and projectile shielding.
- Mirage – Reduces incoming area damage and supplies Minor Resolve. Maintain it through busy waves; incoming direct attacks also reduce your next dodge cost, while casting activates Shadow Barrier.
- Efficient Purge – Removes purgeable harmful effects from you and nearby group members. Keep resources available for dangerous debuffs rather than casting it routinely when nothing needs cleansing.
- Aggressive Horn – Supports group damage through Major Force and larger resource pools. Use when allies can attack effectively, particularly against bosses or dangerous priority waves.
Sorcerer Skill Information
- Goading Throw – Your ranged taunt for securing bosses and dangerous adds. Its healing supports personal survival, while Major Maim reduces the target’s damage.
- Warding Burst – Shields you and nearby allies while maintaining Minor Courage. Its Soul Gem–powered Ultimate generation helps rebuild your next support Ultimate; keep Soul Gems stocked.
- Regenerative Ward – Combines personal shielding and healing with group recovery buffs. Maintain it during pressure, also keeping a Daedric Summoning effect active for Daedric Protection.
- Vibrant Shroud – Heals nearby allies and applies AoE Major Maim to enemies in front. Aim through the stack; casting also activates Exploitation for group penetration.
- Binding Contingency – Immobilises enemies and applies AoE Minor Vulnerability. Arm it once enemies are grouped, then trigger it with another resource-costing skill to keep them inside group damage.
- Replenishing Barrier – An emergency group shield for dangerous waves or recovery moments. Also improves front-bar Magicka Recovery through Magicka Aid and restores Magicka as its wards dissolve.
- Leashing Soul – Pulls ranged enemies into the stack while returning resources. Major Cowardice also makes it useful against bosses that cannot be pulled.
- Razor Caltrops – Applies Major Breach across the wave and activates Powerful Assault. Place it usually in the centre of the room under the intended stack, with allies nearby when casting to receive the set buff.
- Elemental Blockade – Maintains Crusher through your Frost Staff, including after switching bars. Place it under priority enemies; it also inflicts Minor Breach on Chilled targets and projectile shielding.
- Boundless Storm – Maintains Major Resolve while providing a speed boost for collecting enemies. Its continuing nearby damage contributes while you focus on positioning, healing and control.
- Efficient Purge – Removes purgeable harmful effects from you and nearby group members. Keep resources available for dangerous debuffs rather than casting it routinely when nothing needs cleansing.
- Summon Charged Atronach – Adds damage against stacked enemies and provides the synergy for group Major Berserk. Place it where allies can activate the synergy during a useful damage window.
Templar Skill Information
- Goading Throw – Your ranged taunt for securing bosses and dangerous adds. Its healing supports personal survival, while Major Maim reduces the target’s damage.
- Warding Burst – Shields you and nearby allies while maintaining Minor Courage. Its Soul Gem–powered Ultimate generation helps rebuild your next support Ultimate; keep Soul Gems stocked.
- Repentance – Restores your Stamina and heals you and nearby allies by consuming corpses, making it particularly useful between arena waves and as enemies die during a pull. Use it to recover resources before the next wave; it provides no active return when there are no corpses available.
- Living Dark – Supplies reactive healing when direct attacks hit you. Casting also maintains Illuminate, Bright Harbinger and Prism, combining personal defence with group buffs and Ultimate generation.
- Blazing Spear – Provides an ally resource synergy and activates Spear Wall for personal buffs. Its immobilisation adds control; place it where allies can safely collect Blessed Shards.
- Replenishing Barrier – An emergency group shield for dangerous waves or recovery moments. Also improves front-bar Magicka Recovery through Magicka Aid and restores Magicka as its wards dissolve.
- Leashing Soul – Pulls ranged enemies into the stack while returning resources. Major Cowardice also makes it useful against bosses that cannot be pulled.
- Razor Caltrops – Applies Major Breach across the wave and activates Powerful Assault. Place it usually in the centre of the room under the intended stack, with allies nearby when casting to receive the set buff.
- Elemental Blockade – Maintains Crusher through your Frost Staff, including after switching bars. Place it under priority enemies; it also inflicts Minor Breach on Chilled targets and projectile shielding.
- Restoring Focus – Maintains Major Resolve and returns Stamina even while blocking. Stand inside when practical for stronger healing, but retain safe positioning as your priority.
- Extended Ritual – Provides sustained area healing and cleanses your own purgeable effects. Allies must activate Purify to cleanse themselves, so position the area where they can access its synergy.
- Aggressive Horn – Supports group damage through Major Force and larger resource pools. Use when allies can attack effectively, particularly against bosses or dangerous priority waves.
Warden Skill Information
- Goading Throw – Your ranged taunt for securing bosses and dangerous adds. Its healing supports personal survival, while Major Maim reduces the target’s damage.
- Warding Burst – Shields you and nearby allies while maintaining Minor Courage. Its Soul Gem–powered Ultimate generation helps rebuild your next support Ultimate; keep Soul Gems stocked.
- Budding Seeds – Provides group healing and a healing synergy. Its overhealing activates Nature’s Gift and Bountiful Harvest for resource support and Major Heroism; place it around yourself and nearby allies.
- Polar Wind – Your dependable burst heal during dangerous attacks, with additional healing for a nearby ally. Its healing provides Minor Toughness, but does not activate Bountiful Harvest.
- Gripping Shards – Immobilises enemies and repeatedly deals Frost Damage. Maintain it around the stack to help apply Chilled and activate Tundra’s Maw for Major Brittle.
- Feral Guardian – Slotted to enable Flourish’s recovery bonus on the front bar. You do not need to summon the bear.
- Leashing Soul – Pulls ranged enemies into the stack while returning resources. Major Cowardice also makes it useful against bosses that cannot be pulled.
- Razor Caltrops – Applies Major Breach across the wave and activates Powerful Assault. Place it usually in the centre of the room under the intended stack, with allies nearby when casting to receive the set buff.
- Elemental Blockade – Maintains Crusher through your Frost Staff, including after switching bars. Place it under priority enemies; it also inflicts Minor Breach on Chilled targets and projectile shielding.
- Expansive Frost Cloak – Maintains group Major Resolve. Buff before collecting a wave and refresh with allies in range, particularly when the group has no dedicated healer.
- Efficient Purge – Removes purgeable harmful effects from you and nearby group members. Keep resources available for dangerous debuffs rather than casting it routinely when nothing needs cleansing.
- Aggressive Horn – Supports group damage through Major Force and larger resource pools. Use when allies can attack effectively, particularly against bosses or dangerous priority waves.
Scribed Skills
- Wield Soul
- Pull
- Druid’s Resurgence
- Cowardice
- Shield Throw
- Taunt
- Sage’s Remedy
- Maim
- Soul Burst
- Damage Shield
- Anchorite’s Potency
- Courage
- Ulfsild’s Contingency
- Immobilise
- Gladiator’s Tenacity
- Vulnerability
Champion Points
How to Play an Arena Tank
Tanking Veteran Dragonstar Arena and Blackrose Prison is about controlling waves of enemies, supporting group damage and managing resources through repeated rounds. These skill setups work throughout both arenas, so you can focus on learning spawn locations and mechanics without changing your bars.
Add Pulls
Prepare your stacking area. Before a wave begins, activate your defensive buffs and place Elemental Blockade, Razor Caltrops and your other lasting ground effects where you intend to gather enemies. While learning, a central position is a useful starting point, provided the round’s mechanics allow it.
- Secure dangerous enemies first. Taunt elite enemies promptly, especially those that cannot be pulled. Move to the opposite side of your stacking area to encourage melee enemies to follow you into it. Ranged enemies may require line-of-sight positioning rather than simply waiting for them to move.
- Pull smaller enemies into the stack. Use Leashing Soul to bring susceptible enemies onto your ground effects. Keep dangerous frontal attacks facing away from allies, and avoid chasing individual enemies if doing so would scatter the established stack.
- Apply crowd control and debuffs. Once enemies are grouped, use your immobilisation skill where it works and maintain your damage amplification and damage reduction effects. Control enemies inside the group’s damage area rather than rooting them outside it.
- Activate your group support. Maintain your class buffs and trigger your equipped sets. Cast Razor Caltrops to activate Powerful Assault, place Olorime where allies can collect its buff, and use Archdruid Devyric on suitable priority targets. Activate back-bar sets from the correct bar.
- Watch for mechanics and new arrivals. Refresh taunts on surviving elites, interrupt dangerous casts and collect additional enemies as they appear. Keep shields and healing active while managing the pull.
As you learn each arena, you can prepare closer to the actual spawn locations and gather enemies more quickly. A central stack is a useful learning approach, but some rounds require different positioning or separated targets.
Bosses
Prepare before the spawn. Boss locations and wave timings become predictable with experience. Place your ground effects in advance and have defensive and group buffs active so your damage dealers can start attacking immediately.
Taunt and establish positioning. Secure the boss as it appears, face dangerous attacks away from allies and keep it within the group’s ground damage whenever mechanics allow. Avoid unnecessary movement once the position is safe.
Create an early damage window. Apply your assigned debuffs and use your offensive support Ultimate when the boss is vulnerable and your group is ready. If using War Machine on the back bar, cast your Ultimate from that bar. Save defensive Ultimates when an upcoming mechanic requires them.
Maintain control through mechanics. Block dangerous attacks, move out of harmful ground effects, interrupt priority casts and cleanse removable effects when needed. Additional enemies can create more pressure than the boss itself, so secure dangerous spawns without losing control of your main target.
Survival & Sustain
Layered damage is often the main threat in arenas. Maintain damage shields, healing over time and defensive buffs, then use burst healing when those are insufficient. In groups without a dedicated healer, keep your useful group healing and protection within reach of allies.
Preserve resources by refreshing skills near expiry, using sustain abilities and drinking potions regularly. Release block when safe and fit in fully charged Heavy Attacks between dangerous attacks. Activate group synergies for resource returns, especially when wearing Harmony jewellery.
Use the downtime between waves to recover. Drop block and avoid unnecessary sprinting or dodging while waiting for the next spawn. Starting each wave with healthy resource pools makes it much easier to handle several mechanics at once.
Getting the Most Out of This Arena Tank Build
A strong arena tank makes each wave easier for the group: gather enemies into a clean stack, keep dangerous targets controlled and maintain the buffs and debuffs that help your damage dealers finish them quickly. Every class can do this effectively in Veteran Dragonstar Arena and Blackrose Prison.
Use this build as a starting point, then adjust your gear and utility around your group. Without a dedicated healer, healing, protection and group sustain become more important. With those needs covered, you can focus more on increasing damage.
The biggest improvements come from experience. Learning spawn locations, preparing before each wave and recovering resources between rounds will make your runs smoother than chasing a perfect setup. Focus on consistent control and survival first, then build towards faster clears as your confidence grows.
Take Your Tanking Further
🔹 Try Another Class → Explore all ESO Tank Builds
🔹 New to the Role? Start with the Beginner Guide
🔹 Optimising Gear? Read the Tank Gear Guide
🔹 More ESO Content → Visit the ESO Hub
🔹 Playing on Console? See the Best MMORPGs for 2026
Want My Best Tank Builds Before Everyone Else?
Get early access builds, exclusive setups, and direct input on future content.