The Complete ESO Beginner Tank Guide 2025
New to tanking in The Elder Scrolls Online? This ESO Beginner Tank Guide covers everything from core mechanics and gear choices to sustain and positioning. Whether you’re stepping into dungeons for the first time or preparing for veteran content, this guide will help you build confidence and become an effective tank.
Table of Contents
Introduction to the ESO Beginner Tank Guide
In this comprehensive guide, we will cover everything you need to know to become an effective Tank in Elder Scrolls Online (ESO). We’ll start with the basics and gradually move into advanced strategies, ensuring you have the knowledge to excel in your role.
ESO offers a unique Tanking experience compared to many other MMORPGs. The game’s active combat style requires Tanks to maintain aggro, understand and manage mechanics, sustain resources, and survive through various challenges. In addition, Tanks are often expected to buff their group, debuff enemies, and support damage dealers, making them an integral part of any team. In veteran and hardmode content, Tanks play a crucial role in ensuring the group’s success, and the responsibilities can be demanding. While some may think Tanking is an easier role, it quickly becomes clear that it is one of the most challenging roles in ESO. The pressure on Tanks can be immense, as their performance directly impacts the group’s survival and success.
This guide will help you understand the fundamentals of Tanking in ESO. While we won’t be able to cover every mechanic for all dungeons, trials, and arenas, this guide will provide you with the knowledge and confidence to enter content as a Tank and perform your role effectively. Let’s get started!
What is an ESO Tank?
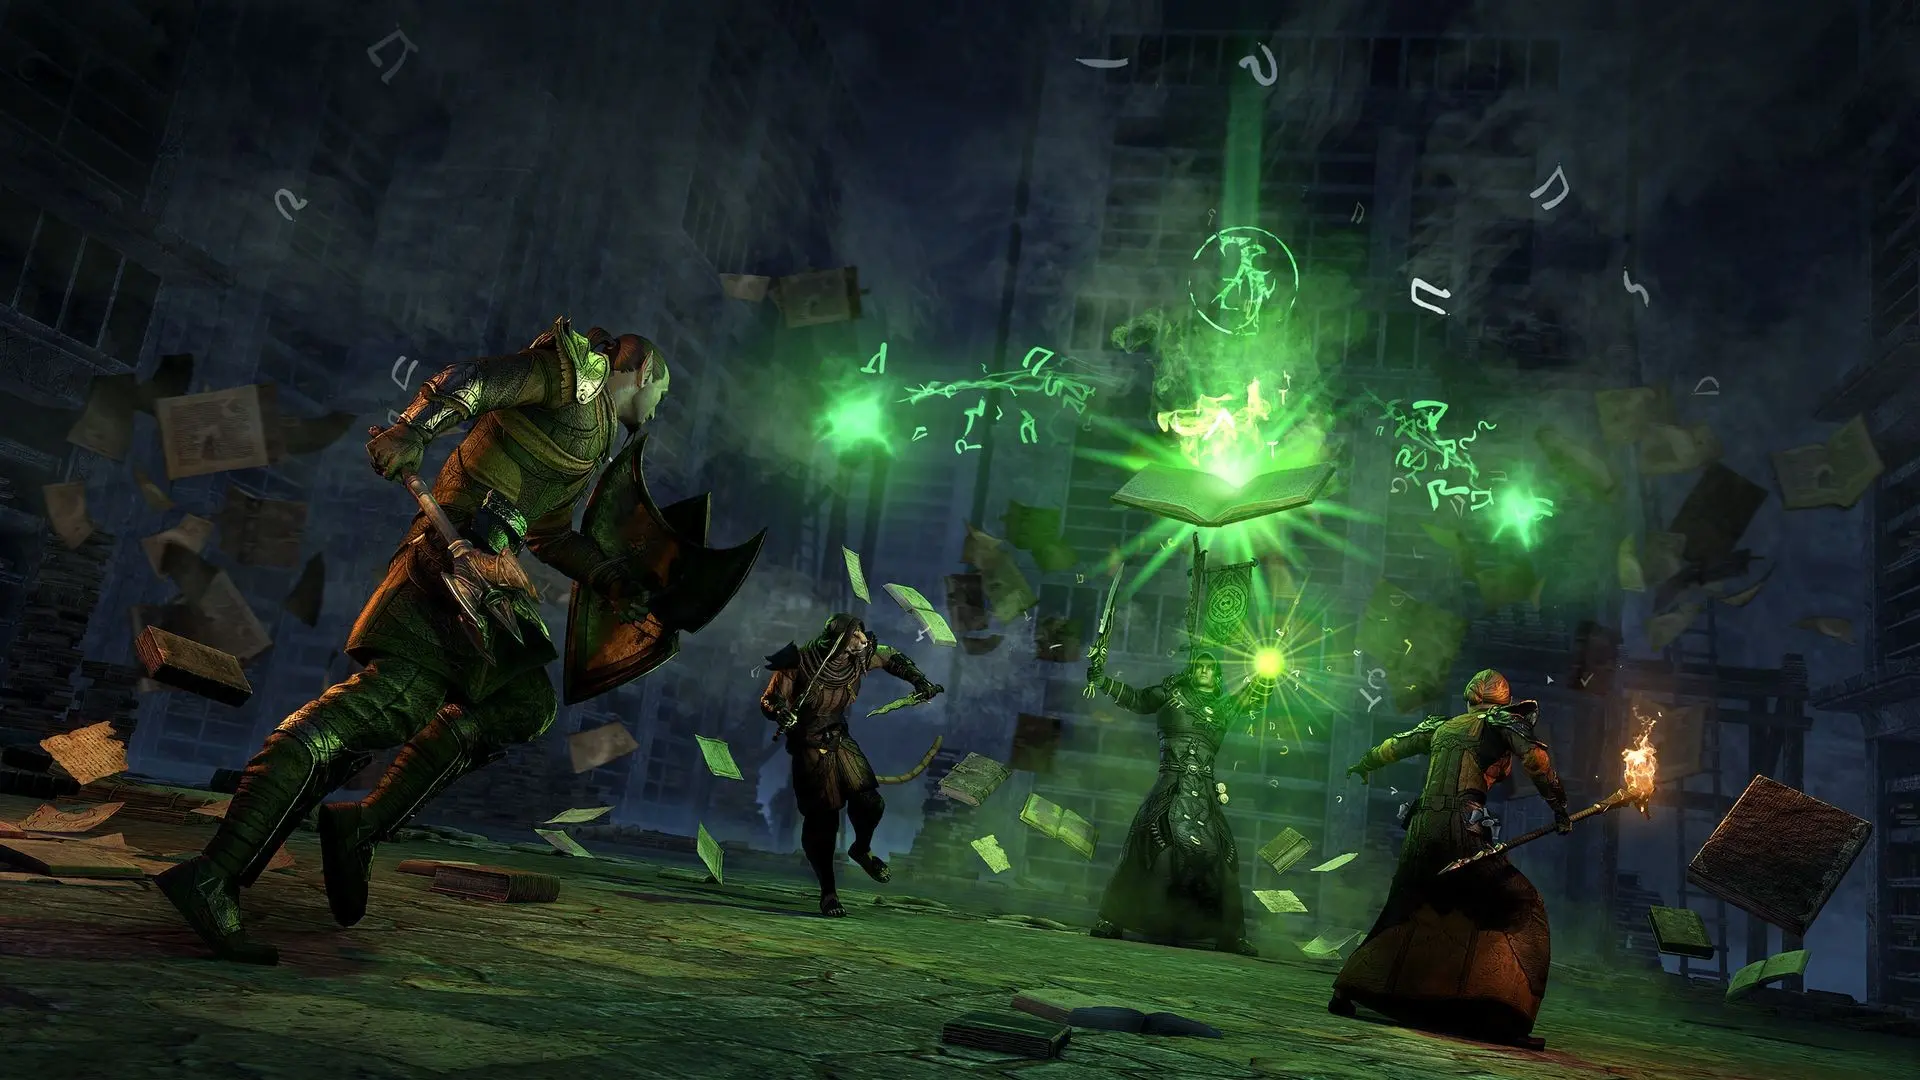
In Elder Scrolls Online, a Tank is the backbone of any group, the heavily armored frontline warrior who protects and defends allies from enemy threats. The primary role of a Tank is to aggro and control enemy targets, forcing them to attack you and minimizing the damage dealt to Damage Dealers and Healers.
Key Responsibilities
- Aggro Management: The Tank’s first job is to gain the attention of enemies, keeping their focus on you.
- Positioning: Safely positioning enemies to protect your allies and allow them to perform their roles effectively.
- Mechanics Mastery: Understanding and efficiently handling fight mechanics and tactics, as you will often deal with them more than other roles.
- Survivability: Prioritizing Max Health and Resistances to withstand heavy damage, ensuring you can endure sustained attacks.
Challenges
- Sustain: Balancing Magicka recovery and Stamina gain is crucial. Blocking depletes Stamina, which cannot regenerate while blocking, making Stamina management essential.
- Survivability: Good sustain allows self-healing, but experience and knowledge of your class, race, role, and specific fights are vital for survival.
Advanced Responsibilities
- Support and Buffing: Once you master the basics, you will support your group by providing buffs and using gear sets that enhance group damage, survivability, and sustain.
- Debuffing Enemies: Applying debuffs to enemies to increase the damage they take, which is easier for Tanks as they are always on the front line.
- Efficiency: The quicker your group can defeat enemies, the better for everyone, especially for Tanks managing sustain and fight mechanics.
ESO Tank Class
Choosing the right Tank Class in Elder Scrolls Online largely depends on which class offers the most benefits to the group. The effectiveness of a Tank is not solely about their ability to withstand damage but also about the unique buffs and debuffs they bring to enhance the group’s overall performance.
Key Considerations:
- Group Benefits: The most valuable Tank Classes provide significant buffs and debuffs that benefit both the Tank and the group.
- Ease of Play: Some classes are more beginner-friendly, making them better choices for new Tanks.
Class Options:
- Base Game Classes: Dragonknight, Nightblade, Sorcerer, Templar
- Purchasable Classes: Warden, Necromancer, Arcanist
Each class has its unique strengths, with significant differences in the buffs, debuffs, and group benefits they offer. While every class is capable of Tanking, some excel more than others and provide additional perks that can make them more desirable for specific scenarios.
✅ Not Sure Which Tank Class to Choose? Check out our ESO Tank Class Guide to find the best class for your playstyle, strengths, and content goals!
| Tier | Class | Best for |
|---|---|---|
| S-Tier | Arcanist, Dragonknight & Sorcerer | Easiest to learn, sustain & survival |
| A-Tier | Warden | Not as strong as other classes at dealing with damage |
| B-Tier | Necromancer | High skill ceiling, powerful but very different to other classes |
| C-Tier | Nightblade & Templar | Difficult sustain, limited utility |
| Tier | Class | Best for |
|---|---|---|
| S-Tier | Arcanist | Most group buffs, huge shields, great survival & sustain |
| A-Tier | Dragonknight | Strong survival, great sustain, but fewer buffs |
| B-Tier | Sorcerer, Necromancer & Warden | Good sustain, utility and buffs, all provide different things but not generally meta |
| C-Tier | Nightblade & Templar | Less useful group utility and self-sustain and simply not as strong as the other classes |
| Tier | Class | Best for |
|---|---|---|
| S-Tier | Arcanist, Dragonknight, Sorcerer & Necromancer | All used in trial tanking and needed for different group compositions |
| A-Tier | Warden | Good tanks but simply not needed due to Warden healers |
| B-Tier | Templar | Almost never needed for trials |
| C-Tier | Nightblade | Not the most useful but also suffer from an overcomplicated playstyle |
ESO Tank Race
Choosing the right race for your tank in The Elder Scrolls Online has always been a debated topic. While you can successfully tank with any race, the choice becomes more critical in Hardmode Trial and Dungeon content.
Key Points:
- Flexibility: Any race can be used for tanking; you don’t need to choose the “best” race to be successful.
- Importance in Endgame: Race choice becomes more significant in high-level content like Hardmode Trials and Dungeons.
- Casual Play: If you don’t plan on reaching the highest levels of tanking, the race is less crucial.
✅ Struggling to Pick the Best Tank Race? Head over to our ESO Tank Race Guide to compare racial passives and find the perfect fit for your build!
Nord
Nords are the best choice for a tank in the long term. You’ll benefit from increased resistances and Ultimate gain. In the newer endgame content, those resistances are crucial to mitigate the high damage and provide more versatility. Key benefits include:
- Reveler: Increases your experience gain with the Two Handed skill line by 15%. Increases the duration of any consumed drink by 15 minutes.
- Resist Frost: Increases your Max Health by 1000 and Frost Resistance by 4620.
- Stalwart: Increases your Max Stamina by 1500. When you take damage, you gain 5 Ultimate. This effect can occur once every 10 seconds.
- Rugged: Increases your Physical and Spell Resistance by 2600.
Nord is particularly beneficial for players struggling to deal with high incoming damage.
Redguard

Redguard is a fantastic choice for beginner tanks. They help with stamina sustain through the Adrenaline Rush passive, restoring 1005 stamina every 5 seconds when dealing damage. Other benefits include:
- Wayfarer: Increases your experience gain with the One Hand and Shield skill line by 15%. Increases the duration of any eaten food by 15 minutes.
- Martial Training: Reduces the cost of your weapon abilities by 8%. Reduces the effectiveness of snares applied to you by 15%.
- Conditioning: Increases your Max Stamina by 2000.
- Adrenaline Rush: When you deal damage, you restore 1005 Stamina. This effect can occur once every 5 seconds.
Redguard is particularly beneficial for players struggling with stamina sustain, making it a good choice for casual tanks seeking immediate improvement.
ESO Tank Attributes
From level 1 to 50, each time you level up, you gain Attribute Points. By level 50, you will have a total of 64 Attribute Points to distribute.
Setting Your Attributes
There’s no absolute right or wrong way to set your attributes, but as a beginner, it’s good to aim for some base level stats:
- 38,000+
- 18,000+
- 14,000+
How to Achieve These Stats
- Gear and Enchantments: Ensure you have your gear equipped and enchanted.
- Skills and Passives: Slot your skills and input passives.
- Champion Points: Distribute any available Champion Points.
- Food & Drink Buffs: Consume buff food or drinks to further boost your stats.
- Attribute Points: Allocate your Attribute Points last, based on the remaining need.
Recommended Distribution: Typically, you can start by placing all 64 points into Health and using Stamina and Magicka glyphs on your gear. This initial setup can change as you progress and adapt to different content.
Prismatic Defense Glyphs: Once you obtain a good tank set, invest in Prismatic Defense (Tri-Stat) glyphs to gain more maximum stats. Though expensive, they are superior to single stat glyphs, providing 2676 more total stats.
Importance of High Max Health: High Max Health is crucial because tank-based healing and damage shield skills scale with Max Health. The more health you have, the larger your heals and shields will be, providing more room for error and survivability.
Balancing Stats
- Avoid Imbalance: Don’t focus solely on Health. Even with 60k Health, insufficient Magicka or Stamina can still lead to failure, as you won’t be able to heal or block effectively.
- Max Stamina: Essential for blocking. Stamina is not regained while blocking, so sustaining Stamina is more important than having a large pool.
- Stamina Priority: Ensure your Stamina is higher than Magicka. Synergies like Orbs or Shards restore the resource with the highest max value.
- Max Magicka: Necessary for skill usage and healing. Aim for around 16k to maintain skill casting and healing without running out quickly. Magicka sustain is generally easier due to regeneration while blocking.
Sustaining Resources
- Stamina Sustain: Focus on sustaining Stamina rather than maximizing it. Learn mechanics to block less, use heavy attacks, food, potions, and harmony jewellery to improve sustain.
- Magicka Sustain: Easier to maintain due to regeneration. Aim for decent Magicka recovery rather than a high Max Magicka.
ESO Tank Mundus Stone
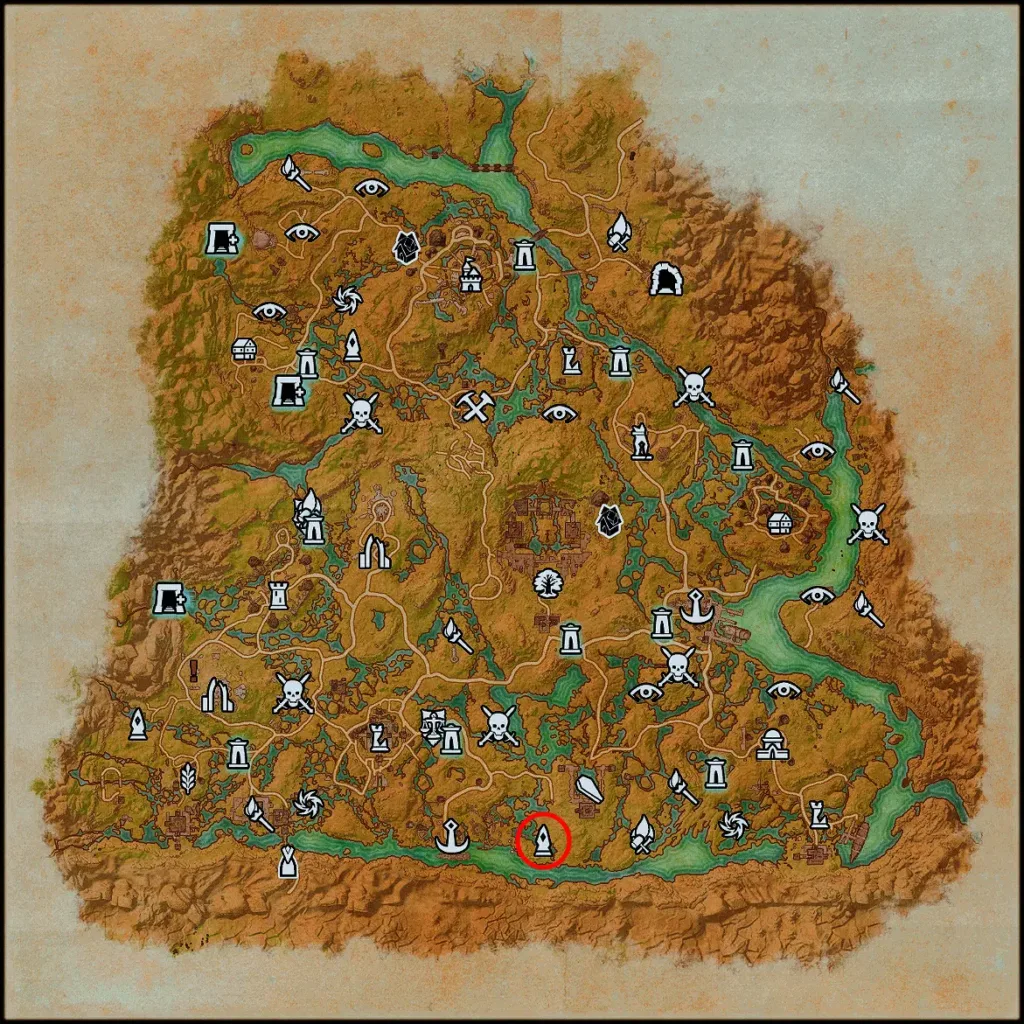
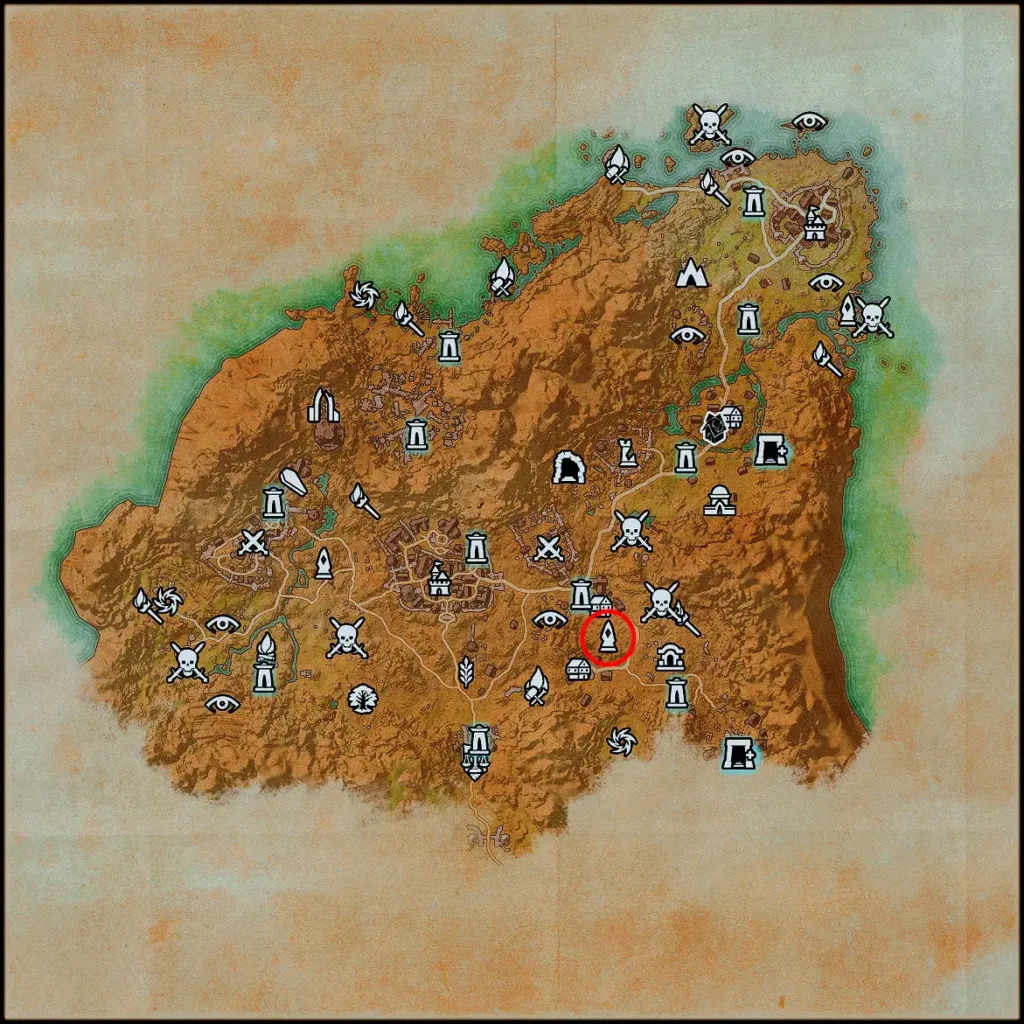
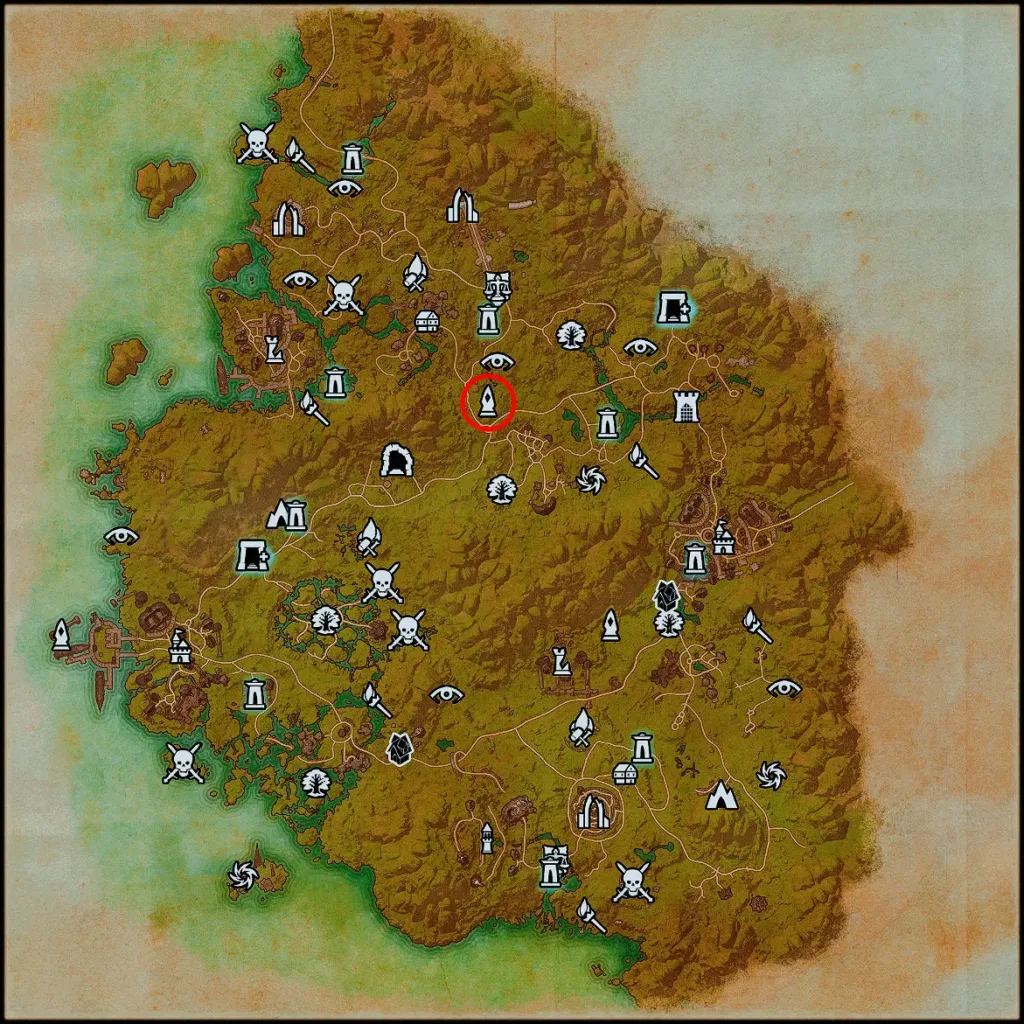
Mundus Stones provide additional benefits and are found throughout the world of The Elder Scrolls Online, including in player houses. Collect one as soon as possible for free benefits that enhance your character.
The Atronach
Increased Magicka Recovery by 310
(7 Divines Gear) Increased Magicka Recovery by 507
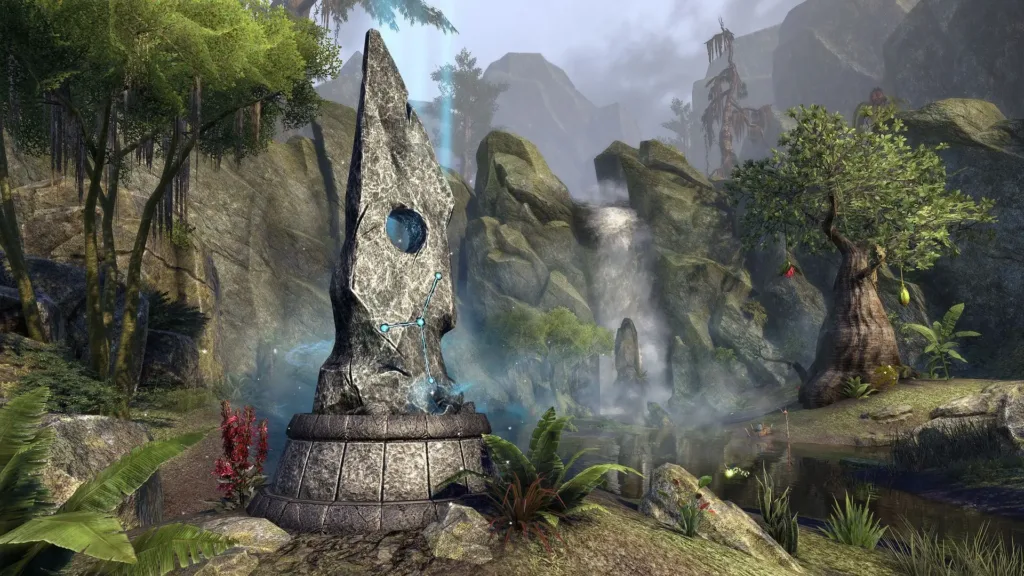
Main Option for Tanks
- The Atronach: The most popular Mundus Stone for Tanks due to its significant Magicka recovery benefits.
Why Choose The Atronach?
- Sustain: Magicka recovery is crucial for casting spells and using skills effectively.
- Magicka Skills: Essential for healing, shielding, and crowd control, ensuring you protect yourself and your group.
- Blocking Mechanics: Magicka recovery continues while blocking, unlike Stamina recovery, making it vital for sustained blocking.
- Stamina Restore: Magicka skills can be used to gain Stamina with certain classes and the Scribing System.
Prioritizing The Atronach ensures you have the resources needed for efficient Tanking, keeping yourself and your group safe.
ESO Tank Consumables
| Item | Effect | Ingredients to Craft |
|---|---|---|
| Orzorga’s Red Frothgar | Increase Max Health by 5395 and Magicka Recovery by 493 for 2 hours. | 1x Comberry 1x Honey 1x, Mint, 1x Clear Water |
| Bewitched Sugar Skulls | Increase Max Health by 4620, Max Stamina and Magicka by 4250, and Health Recovery by 462 for 2 hours. These effects are scaled based on your level. | 2x Bervez Juice, 5x Flour, 5x Honey, 2x Scrib Jelly, 2x Columbine. |
| Jewels of Misrule | Increase Stamina and Magicka Recovery by 357 and Max Health by 3927 for 2 hours. These effects are scaled based on your level. | 1x Bervez Juice, 1x Lotus, 1x Mint, 1x Rose, 1x Columbine |
| Orzorga’s Smoked Bear Haunch | Increase Max Health by 4312, Health Recovery by 406 and Stamina and Magicka Recovery by 369 for 2 hours. | 1x Frost Mirriam, 1x Perfect Roe, 1x Red Meat, 1x Tomato, 1x White Cap. |
| Item | Effect | Ingredients to Craft |
|---|---|---|
| Crown Tri-Restoration Potions | Restore Health, Magicka and Stamina plus you gain Health Recovery, Magicka Recovery and Stamina Recovery. | These potions are obtained via the Daily Login Rewards, Crown Store, Crown Crates and Level Up Rewards |
| Essence of Health (Tri-Stat Potions) | Restore Health, Magicka and Stamina plus you gain Health Recovery, Magicka Recovery and Stamina Recovery. | Bugloss, Columbine, Mountain Flower |
| Essence of Magicka (Heroism Potions) | Restore Magicka and Stamina plus you get Minor Heroism which restores 1 Ultimate every 1.5 seconds. | Columbine, Dragon’s Blood, Dragon Rheum |
| Essence of Immovability | Restore Health and Stamina, gain Health and Stamina Recovery, become immune to knockbacks and disabling effects. | Columbine, Mountain Flower, Namira’s Rot |
| Essence of Health (Cloudrest Potions) | Restore Health, gain Health Recovery, gain Health per second and gain 30% healing taken. | Butterfly Wings, Powdered Mother of Pearl, Blue Entoloma |
| Essence of Speed (Cloudrest Potions) | Restore Health per second and you are granted 30% increased movement speed and 30% increased healing taken. | Butterfly Wings, Powdered Mother of Pearl, Scrib Jelly. |
| Essence of Speed (Ultigen Potions) | Restore Stamina, gain increased Stamina Recovery and you are granted 30% increased Movement Speed and 1 Ultimate every 1.5 seconds. | Dragon’s Blood, Dragon Rheum, Blessed Thistle |
Food & Drinks
- Red Frothgar: Excellent sustain food with high Max Health and tons of Magicka Recovery. However, it may leave your Stamina lower than Magicka, depending on your build.
- Bewitched Sugar Skulls: The best tri-stat food, offering a balance of all max stats plus Health Recovery.
- Jewels of Misrule: Ideal for experienced tanks who block selectively, providing all three recoveries. Not recommended if you block constantly or use little Stamina.
- Smoked Bear Haunch: A slight upgrade to Jewels of Misrule for min-maxing, but costly to craft and buy, making it less practical.
Potions
- Tri-Stat Potions: The go-to option for most situations, restoring Health, Stamina, and Magicka while boosting all recoveries.
- Heroism Potions: Essential for faster Ultimate generation, helping maintain Warhorn uptime.
- Immovability Potions: Prevent knockbacks and disabling effects, making them invaluable for fights with frequent CC mechanics.
- “Cloudrest” Potions: Specifically useful for handling portals in Cloudrest. The Speed variant is also excellent for off-tanking in Asylum Sanctorium.
ESO Tank Champion Points
Champion Points (CP) are earned after reaching level 50 with your first ESO character. If you have a character with CP levels, you can apply these points to your new Tank character immediately.
While tanking at low CP levels is possible, having at least 1200 CP is recommended for Veteran content. This amount provides significant benefits, including increased stats, recoveries, and defense, which are crucial for effective tanking.
There are two types of Champion Points:
- Slottable Champion Points: Need to be equipped on your champion bar to be active.
- Passive Champion Points: Always active and do not need to be slotted.
To begin with, focus on 4 main Fitness and 4 Warfare passives that will help you the most, combined with all of the passive Champion Points that don’t need to be slotted.
Below are the general Champion Point slottables for a Tank and also a general Champion Point guide you can follow from 160CP to 1600CP for all general placement of Champion Points.
- Ironclad
- Duelist’s Rebuff
- Bulwark
- Enduring Resolve (DoT damage fights)
- Unassailable (AoE damage fights)
Warfare
10 Tireless Discipline
↓
10 Quick Recovery
↓
20 Preparation, 13 Elemental Aegis
Fitness
20 Boundless Vitality (Slottable)
20 Fortified (Slottable)
13 Rejuvenation (Slottable)
Warfare
10 Tireless Discipline
↓
10 Quick Recovery
↓
7 Hardy, 20 Preparation, 20 Elemental Aegis
Fitness
26 Boundless Vitality (Slottable)
20 Fortified (Slottable)
20 Rejuvenation (Slottable)
Warfare
10 Tireless Discipline
↓
10 Quick Recovery
↓
20 Hardy, 20 Preparation, 20 Elemental Aegis
↓
20 Enduring Resolve (Slottable)
Fitness
30 Boundless Vitality (Slottable)
30 Fortified (Slottable)
30 Rejuvenation (Slottable)
10 Tireless Guardian
Warfare
10 Tireless Discipline
↓
10 Quick Recovery
↓
20 Hardy, 20 Preparation, 20 Elemental Aegis, 3 Ironclad (Slottable)
↓
50 Enduring Resolve (Slottable)
Fitness
30 Boundless Vitality (Slottable)
30 Fortified (Slottable)
30 Rejuvenation (Slottable)
10 Tireless Guardian
3 Nimble Protector → 30 Bracing Anchor (Slottable)
Warfare
10 Tireless Discipline
↓
10 Quick Recovery
↓
20 Hardy, 20 Preparation, 20 Elemental Aegis, 25 Ironclad (Slottable)
↓
12 Duelist’s Rebuff (Slottable), 50 Enduring Resolve (Slottable)
Fitness
40 Boundless Vitality (Slottable)
33 Fortified (Slottable)
30 Rejuvenation (Slottable)
10 Tireless Guardian
3 Nimble Protector → 50 Bracing Anchor (Slottable)
Warfare
10 Tireless Discipline
↓
10 Quick Recovery
↓
20 Hardy, 20 Preparation, 20 Elemental Aegis, 25 Ironclad (Slottable)
↓
25 Duelist’s Rebuff (Slottable), 50 Enduring Resolve (Slottable), 20 Unassailable (Slottable)
Fitness
40 Boundless Vitality (Slottable)
33 Fortified (Slottable)
30 Rejuvenation (Slottable)
10 Tireless Guardian
3 Nimble Protector → 50 Bracing Anchor (Slottable)
4 Defiance ← 30 Tumbling
Warfare
10 Tireless Discipline
↓
10 Quick Recovery
↓
20 Hardy, 20 Preparation, 20 Elemental Aegis, 25 Ironclad (Slottable)
↓
25 Duelist’s Rebuff (Slottable), 50 Enduring Resolve (Slottable), 25 Unassailable (Slottable)
28 Bulwark (Slottable)
Fitness
40 Boundless Vitality (Slottable)
40 Fortified (Slottable)
40 Rejuvenation (Slottable)
10 Tireless Guardian
3 Nimble Protector → 50 Bracing Anchor (Slottable)
20 Defiance ← 30 Tumbling
Warfare
10 Eldritch Insight 12 Tireless Discipline
↓
10 Quick Recovery
↓
20 Hardy, 20 Preparation, 20 Elemental Aegis, 25 Ironclad (Slottable)
↓
25 Duelist’s Rebuff (Slottable), 50 Enduring Resolve (Slottable), 25 Unassailable (Slottable)
50 Bulwark (Slottable)
Fitness
40 Boundless Vitality (Slottable)
40 Fortified (Slottable)
40 Rejuvenation (Slottable)
10 Tireless Guardian → 30 Fortification
6 Nimble Protector → 50 Bracing Anchor (Slottable)
20 Defiance ← 30 Tumbling
Warfare
10 Eldritch Insight 20 Tireless Discipline
↓
10 Quick Recovery
↓
20 Hardy, 20 Preparation, 20 Elemental Aegis, 50 Ironclad (Slottable)
↓
25 Duelist’s Rebuff (Slottable), 50 Enduring Resolve (Slottable), 25 Unassailable (Slottable)
50 Bulwark (Slottable)
Fitness
50 Boundless Vitality (Slottable)
50 Fortified (Slottable)
50 Rejuvenation (Slottable)
10 Tireless Guardian → 30 Fortification
6 Nimble Protector → 50 Bracing Anchor (Slottable)
20 Defiance ← 30 Tumbling
↓
4 Mystic Tenacity
Warfare
18 Eldritch Insight 20 Tireless Discipline
↓
10 Quick Recovery
↓
20 Hardy, 20 Preparation, 20 Elemental Aegis, 50 Ironclad (Slottable)
↓
50 Duelist’s Rebuff (Slottable), 50 Enduring Resolve (Slottable), 25 Unassailable (Slottable)
50 Bulwark (Slottable)
Fitness
50 Boundless Vitality (Slottable)
50 Fortified (Slottable)
50 Rejuvenation (Slottable)
10 Tireless Guardian → 30 Fortification
6 Nimble Protector → 50 Bracing Anchor (Slottable)
7 Hasty
20 Defiance ← 30 Tumbling
↓
10 Mystic Tenacity → 20 Hero’s Vigor
Warfare
2 Flawless Ritual ← 10 Piercing
↑
20 Blessed ← 20 Eldritch Insight 20 Tireless Discipline
↓
10 Quick Recovery
↓
20 Hardy, 20 Preparation, 20 Elemental Aegis, 50 Ironclad (Slottable)
↓
50 Duelist’s Rebuff (Slottable), 50 Enduring Resolve (Slottable), 25 Unassailable (Slottable)
50 Bulwark (Slottable)
Fitness
50 Boundless Vitality (Slottable)
50 Fortified (Slottable)
50 Rejuvenation (Slottable)
10 Tireless Guardian → 30 Fortification
6 Nimble Protector → 50 Bracing Anchor (Slottable)
20 Sprinter ← 16 Hasty → 4 Celerity (Slottable)
20 Defiance ← 30 Tumbling
↓
10 Mystic Tenacity → 20 Hero’s Vigor
Warfare
35 Flawless Ritual ← 10 Piercing
↑
20 Blessed ← 20 Eldritch Insight 20 Tireless Discipline
↓
10 Quick Recovery
↓
20 Hardy, 20 Preparation, 20 Elemental Aegis, 50 Ironclad (Slottable)
↓
50 Duelist’s Rebuff (Slottable), 50 Enduring Resolve (Slottable), 25 Unassailable (Slottable)
50 Bulwark (Slottable)
Fitness
50 Boundless Vitality (Slottable)
50 Fortified (Slottable)
50 Rejuvenation (Slottable)
10 Tireless Guardian → 30 Fortification
6 Nimble Protector → 50 Bracing Anchor (Slottable)
20 Sprinter ← 16 Hasty → 38 Celerity (Slottable)
20 Defiance ← 30 Tumbling
↓
10 Mystic Tenacity → 20 Hero’s Vigor
Warfare
40 Flawless Ritual ← 10 Piercing → 18 Battle Mastery
↑
20 Blessed ← 20 Eldritch Insight 20 Tireless Discipline
↓
20 Quick Recovery
↓
20 Hardy, 20 Preparation, 20 Elemental Aegis, 50 Ironclad (Slottable)
↓
50 Duelist’s Rebuff (Slottable), 50 Enduring Resolve (Slottable), 25 Unassailable (Slottable)
50 Bulwark (Slottable)
Fitness
50 Boundless Vitality (Slottable)
50 Fortified (Slottable)
50 Rejuvenation (Slottable)
21 Savage Defense ← 10 Tireless Guardian → 30 Fortification
6 Nimble Protector → 50 Bracing Anchor (Slottable)
20 Sprinter ← 16 Hasty → 50 Celerity (Slottable)
20 Defiance ← 30 Tumbling
↓
10 Mystic Tenacity → 20 Hero’s Vigor
Warfare
12 Precision
40 Flawless Ritual ← 10 Piercing → 40 Battle Mastery
↑
20 Blessed ← 20 Eldritch Insight 20 Tireless Discipline
↓
20 Quick Recovery
↓
20 Hardy, 20 Preparation, 20 Elemental Aegis, 50 Ironclad (Slottable)
↓
50 Duelist’s Rebuff (Slottable), 50 Enduring Resolve (Slottable), 25 Unassailable (Slottable)
50 Bulwark (Slottable)
Fitness
50 Boundless Vitality (Slottable)
50 Fortified (Slottable)
50 Rejuvenation (Slottable)
30 Savage Defense ← 20 Tireless Guardian → 30 Fortification
6 Nimble Protector → 50 Bracing Anchor (Slottable)
20 Sprinter ← 16 Hasty → 50 Celerity (Slottable)
20 Defiance ← 30 Tumbling
↓
10 Mystic Tenacity → 20 Hero’s Vigor → 10 Piercing Gaze → 4 Tempered Soul
Warfare
20 Precision
40 Flawless Ritual ← 10 Piercing → 40 Battle Mastery
↑
20 Blessed ← 20 Eldritch Insight 20 Tireless Discipline
↓
20 Quick Recovery
↓
20 Hardy, 20 Preparation, 20 Elemental Aegis, 50 Ironclad (Slottable)
↓
50 Duelist’s Rebuff (Slottable), 50 Enduring Resolve (Slottable), 50 Unassailable (Slottable)
50 Bulwark (Slottable)
Fitness
50 Boundless Vitality (Slottable)
50 Fortified (Slottable)
50 Rejuvenation (Slottable)
30 Savage Defense ← 20 Tireless Guardian → 30 Fortification
6 Nimble Protector → 50 Bracing Anchor (Slottable)
20 Sprinter ← 16 Hasty → 50 Celerity (Slottable)
20 Defiance ← 30 Tumbling
↓
10 Mystic Tenacity → 20 Hero’s Vigor → 10 Piercing Gaze → 38 Tempered Soul
Warfare
20 Precision
10 War Mage ← 40 Flawless Ritual ← 20 Piercing → 40 Battle Mastery → 13 Mighty
↑
20 Blessed ← 20 Eldritch Insight 20 Tireless Discipline
↓
20 Quick Recovery
↓
20 Hardy, 20 Preparation, 20 Elemental Aegis, 50 Ironclad (Slottable)
↓
50 Duelist’s Rebuff (Slottable), 50 Enduring Resolve (Slottable), 50 Unassailable (Slottable)
50 Bulwark (Slottable)
All Blue CP from this point should be applied to any passive CP or additional situational slottable CP you might need.
Fitness
50 Boundless Vitality (Slottable)
50 Fortified (Slottable)
50 Rejuvenation (Slottable)
30 Savage Defense ← 20 Tireless Guardian → 30 Fortification
6 Nimble Protector → 50 Bracing Anchor (Slottable)
20 Sprinter ← 16 Hasty → 50 Celerity (Slottable)
20 Defiance ← 30 Tumbling
↓
10 Mystic Tenacity → 20 Hero’s Vigor → 10 Piercing Gaze → 50 Tempered Soul
All Red CP from this point should be applied to any passive CP or additional situational slottable CP you might need such as:
Sustained by Suffering / Slippery / Expert Evasion / Shield Master / Ward Master / Bastion / Strategic Reserve / Refreshing Stride
ESO Tank Gear
Flexibility in Gear
As a tank, having multiple sets of gear is crucial for flexibility in providing self-buffs, group buffs, and general trial viability. Your strength comes from class passives, Champion Points, skills, gear traits, and enchants. Many tank sets are underwhelming, emphasizing the need for sets that offer group benefits.
Importance of Group Synergy
In group content, tanks play a vital role in debuffing enemies and buffing group members. Faster enemy kills make tanking easier, reducing the need for prolonged survival and sustain. Prioritize sets that enhance group performance to make fights quicker and more manageable.
Starting Gear for Beginners
When first tanking content, use gear that enhances your sustain or survival. This helps you learn enemy mechanics, positioning, and overall survivability. As you gain experience, switch to sets that offer significant group benefits, helping your team complete content more efficiently.
Choosing the Right Sets
Each gear set has strengths and weaknesses. For example, Leeching Plate is useful in fights with many enemies but ineffective in boss fights with few targets. Start with comfortable gear and optimize your build over time.
Gear Weights
Be mindful of gear weights when selecting sets. For example:
- Powerful Assault: This strong group buff set is Medium Armor, so it should be used on weapons and jewelry to maintain Heavy Armor benefits on your body pieces.
- Saxhleel Champion: Activates when you use your ultimate, so it only needs to be equipped on your Ice Staff and jewelry or three other gear pieces. It does not need to be active at all times.
Monster Sets
Monster sets are obtained by completing Veteran Dungeons for Helmets and daily Undaunted Pledges for Shoulders. Each set is useful in different situations. For beginners, Engine Guardian is highly recommended for its sustain. It provides resources, helping maintain blocking and overall survivability. Long term this needs to be replaced with a more beneficial group set.
Summary
- Multiple Sets: Essential for flexibility in self and group buffs.
- Group Synergy: Focus on sets that benefit the group for quicker fights.
- Beginner Gear: Start with gear that enhances sustain and survival.
- Optimize Over Time: Switch to group-beneficial sets as you gain experience.
- Mind Gear Weights: Combine different weights to maintain benefits.
- Monster Sets: Engine Guardian is great for beginners due to its sustain.
✅ Not sure what gear to farm? Check out the ESO Tank Gear Guide to find the best sets for your build and optimize your tanking performance!
ESO Tank Gear, Traits and Enchants
Gear in ESO comes in three weights: Heavy, Medium, and Light.
Armor Setup
- Primary Gear: As a tank, you should use at least 5 pieces of Heavy Armor. This provides increased resistances, health, and sustain from Heavy Armor passives.
- Secondary Gear: The most common setup is 5 Heavy, 1 Medium, and 1 Light piece. This 5/1/1 configuration allows you to:
- Gain passives and bonuses from Light and Medium Armor, offering minor additional benefits.
- Increase your max stats through the Undaunted Mettle passive.
Beginner Tank Setup
Setting up as a beginner tank will differ from a long-term setup. Focus on traits and enchants that enhance your survivability and sustain. As you progress, adjust your gear to improve your tanking capabilities further.
Gear, Traits and Enchants
These are classed as ‘Big’ slots because they provide the full value of an enchant/glyph.
- Primary Trait: Divines – Buffs your Mundus stone, enhancing magicka recovery and overall sustain.
- Optional Trait: Sturdy or Reinforced – Use Sturdy for reduced block cost if necessary. If you’re struggling with high incoming damage, use Reinforced to increase resistances. Ensure resistances do not exceed the cap of 33,100 when fully buffed.
Best Enchant: Prismatic Defense/Tri-Stat
These enchants boost health, stamina, and magicka but can be expensive. For beginners, use single stat enchants. On the big slots, prioritize stamina enchants if you have all attributes allocated to health.
These are classed as “Small” slots because the enchant values on these slots are significantly smaller than those on “Big” armor slots.
Primary Trait: Divines – Buffs your Mundus stone, enhancing magicka recovery and overall sustain.
Enchants – Since these are small enchants, you can use either Stamina or Magicka enchants to balance your stats, especially if you have all attribute points allocated to health. Eventually, aim for Tri-Stat enchants on all slots. Until then, focus on reaching the suggested stats from the Attributes section by using single stat enchants.
Shields are classed as a “Big” slot, similar to Chest, Legs, and Helmets. Note that the benefits of the shield and its enchant are only active on the bar where the shield is equipped.
Primary Traits
- Divines: Enhances your Mundus stone benefits.
- Sturdy: Reduces block cost, useful for blocking on your main bar.
- Reinforced: Increases resistances, useful for blocking big damage hits.
- Well-Fitted: Reduces roll dodge and sprint cost while on that bar.
Enchants
- Stamina: Ideal for a big gear slot, enhancing your sustain.
- Tri-Stat: Recommended later for balanced max stats.
For weapons, you need to use a One-Handed Weapon on your front bar with your Shield. The type of one-handed weapon doesn’t matter, as they all perform equally when paired with a shield, unlike Dual Wield.
Traits
One-Handed Weapons have half the value of their Trait and Enchant compared to Two-Handed Weapons.
- Decisive: Excellent for generating Ultimate faster.
- Infused: Slightly boosts your weapon enchantment but lacks the new benefit provided by Decisive.
- Defending: Great for increasing resistances if you’re struggling with incoming damage, have low resistances, or are low CP.
Enchants
Weapon glyphs on one-handed weapons have half the value, so use them to benefit yourself. Strong group-based glyphs should be used on two-handed weapons for full value.
- Decisive/Absorb Stamina: Gains Ultimate and extra incoming stamina.
- Infused/Weakening: Debuffs enemies, reducing their damage.
- Infused/Hardening: Provides a small damage shield.
- Charged/Shock Glyph: Offers Minor Vulnerability to the group.
For the back bar weapon, use an Ice Staff. This is because the Ice Staff is essentially a tank weapon that reduces incoming damage and block cost when used.
Staves are Two-Handed Weapons and thus provide the full benefit of their traits and enchants, unlike One-Handed Weapons. Using an Infused Ice Staff with a Crusher enchant maximizes your tanking effectiveness and group support.
Key Points:
- Avoid Tri-Focus Passive: Do not use this passive, as it makes you block with Magicka instead of Stamina, making it hard to cast abilities—especially problematic for beginners.
- Destruction Staff Skills: Every Destruction staff skill offers significant benefits to a tank and group utility when using an Ice Staff, making it the best choice over other weapons, including a dual One-Hand and Shield setup.
Best Setup:
- Trait: Infused
- Enhances the power of the weapon enchantment.
- Enchantment: Crusher
- Provides a valuable group buff by reducing enemy resistances, and when combined with an Infused trait, the effect is even stronger.
When starting out, use jewelry with whatever trait it drops in, typically Healthy, Robust, or Arcane. These are not valuable long-term.
Best Traits
- Harmony: Provides a significant resource recovery boost when activating a synergy. However, it’s less effective if your group doesn’t provide synergies.
- Infused: Best for beginners as it improves sustain. Using three Infused pieces is recommended.
Enchants
- Bracing Enchants: Initially, use 1-2 Bracing enchants to reduce block cost. This is helpful as new players often block frequently.
- Magicka Recovery: The best enchants are three Magicka Recovery enchants. These will greatly improve your ability to tank by enhancing magicka sustain for frequent skill usage.
- Prismatic Cost Reduction: Good for experienced players who cast many skills and have high recovery to benefit from cost reduction. More useful if you frequently use short-duration stamina skills.
Recommended Setup
- 3 Infused with 1-2 Bracing + 1-2 Magicka Recovery, or 3 Magicka Recovery.
Generic Beginner Traits
| Piece | Weight | Trait | Enchantment |
|---|---|---|---|
| Head | Medium | Divines | Stamina |
| Shoulder | Light | Divines | Magicka |
| Chest | Heavy | Divines | Stamina |
| Hands | Heavy | Divines | Magicka |
| Waist | Heavy | Divines | Magicka |
| Legs | Heavy | Divines | Stamina |
| Feet | Heavy | Divines | Magicka |
| Necklace | Jewellery | Robust/Infused | Bracing |
| Ring | Jewellery | Robust/Infused | Magicka Recovery |
| Ring | Jewellery | Robust/Infused | Magicka Recovery |
| Main Hand | Any 1H | Infused | Absorb Stamina |
| Off Hand | Shield | Divines | Stamina |
| Main Hand Backup | Ice Staff | Infused | Crusher |
ESO Tank Resistances & Mitigation
As a tank in ESO, reducing incoming damage and the damage dealt by bosses and enemies is crucial for survival. There are three key aspects to this: Armor/Resistances, Block Mitigation, and General Mitigation. Combining these elements is essential for staying alive as a tank.
Resistances (Armor)
Resistances, often referred to as Armor, are divided into Spell and Physical Resistances, each with sub-categories:
- Spell Resistance: Mitigates magic attacks, including Flame, Shock, Ice, and Magic damage.
- Physical Resistance: Mitigates physical attacks, including Disease, Poison, and Bleed damage.
The resistance cap is 33,100, equating to 50% damage mitigation. Each 660 resistances provide 1% damage mitigation. Resistances are displayed on your character information screen. At lower CP levels and with non-optimized gear, resistances are crucial. Aim for the cap in recent content where damage sources are high, but for older content, 25-30k resistances are sufficient. Sources of resistances include Major and Minor Resolve buffs, Champion Points, Gear, Reinforced gear trait, Heavy Armor, and Defending weapon trait.
Block Mitigation
Block Mitigation reduces the damage from enemy attacks when you block:
- The cap is 90%, meaning you reduce incoming damage by 90% when blocking.
- Bleed and Damage Over Time (DoT) effects cannot be blocked and are unaffected by block mitigation.
For example, a 100,000 damage attack is reduced to 10,000 with 90% block mitigation. Typical block mitigation ranges from 70-80% for a tank using the Bracing Anchor champion point passive and heavy armor. Skills like the heavy armor skill Immovable and specific sorcerer skills can help reach the cap.
Overall Mitigation
Mitigation combines all actions to reduce damage:
- Character Buffs and Passives: Include resistances, gear set bonuses, and champion points.
- Enemy Debuffs: Apply debuffs to reduce enemy damage, such as Infused/Weakening, Major and Minor Maim, and Major and Minor Cowardice.
- Uncapped Mitigation: Overall mitigation is uncapped, but stacking too high offers diminishing returns and penalties to ensure some damage is always taken.
Maximizing overall mitigation involves using block mitigation, stacking resistances, and applying buffs to yourself and your group and debuffs to enemies and bosses. Utilize block mitigation with resistances, Minor Aegis, Major and Minor Protection, unique gear buffs, and enemy debuffs to enhance your survivability as a tank.
Combining these elements effectively is key to surviving and excelling as a tank in ESO. It’s possible, if you time everything correctly, to reach incredibly high overall mitigation where you are fully buffed and the enemy is fully debuffed leading to you mitigate over 95+% of incoming damage.
ESO Tank Skills
You can see all of the required skills needed for Tanking on the build pages where all class skills and passives are broken down into detail. There are some general none class skills used by Tanks however
One Hand & Shield
Ransack → Morph of Puncture
(Unnecessary)
This is a melee Taunt and an easy source of Minor Protection and Major Breach. Some classes such as Nightblades and Templars have Minor Protection built into their class already so this would not be needed, on other class Tanks you could just slot Temporal Guard.
Pierce Armor → Morph of Puncture
(Vital)
This again is a melee Taunt but it does not offer Minor Protection, instead you gain the addition of Minor Breech along with the Major Breech. This is a large increase to group DPS.
Heroic Slash → Morph of Low Slash
(Useful)
This debuffs enemies so they do less damage which is useful in high damage environments, but most importantly is the Ultimate gain which is the main reason to maintain this skill during combat.
Defensive Stance → Morph of Defensive Posture
(Optional)
This is a skill that can be slotted for the additional block mitigation and damage shield, although it’s not really worth it for the block mitigation nowadays. This ability will also reflect one projectile back at an enemy, when doing so you don’t need to be blocking. The best combat situations for this are where you are Tanking at range and the enemy has a reflect-able projectile such as Lokkestiiz in Sunspire, you can simply cast this and return the damage back at the boss. Not all boss projectiles can be reflected so you need to be careful. Things such as Dark Barrage by Rakkhat in Maw of Lorkhaj cannot be reflected and it will heal the boss if you reflect it and if you use it in Lair of Maarselok you’ll make more adds spawn.
Absorb Missile → Morph of Defensive Posture
(Situational)
This skill will absorb projectiles and heal you for a portion of the amount you absorbed. You will have to block when using this skill and it won’t save you from a heavy projectile if not blocking since it will not always absorb a whole projectile only a certain amount of the damage. This is sometimes a good option as it will work against projectiles that Defensive Stance does not work with. You can use this to help dealing with the Heavy Attack from Z’Maja in Cloudrest and for surviving the Dark Barrage from Rakkhat in Maw of Lorkhaj.
Shield Charge
(Situational)
A skill you might use for very certain mechanics in fights where you get knocked back or need to close the gap quickly on the enemy. Something like Halls of Fabrications last boss, you get punched to the middle of the room and need to get back to the boss fast and this would be a method of doing so.
Power Bash
(Situational)
If you are using the Vateshran One Hand and Shield, then you will need this skill. This skill is also used in the Dungeon Tank Build.
All One Hand and Shield Passives are vital for Tanking.
Destruction Staff
Not Used
Tri-Focus
(Optional)
This is a passive you need to be very careful with. It can be very powerful and also make life impossible for you. For general Tanking – do not use this passive.
By using this passive, when you switch to your Staff and you Block, you will block with Magicka and you will lose your Magicka Regen but you will gain Stamina Regen in place of it. For most Tanks, losing your Magicka Recovery is pretty devastating as you will lose your ability to heal, you won’t be able to cast almost any of your abilities and it can be fatal. For Tanks who know how to manage this, it could be a powerful way to regain Stamina while blocking. Since most Tank skills cost Magicka it doesn’t make sense to block with Magicka as well.
Penetrating Magic
(Unnecessary)
You can use this passive if you want but it will make very minimal difference so if you are short on Skill Points, skip this one.
Elemental Force
(Vital)
One of the main reasons we use a Staff is for the status effects we can inflict with them, so absolutely pick up this passive.
Ancient Knowledge
(Vital)
This is especially vital with an Ice Staff. If you don’t take this passive then your Frost Staff won’t provide you with any Tank related benefit. This makes Tanking with a Frost Staff almost the same defensively as Tanking with a One Hand and Shield.
Destruction Expert
(Vital)
Frost Blockade provides you and some of your group with a projectile damage shield, by using this passive you’ll gain back some Magicka if that shield absorbs any damage.
Heavy Armor
Immovable → Morph of Unstoppable
(Situational)
This skill provides an immunity to knockbacks and increases amount of damage you can block. It’s a really strong skill in fights where you take a lot of damage and don’t have to move a lot, you take less damage however you are almost stuck to the floor for 6 seconds so it’s a difficult skill to use and needs to be timed for very specific moments.
You ideally use this skill along with 6 Heavy Armor, this is so you can reach the maximum buff while also still able to roll dodge and move a little. If you use 7 heavy, you are stuck in 1 spot for 6 seconds and this is not advised. It’s also worth noting that block mitigation is capped at 90% so this may have very minimal effect if you are already close to 90% block mitigation.
Each piece of Heavy Armor does the following:
- Reduces damage taken from Martial attacks by 1%
- Increases the amount of damage blocked by 1%
- Increases damage done with Bash by 3%
- Reduces your damage taken while immune to crowd control by 1%
Each piece of Heavy Armor does the following:
- Increases damage taken from Magical attacks by 1%
- Reduces the Movement Speed bonus of Sprint by 1%
- Increases the cost of Roll Dodge by 3%
- Increases the size of your detection area while Sneaking by 10%
Medium Armor
Shuffle → Morph of Evasion
(Situational)
If you are Medium Armor Tanking in some level of content that has some kind of immobilization or snare mechanic then you would use this morph of the skill to help prevent it from happening.
Elude → Morph of Evasion
(Situational)
This would typically be the morph you would use when Medium Armor Tanking to reduce the incoming AoE damage by 25% which is a considerable amount when Tanking in Medium Armor. This Morph of the skill will increase the duration depending on how many Medium pieces you are using.
Each piece of Medium Armor does the following:
- Reduces the cost of Sprint by 1%
- Reduces the cost of Sneak by 5%
- Reduces the cost of Block by 3%
- Reduces damage taken from Area of Effect attacks by 2% for 2 seconds after you use Roll Dodge
- Increases Movement Speed by 2% while immune to crowd control
Dexterity
(Unnecessary)
This is not a vital passive for Tanking, it will increase your damage/healing slightly and would be needed for something like a Nightblade Tank that relies on causing crit damage to proc their group buff or when using a Crit based set such as Grundwulf.
Wind Walker
(Vital)
With this Passive you benefit with a very minor Stamina Cost Reduction of your skills such as Puncture and Heroic Slash, so it is worth picking up as a Tank for some minor sustain support if you are using any Medium Armor pieces.
Improved Sneak
(Not Needed)
Agility
(Unnecessary)
You can use this if you want but it’s not vital for Tanking.
Athletics
(Vital)
Reduced Roll Dodge cost and increased Sprint Speed is just a nice little extra bit of help with sustain if you are using any Medium pieces.
Light Armor
Annulment
(Unnecessary)
Not really ever needed by a Tank as you need to use 5 Light Armor pieces to be able to use the skill.
Each piece of Light Armor does the following:
- Reduces damage taken from Magical attacks by 1%
- Reduces the cost of Roll Dodge by 3%
- Reduces the Movement Speed penalty of Sneak by 5%
- Reduces the cost of Break Free by 5%
- Reduces the cost of Bash by 3%
Each piece of Light Armor does the following:
- Increases damage taken from Martial attacks by 1%
- Increases the cost of Block by 3%
- Decreases damage done with Bash by 1%
Vital skills are only vital if using Light Armor pieces.
Grace
(Vital)
Reduce Sprint cost an reduce the effectiveness of Snare applied to us, well worth having.
Evocation
(Vital)
Magicka Recovery and Reduce Magicka Cost both very important for Tanks as most of our abilities are Magicka costing.
Spell Warding
(Vital)
Not a huge boost to Spell Resistances but worth having since we need this as a Tank anyway.
Prodigy
(Unnecessary)
Damage passive, not very effective for a Tank.
Concentration
(Unnecessary)
Damage passive, not very effective for a Tank.
Fighters Guild
Dawnbreaker
(Unnecessary)
Can be used for solo content and slotted front bar for a Hybrid Tank.
Silver Leash → Morph of Silver Bolts
(Unnecessary)
If you are playing on a class that does not have a pull ability such as the DK Unrelenting Grip then this is an alternative. It costs Stamina which makes it slightly undesirable compared to the DKs Chain but it’s really your only option for most class Tanks. That is unless you have Gold Road and Scribing, in which case you can make a better skill.
Turn Evil → Morph of Circle of Protection
(Optional)
If you have the bar space and you are in a combat situation where you are stacked with your group then this will give them some additional buffs helping them to survive. If you are fighting none Elite/Boss enemies then this will also fear them.
Mages Guild
Inner Light → Morph of Magelight
(Optional)
Could be used to boost your Max Magicka and boost your Magicka Controller passives if you need it.
Entropy
(Not Needed)
Scalding Rune → Morph of Fire Rune
(Situational)
This is useful for helping Tanks to maintain Elemental Catalyst Flame Weakness and proccing Encratis’s Behemoth.
Spell Symmetry → Morph of Equilibrium
(Situational)
This is needed in situations where you want unlimited Magicka sustain but you do not need a source of Major Resolve. Tanks have a high Max Health pool, so you utilise that Max Health when you are in low damage situations to generate Magicka for more skill casting. When using this on a DK or Sorcerer it means you basically have unlimited sustain so long as someone is healing you as you have abilities that cost Magicka and can convert Magicka into Stamina. You should always take care to time the use of this, it’s not good to use it immediately before a Heavy Attack or Mechanic as it drops your Health and you have a 4 second self-healing debuff, you will still receive normal healing from a Healer however. With this morph, Nightblades especially can use this skill since they have Major Resolve built into their class Passives, if you have a Warden in your group who keeps 100% uptime of Frost Cloak then you wouldn’t need to apply your own Major Resolve either. This is an important sustain skill, at the cost of Health you gain 3k Magicka but it also reduces the cost of your next Magicka ability which can be really good in situations where you have a healer constantly healing you and you need to be casting expensive Magicka abilities frequently such as Purge.
Balance → Morph of Equilibrium
(Vital)
This is a must have skill for most Tanks unless you have Major Resolve already in which case you could use Spell Symmetry. Tanks have a high Max Health pool, so you utilise that Max Health when you are in low damage situations to generate Magicka for more skill casting. When using this on a DK or Sorcerer it means you basically have unlimited sustain so long as someone is healing you as you have abilities that cost Magicka and can convert Magicka into Stamina. You should always take care to time the use of this, its not good to use it immediately before a Heavy Attack or Mechanic as it drops your Health and you have a 4 second self-healing debuff, you will still receive normal healing from a Healer however. This morph provides the longest lasting source of Major Resolve available also, so as soon as its possible you should switch away from classed based Major Resolve sources to this one since it is a longer duration plus costs Health so its more sustainable in resource cost.
Mage Adept
(Vital)
Very important passive to have so your Balance/Spell Symmetry costs less Health to cast.
Everlasting Magic
(Vital)
This is the passive that causes your Balance to provide the longest source of Major Resolve that is available.
Magicka Controller
(Vital)
Gives you a slight buff to your Magicka sustain when you have Mage’s Guild abilities slotted. You should always have at least 1 so its worth having this.
Undaunted
Overflowing Altar → Morph of Blood Altar
(Optional)
This is a good skill to help your group. You have to place it anywhere within 28 metres of the enemy, then when you or a group member hits an enemy they are healed via Minor Lifesteal. Your allies don’t need to be near the Alter to benefit from the Minor Lifesteal they gain the benefit just from hitting the enemy that is within 28m of the Altar. This is a very sustainable skill as it has a low Health cost to cast it so it can be maintained easily by a Tank. This morph would be used in situations where you need to make use of the synergy for healing your group in things such as Asylum Sanctorium and Cloudrest, the synergy will provide the group with a much bigger heal than the other morph.
Shadow Silk → Morph of Trapping Webs
(Optional)
You cast this on ranged targets for your Stamina Damage Dealers to use so they can hit more DPS and also gain some resources from it. In some situations where your group has very little synergies an Off Tank might use this to provide another Alkosh synergy. This is quite a tricky skill to make use of since you need to cast it on an enemy, but your team members need to be away from that enemy to be able to gain the synergy so in a situation where there is just 1 target such as a boss its useless because the group needs to be at range to have the synergy become visible to them.
Inner Rage → Morph of Inner Fire
(Optional)
This is secondary to using Frost Clench. It allows you to range taunt enemies, but also its a Magicka taunt so you can use it to instigate combat, use it to taunt enemies that are not close to you and if you are low on Stamina use it to benefit your sustain. This morph also provides a guaranteed group synergy which can be nice for helping with proccing gear sets and additional group sustain.
Bone Surge → Morph of Bone Shield
(Optional)
This is not a vital skill to use since its hard to sustain with costing Stamina. You might see it used in close combat fights since you need to be stood very close to other people. If will provide Major Vitality which is quite a useful buff to have in some situations and gives a nice shield scaled on Max Health.
Energy Orb → Morph of Necrotic Orb
(Optional)
This is only needed if you are trying to proc a gear set on your group such as Spell Power Cure, Symphony of Blades or something similar. Also useful on a Warden Tank for maintaining their group buff Minor Toughness.
Undaunted Command
(Vital)
You must have this skill especially when using Alkosh since you will be using a lot of synergies and as a Tank you need sustain and this passive will return resources to you every time you use any synergy.
Undaunted Mettle
(Vital)
Extra resources no matter whether you are using 7 Heavy or 5/1/1 you’ll get extra stats.
Psijic Order
Temporal Guard → Morph of Undo
(Optional)
This is more of a passive Ultimate, you can slot this for easy permanent Minor Protection. For a Nightblade or Templar this likely wouldn’t be needed as they have class based options for obtaining this buff. You’ll usually benefit more from slotting Barrier and gaining the extra sustain.
Race Against Time → Morph of Accelerate
(Vital)
Pretty useful for all Tanks, having a speed boost so you can keep up with your group in Heavy Armor is quite important and it costs Magicka so its sustainable. This morph also has a nice effect where it will remove snares and immobilisations and give you immunity to them which is particularly helpful as a Tank.
Meditate
(Unnecessary)
If you are completely unable to sustain combat as a Tank, generally there is a fundamental issue you need to look into. I would initially suggest checking out the Tank Guides section for the Sustaining as a Tank Lecture. In the meantime, you can use this skill you help you sustain. The best time to use this would be when there are no mechanics happening or immediately after you have received and blocked a Heavy Attack from an enemy. Its best to use this in regular short bursts rather than waiting until you are out of resources and using it.
These passives are only Vital if you are using Psijic Order abilities.
Clairvoyance
(Vital)
This is needed if you occasionally use Race Against Time to reduce the cost of it.
Concentrated Barrier
(Vital)
If you ever slot any Psijic Order ability then you should have this passive to give yourself an extra little shield.
Deliberation
(Situational)
You only need this passive if you are using Meditate or its morphs. This will increase your ability to survive during the phases in which you are channelling the ability.
Assault
Vigor
(Situational)
Either morph of this skill are used on most Tanks to proc Powerful Assault. It’s also used sometimes for a general Heal over Time for Tank and on certain classes who have restricted Healing such as Templars and Necros.
Resolving Vigor→ Morph of Vigor
(Situational)
This is generally the better morph since you get a small heal over time but also Minor Resolve which buffs your resistances and mitigation.
Charging Maneuver → Morph of Rapid Maneuver
(Situational)
This is useful in most situation for providing yourself and group a speed boost wherever needed.
Razor Caltrops → Morph of Caltrops
(Vital)
This ability inflicts an Area of Effect Major Breach to enemies which reduces their resistances meaning your group will do more damage to any enemy stood inside the caltrops. It also causes a pretty strong snare on any none Elite/Boss enemies which can be good for things like Dungeons and Arenas. This also procs Powerful Assault on your group members so it can be better than using Vigor since it has more benefits.
Proximity Detonation → Morph of Magicka Detonation
(Situational)
This would be used alongside Powerful Assault gear set, the reason for using this skill is because it costs Magicka, it’s instant cast unlike the other morph and it would be extremely easy to sustain when used alongside Balance/Spell Symmetry.
Continuous Attack
(Vital)
You need to put 1 Skill Point into here to have permanent Major Gallop to increase the speed of your mount.
None of the other passives provide any benefit to a Tank in PvE content as they are all PvP passives.
Support
Barrier
(Vital)
This is a very nice and useful Ultimate to have for the passive benefits that you can gain from it. If you have the Magicka Aid passive and this is slotted you will benefit from 10% more Magicka Recovery which is an extremely important stat for Tanks. Generally you wont use this Ultimate, so it doesn’t need to be morphed. You are just using it to gain the Magicka Aid passive. If you did need to use it in an emergency situation it will provide you and your group with a pretty large and long lasting Damage Shield.
Replenishing Barrier → Morph of Barrier
(Optional)
If you are actually using Barrier as a Skill – maybe alongside the Saxhleel Champion set then you would want this morph so you can gain your Ultimate back faster.
Efficient Purge → Morph of Purge
(Vital)
As a Tank you will often be expected to use Purge in situations where it is needed and help your group remove deadly negative effects. We use the Efficient morph as it reduces the Magicka cost by a lot.
Mystic Guard → Morph of Guard
(Situational)
This skill is useful to helping people to stay alive. With this morph it would be typically used on another Tank for dealing with really high amounts of damage such as in Kyne’s Aegis. If you are using this to guard a DK Tank it can be a bit of a waste since they already have easy access to Minor Vitality, but for other classes its a great option as this will increase the healing they receive.
Stalwart Guard → Morph of Guard
(Optional)
This morph of guard is sometimes used in lower damage situation by a Tank and applied to Damage Dealers to help increase their DPS as they benefit from the Minor Force which frees up another skill slot on their ability bar for something else.
Revealing Flare
(Optional)
You slot this and you gain Major Protection reducing your incoming damage by 10%. If you are having a hard time in any situation, then you need to use this as it will drastically improve your survival.
Magicka Aid
(Vital)
This passive the vital reason for using Barrier as a slottable ultimate.
None of the other passives provide any benefit to a Tank in PvE content as they are all PvP passives.
ESO Tank Scribing
Scribing is a new system introduced with the Gold Road chapter, playing a crucial role in enhancing tanking abilities by providing easily accessible effects such as immobilizations, magicka pulls, and damage shields. It also offers buffs and debuffs like Major Cowardice, Major Vitality, Minor Resolve, Minor Vulnerability, and Minor Brittle, along with class-specific buffs and improved sustain.
Key Points:
- Versatility: Scribing allows for customizable enhancements to your tank, varying with each class.
- Requirements: You need to own the Gold Road chapter and complete the Scribing quest to access everything.
- Components: Obtain Grimoires (base spells), Scripts (spell effects), and Ink (crafting material) to create powerful tank spells.
Scribing offers a customizable way to enhance your tanking capabilities, making it an essential tool for improving performance and adapting to different scenarios.
Focus Script: Pull
Deals Magic Damage to an enemy, pulls them to you, and taunts them if they are not already taunted.
Signature Script: Druid’s Resurgence
Restores Magicka and Stamina.
Affix Script: ?
Choose one that works for you. (Breach, Cowardice, Vitality)
A Magicka-costing skill that pulls enemies, taunts them, and returns resources, replacing the need for Silver Leash. This skill is beneficial for all classes, as it allows tanks to use Magicka to cast the skill, which then returns Stamina, aiding in overall sustain. Additionally, it provides a Major buff or debuff; you can choose one that suits your build’s needs. Two excellent options are Major Vitality for increased healing received and Major Cowardice to reduce enemy damage output.
Focus Script: Immobilize
Immobilizes enemies.
Signature Script: Hunter’s Snare
Reduces the Movement Speed of enemies.
Affix Script: ?
Choose one that works for your class.
An accessible potential immobilization skill which is available for all classes. The primary focus is on its AoE, 360-degree immobilization, opening up new crowd control opportunities for classes that previously lacked this option. The other scripts used on this skill can vary depending on what your build is missing, allowing you to customize it to fit your specific needs.
Types of Tanking
In ESO, tanks can be categorized into several types based on their roles and the content they focus on:
General Tank:
Focuses on 4-player content such as dungeons, arenas, and general activities like pledges and daily content.
Main Tank:
Takes on the primary role in 12-player trials, maintaining aggro on the main boss and handling the primary threats.
Off Tank:
Assists the Main Tank in trials, taunting additional enemies, stacking add pulls, and providing additional group support. They may trade taunts with the Main Tank or handle separate bosses in multi-boss trials.
Hybrid Tank:
Capable of tanking enemies while also dealing damage. Commonly used in overland content, questing, delves, and sometimes as an Off Tank in older trials or dungeons with minimal damage and mechanics.
Each tank type has its unique responsibilities and is essential for different aspects of the game. Understanding these roles helps optimize your tanking strategy in various ESO activities.
Taunting & Aggro
Taunting is the primary focus of tanks in The Elder Scrolls Online and the main method of forcing enemies to target and attack you, also known as having “Aggro.”
Key Points About Taunting:
- Skills: Achieved using specific skills that trigger a taunt on an enemy.
- Duration: Taunts last for 15 seconds, requiring regular refreshing to maintain aggro.
- Individual Taunts: Each enemy needs to be taunted individually. Area taunting or taunting multiple enemies with one skill or button press is not possible.
- Simplicity: Unlike many other MMORPGs, ESO tanks don’t have to manage threat levels. Simply taunting and refreshing the taunt every 15 seconds keeps enemies focused on you.
- Consequences: Losing the taunt means enemies will target other group members until re-taunted.
Taunting is the most important tank responsibility, so understanding and mastering it is crucial before getting started.
There are multiple ways to apply taunt to an enemy in ESO, including melee taunts, ranged taunts, and chain taunts. These taunts can cost either stamina or magicka and are fundamental for maintaining aggro on enemies.
Common Taunts:
- Pierce Armor: A melee-range, stamina-costing taunt from the One Hand and Shield skill line. This skill not only taunts but also debuffs enemies, making them take more damage.
- Frost Clench: A 28-meter range, magicka-costing taunt from the Destruction Staff skill line. It taunts enemies and reduces their damage output.
Both Pierce Armor and Frost Clench have a 15-second duration, forcing the enemy to focus their attacks on you for the duration.
Chain Taunts:
Chain taunts are primarily used to pull ranged enemies into a stack with other enemies. While their main function is to pull enemies, they also apply a taunt. However, they only taunt untaunted enemies and cannot refresh an existing taunt until it expires, which can be risky. These taunts also last for 15 seconds.
Examples of Chain Taunts:
- Silver Leash: A stamina-costing chain taunt.
- Unrelenting Grip (Dragonknights): A magicka-costing chain taunt.
- Beckoning Armor (Necromancers): A magicka-costing chain taunt.
- Swarm Mother Monster Set: Provides a chain taunt effect.
Other Taunts:
- Inner Fire: A magicka-costing ranged taunt from the Undaunted skill line, useful for taunting enemies at a distance.
- Runic Sunder (Arcanists): A taunt skill unique to the Arcanist class.
- Tormentor (Gear Set): Taunts enemies when you deal damage with a charge, leap, teleport, or pull ability.
What is Over Taunting?
Over taunting occurs when multiple players taunt the same enemy too frequently within a short period, causing the enemy to become taunt immune.
Mechanics of Over Taunting:
- Taunt Immunity Threshold: Enemies become taunt immune after being taunted 5 times between two unique targets.
- Debuff Indicators: When you taunt an enemy, an additional debuff now appears to show how many times the target has been taunted by another source. This visual cue helps track taunt applications and avoid reaching taunt immunity.
- Taunt Stack Counter: The duration of the taunt stack counter is 7 seconds. This means the taunt stacks fall off after 7 seconds, giving more breathing room in multi-boss encounters.
Effects of Over-Taunting:
- Taunt Immunity Duration: Taunt immunity lasts for 7 seconds, aligning with the taunt stack counter duration. This synchronization helps you know how long the target will be taunt immune.
- Visual Cues: The taunt counter is now visible but it was previously a hidden mechanic.
- Natural Taunt Immunity: Some targets are naturally immune to taunts due to their own effects and mechanics. These targets will not display the taunt immunity icon.
Using the In-Game Buff & Debuff Tracker
To track your taunt on enemies efficiently, follow these steps:
Options > Combat > Buffs & Debuffs > ALL – Always Show > TARGET DEBUFFS – On > FROM OTHERS – Off
- When you taunt an enemy, look at the top of your screen.
- Focus on the enemy you are targeting with your middle cursor and look at the health bar at the top of the UI.
- Debuffs will be displayed beneath the health bar, showing the debuffs you have applied and their remaining duration, including taunt.
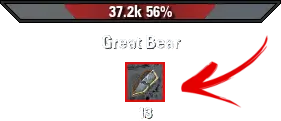
For single bosses, enable Ability Bar Timers to track your taunt skills easily:
Options > Combat > Ability Bar Timers - On
- Watch the timers on your taunt skills.
- Refresh your taunt skill once the timer is almost expired to maintain aggro.
Addons
For PC players, addons such as Untaunted and Srendarr can significantly enhance taunt tracking. These addons allow you to customize and move tracking interfaces, enabling you to monitor your taunts on multiple targets effectively.
When dealing with multiple targets stacked in a small area, taunting the right enemy can be challenging. The best way to focus on specific targets is by using tab targeting.
How to Use Tab Targeting
- On PC: Point your cursor at the enemy and press Tab.
- On Console: Point your cursor at the enemy and press in the right analogue stick (R3).
When you tab target an enemy, they get a white highlight around them, making them easier to see. This also helps focus most of your skills towards the selected enemy.
Benefits of Tab Targeting
- Priority Targeting: Tab targeting is particularly useful for focusing on priority enemies in add pulls, ensuring you gain taunt more easily without other enemies blocking your view.
- Increased Accuracy: While not 100% reliable, tab targeting significantly increases the accuracy of your taunts and skills.
Turning Off Tab Targeting
To turn off a tab target:
- Perform the same action (press Tab or R3) while facing away from the enemy. This can be necessary if you’ve tab-targeted an enemy but need to taunt additional adds that spawn during a boss fight.
Taunt Priority
Determining Taunt Priority
One of the tricky parts of tanking is figuring out which enemies to taunt first. The health bars help identify priority targets, with stronger enemies indicated by specific health bar features.
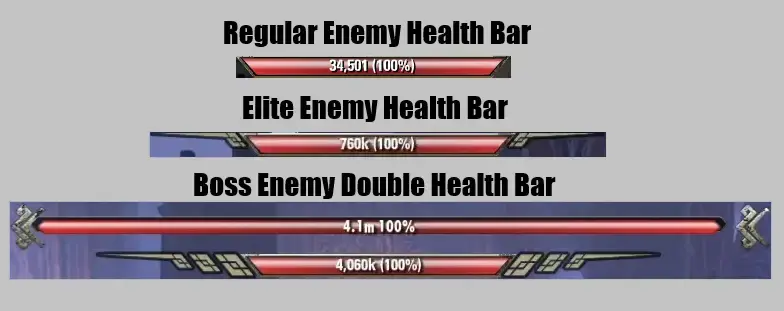
Regular Enemies
- No Taunt Needed: Regular enemies often don’t need to be taunted. They can usually be controlled with crowd control (CC) abilities, and your group can kill them with area damage.
- Crowd Control: Use CC on regular enemies instead of wasting taunts. Only taunt them if necessary after handling higher-priority targets.
Elite Enemies
- Visual Indicators: Elite enemies have extra markers on their health bars, indicating they are stronger.
- High Priority: These are your main taunt priority as they can easily kill group members. They are often mixed with regular enemies and can be found in the middle of larger pulls. Taunt them as soon as possible.
Bosses
- Boss Indicators: Bosses have an Elite-style health bar and an additional health bar on the compass at the top of your screen.
- Highest Priority: Maintaining aggro on bosses is crucial as they can cause significant damage to unprepared group members. Always prioritize taunting bosses.
General Taunt Rule
Follow this priority order when deciding which enemies to taunt:
- Bosses
- Elite Enemies
- Melee 2-Handed Regular Enemies
- Other Regular Melee Enemies
- Regular Ranged Enemies
By adhering to this priority, you ensure that the most dangerous threats are controlled, keeping your group safe and effective in combat.
ESO Tank Blocking
Blocking is one of the most crucial survival tools in ESO, but many tanks struggle to fully understand how to block effectively. Here’s a detailed guide to help you master this essential skill:
Key Points About Blocking:
- Stamina Cost: Blocking costs Stamina. While blocking, you cannot gain Stamina via regeneration, as it is turned off.
- Exception: Using an Ice Staff with the Tri-Focus passive allows you to block with Magicka, but this turns off Magicka recovery, which is problematic since most tank skills cost Magicka. Therefore, using Tri-Focus is not recommended.
- Block Mitigation: When blocking, you instantly reduce incoming damage by 50%. You also gain the benefit of Block Mitigation, which can be stacked up to a maximum of 90%. At this cap, you only receive 10% of the incoming damage.
- Bar Swapping: You can safely maintain block while bar swapping, making it easier to maintain skill uptime and manage damage.
- Avoid Over-Blocking: One common mistake, especially for beginners, is blocking too much. Perma-blocking leads to sustain issues, as you will eventually run out of Stamina and be unable to block when needed.
- Block Cost: Aim for a block cost of around 1000 Stamina per hit. Lowering this further is possible but not significantly beneficial beyond 900, as it requires more effort and sacrifices within your build.
- Reduction Methods: Use 1 or 2 Bracing enchants on your jewellery to reduce block cost until you are comfortable with blocking. Be aware of diminishing returns when stacking block cost reduction.
- Damage Over Time: Damage Over Time and Bleed Damage cannot be blocked, so blocking and block mitigation do nothing to reduce the incoming damage of either of these effects.
Sustaining Blocking:
- Selective Blocking: You do not need to block every single hit. Focus on blocking heavy attacks and mechanic attacks. Other damage can be mitigated through resistances, healing, damage shields, and debuffing enemies.
- Intermittent Blocking: For tanks accustomed to perma-blocking, try dropping block intentionally for a few seconds and then re-blocking. This method reduces Stamina loss and maintains a sense of safety.
- Stamina Regeneration Methods:
- Potions and Passives: Use potions and class passives to regenerate Stamina.
- Synergies: Activate synergies to return resources. Using Harmony jewellery increases the benefits.
- Skills: Certain skills, like Dragonknight’s Igneous Shield, can return Stamina when cast. All classes can also use the scribing system to regain Stamina.
Best Practices for Blocking:
- Learn Fight Mechanics: Understand when to block big attacks and when it’s safe to drop block.
- Build Optimization: Include high resistances, self-buffs, and enemy debuffs in your build to reduce incoming damage and sustain blocking.
- Utilize Skills and Synergies: Make use of available skills, potions, and synergies to manage resources effectively.
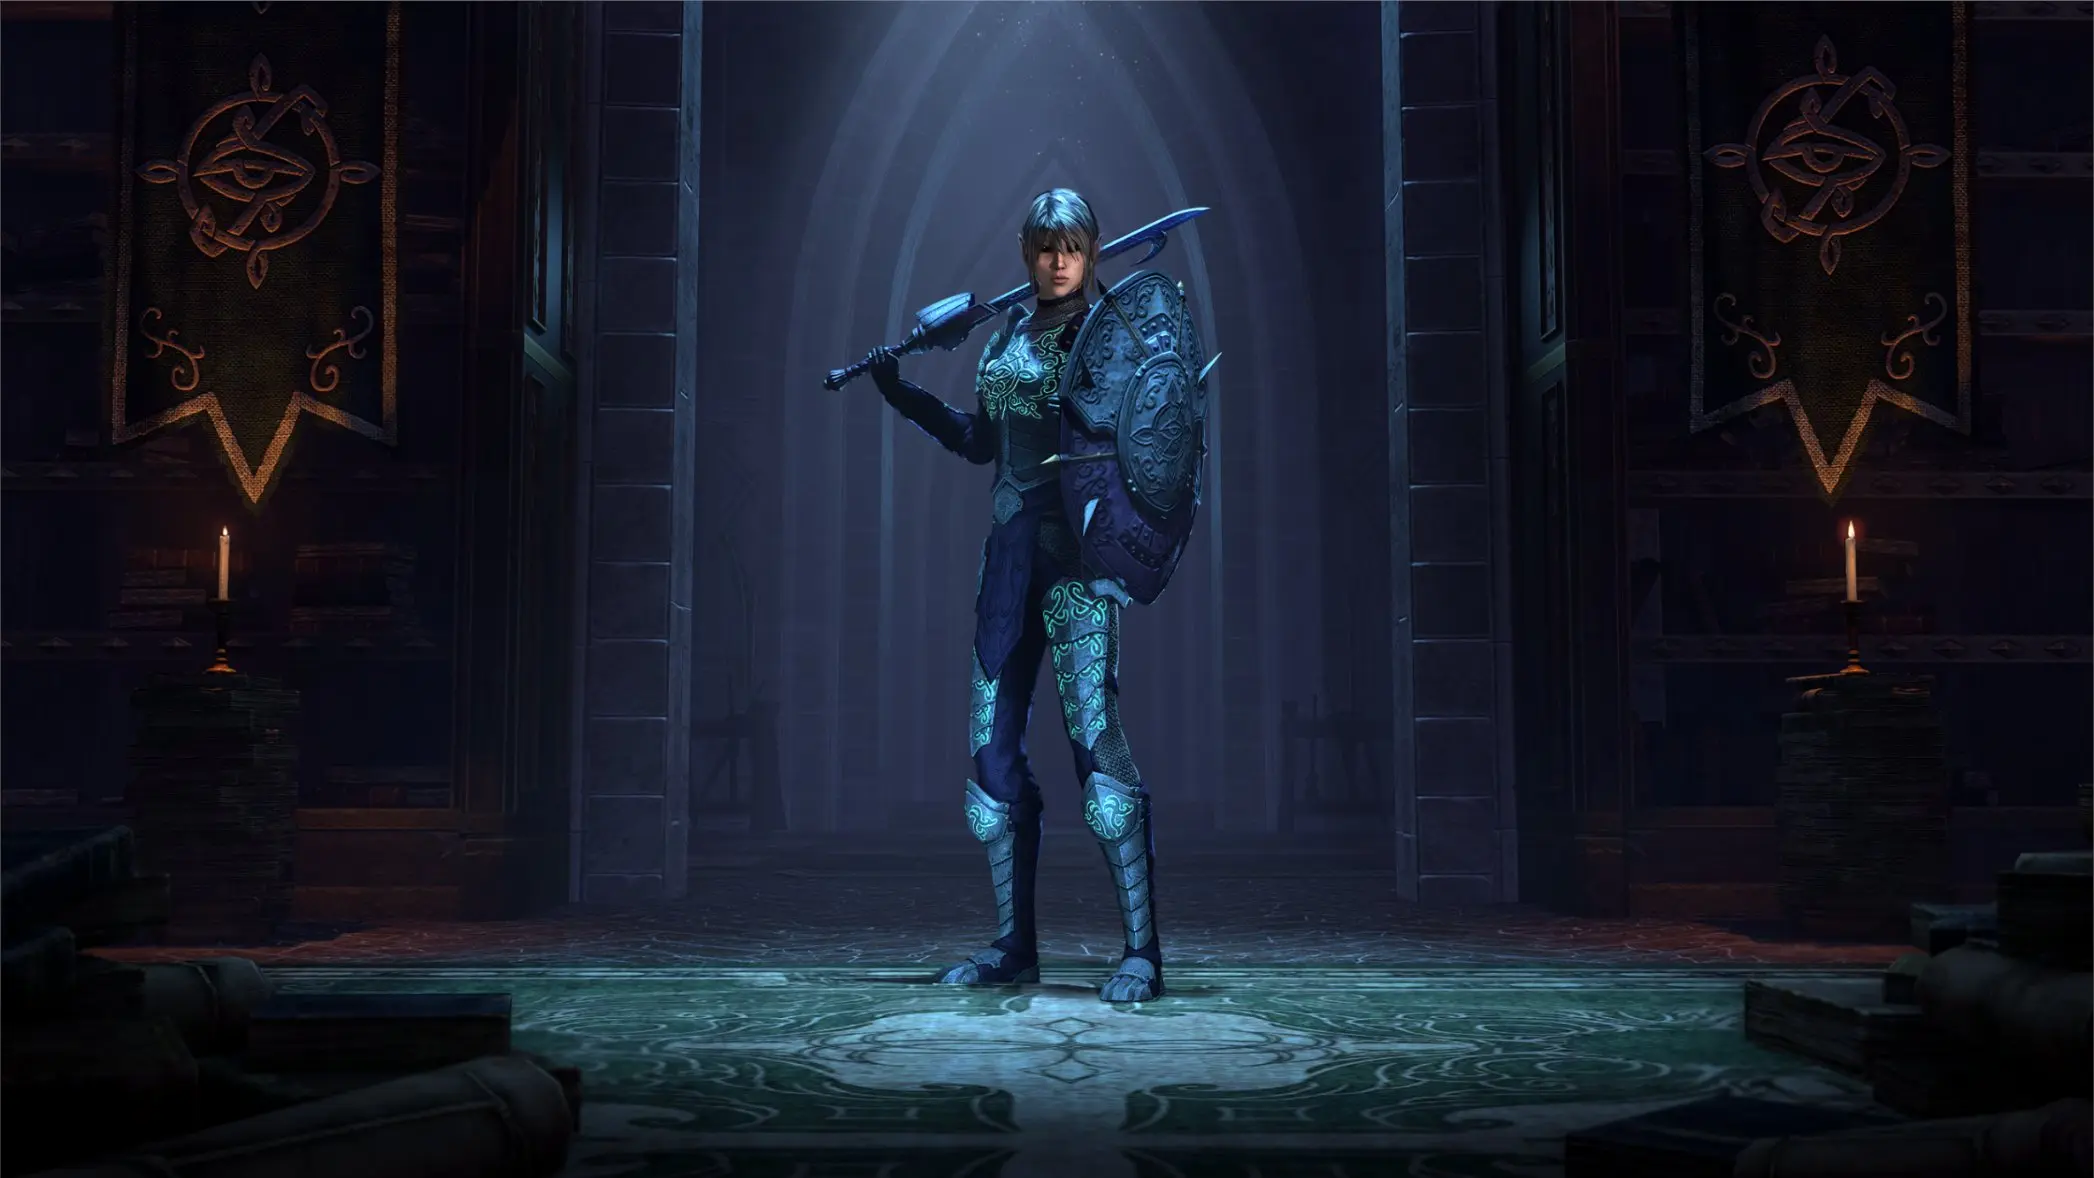
ESO Tank Enemy Positioning
Positioning enemies is an integral part of ESO tanking, but there isn’t a common method that applies to all situations. However, a few simple rules can help guide your positioning.
Add Pulls: Add pulls are usually positioned slightly in front of their starting location. As you approach the adds, let them move a bit towards you so the ranged enemies come within range of your chain skills and Void Bash proc (if using it). If you are using Void Bash, do not activate it immediately when entering an add pull. Instead, place Elemental Blockade to start the enemies moving, drop Razor Caltrops in front to slow them, circle around the first enemy, and then proc Void Bash. This ensures that almost all enemies within 12 meters are pulled in. The goal in add pulls is to gather all enemies into a stack and hold them still for your damage dealers to quickly eliminate with AoE attacks. Turn enemies away from your group to prevent cleave attacks from hitting them.
Boss Fights: For bosses, positioning depends on the type of boss and the mechanics involved:
- Stationary Bosses: Hold them where they are.
- Teleporting Bosses: Follow them around the room.
- Positioning: Generally, tank bosses either at the edge of the room or in the center.
- Center Positioning: Used when the area is open and mechanics or adds spawn throughout the fight.
- Edge Positioning: Used when bosses drop AoEs or fill the room with effects, moving to the edge provides more space for your group.
As a general rule, taunt the boss, keep it in the middle of the room, and turn it away from the group. This strategy works for most bosses in ESO.
Turning Enemies Away: Turning enemies away from the group is crucial because bosses often perform cleave attacks that hit the area in front of them or drop AoEs and damage under the tank. Damage dealers should stand behind the boss or away from the tank to avoid these effects. Avoid moving bosses unnecessarily, as it causes significant damage losses. Many damage dealer abilities and ultimates are ground-based, so moving the boss can pull them out of these effects, slowing down the kill and worsening sustain for your damage dealers as they have to recast their abilities and potentially waste ultimates.
ESO Tank Survival
Tank survival is crucial in every aspect of the game. A dead tank often leads to a dead group, making it nearly impossible to clear content and defeat bosses if the tank cannot stay alive.
Key Tips for Tank Survival:
- Sustain: One of the most common reasons for tank deaths is a lack of sustain, preventing them from blocking effectively. Ensure you have enough resources to maintain block and use your skills.
- Self Buffs and Debuffs: Use self buffs to reduce incoming damage and apply debuffs to enemies to lower their damage output. Incorporate self-healing and damage shields to enhance your survivability.
- Learn Patterns: With experience, you will notice patterns in enemy movements, abilities, damage, and mechanics. Experience is key to effective tanking.
- High Resistances and Health: When learning a fight for the first time, prioritize high resistances and health, and use gear you are comfortable with. This ensures survival as you familiarize yourself with the encounter.
- Adapt and Improve: Once you gain experience and understand the fight, transition to a more group-oriented setup that benefits the entire team.
For specific advice on boss fights or mechanics, join The Tank Club Discord, where you can get personalized help from other tanks. Additionally, watch TC_Lee13 on Twitch for regular Dungeon, Trial, and Arena tanking streams, where you can see expert tanking in action and ask questions
Blocking is absolutely critical for survival as a tank in ESO. It may sound simple, but mastering the art of blocking can make the difference between life and death for you and your group. See more in the Blocking section.
Block casting is an essential skill for tanks in ESO, especially in Veteran content. It allows you to cast most of your abilities while maintaining your block, ensuring you stay protected even while using skills.
Key Points About Block Casting:
- Casting While Blocking: You can cast most abilities while holding the block button. Your character may appear to drop the block during the animation, but you are still blocking.
- Safety: Block casting is the safest option, significantly reducing the damage you take during combat.
Abilities Safe to Block Cast:
- Taunts
- Heals
- Crowd Control Abilities
Exceptions:
- Channel or Cast Time Abilities: Some abilities force you to drop block. These include abilities with a channel or cast time, such as:
- Stone Giant
- Dark Deal
- Certain Scribing Skills
Buffing yourself is essential for managing damage and staying alive as a tank in ESO.
Key Buffs to Maintain:
- Major Resolve and Minor Armor/Resistance Buffs: These buffs provide significant resistances and reduce incoming damage. Always strive to keep these active.
Additional Buffs:
- Minor Protection: Slot Temporal Guard from the Psijic Order skill line to reduce incoming damage by 5%.
- Major Protection: Slot Revealing Flare to gain Major Protection, reducing incoming damage by 10%. These effects can also be gained from other sources.
Gear-Provided Buffs:
- Minor Aegis: Wearing trial gear provides this self-buff, reducing incoming damage.
- Unique Damage Reduction: Certain gear sets like Pearlescent Ward and Lucent Echoes offer unique damage reduction benefits.
Healing Buffs:
- Major/Minor Vitality: Increases healing received.
- Major/Minor Mending: Increases healing done. Utilize these to enhance your healing capabilities.
General Buffs:
- Any buffs that boost resistances, damage reduction, damage mitigation, incoming healing, or extra resources are invaluable for tanking.
Debuffing enemies is an effective way to reduce the damage they deal, thereby improving your survivability as a tank.
Key Debuffing Techniques:
- Frost Staff and Destructive Clench:
- Taunt and Major Maim: Using Destructive Clench with a Frost Staff taunts the enemy and applies Major Maim, reducing their damage by 10%.
- Chilled Effect: This skill also guarantees the Chilled effect, which applies Minor Maim, reducing the enemy’s damage by an additional 5%. Combined, this results in a total damage reduction of 15%.
- Major and Minor Cowardice:
- Weapon and Spell Damage Reduction: These debuffs lower the enemy’s weapon and spell damage. The scribing system has made these debuffs more accessible, allowing you to reduce enemy damage output significantly.
- Infused Weapon with Weakening Glyph:
- Damage Reduction: An Infused weapon with a Weakening glyph reduces the enemy’s damage. This debuff is often applied by a healer, but if it isn’t, use it on your one-handed weapon to ensure the enemy’s damage is minimized.
By effectively debuffing enemies, you can substantially reduce the damage they deal, making it easier to manage incoming damage and keep yourself and your group safe.
Building up your resistances is fundamental to reducing incoming damage and surviving as a tank in ESO. Here are the key points to remember:
Resistance Cap: The maximum benefit you can gain from resistances in PvE content is 33,100. Always aim to reach this cap to maximize your damage mitigation.
Importance: High resistances significantly reduce the amount of damage you take, making it easier to survive encounters, especially in challenging content.
Ways to Increase Resistances:
- Major and Minor Resolve: Utilize skills that provide these buffs to boost your resistances.
- Champion Points: Allocate points to Resistance-buffing nodes.
- Race and Gear: If you are still under the resistance cap, consider:
- Using the Nord race for its resistance bonuses.
- Equipping Reinforced gear to boost resistances.
- Using a Defending One-Handed Weapon to increase resistances.
Self-healing is often necessary, especially in dungeon groups without a healer or with an inexperienced or dead healer. There are several methods to heal yourself as a tank:
1. Burst Healing
- Definition: Provides a large heal in a short amount of time, crucial for recovering from big hits.
- Example: Dragonknight’s Dragon Blood, which scales with your max health, making it more effective with higher health pools.
- Usage: Save for moments of high incoming damage. It’s expensive to recast frequently, so use it wisely.
- Boosting Effectiveness: Combine with healing buffs like Igneous Shield to enhance healing via Major Mending, making burst heals even more potent.
- Critical Heals: Burst heals can also critically heal, providing extra healing on top of the initial amount.
2. Healing over Time (HoT)
- Definition: Provides small, continuous heals over an extended period.
- Example: Dragonknight’s Cinder Storm offers sustained healing over 15 seconds.
- Usage: Ideal for mitigating small, regular damage. It helps sustain health without consuming too many resources.
- Additional Tools: Consider using the Engine Guardian Monster Set for extra healing over time.
3. Health Recovery
- Definition: A character stat that automatically restores health every 2 seconds.
- Sources:
- Class passives and Heavy Armor passives.
- Minor Fortitude and Potions providing Major Fortitude.
- Bewitched Sugar Skulls food.
- Strategic Reserve Champion Points.
- Effectiveness: Typically provides around 1k Health Recovery, equivalent to 500 healing per second. While not substantial for high health pools (e.g. 40k health), it adds up over long fights.
4. Damage Shields
- Definition: Shields absorb damage, protecting your health bar.
- Usage: Use damage shields to mitigate incoming damage, making them vital for survival.
- Example: Igneous Shield provides a strong damage shield that can drastically improve survivability.
General Tips for Effective Self-Healing:
- High Magicka Recovery: Ensure you have a high magicka recovery to sustain healing and other magicka-based skills.
- Combination of Healing Methods: Use a combination of burst healing, healing over time, and damage shields to cover different damage scenarios.
- Healing Buffs: Utilize buffs like Major and Minor Vitality (for increased healing received) and Major and Minor Mending (for increased healing done).
By incorporating these self-healing techniques and understanding when to use each method, you can significantly enhance your tank’s survivability in ESO.
Roll dodging is a crucial but often underused technique among new players. It can be expensive in terms of stamina, but its benefits for survival are significant.
How Roll Dodge Works:
- Evade Damage: When you roll dodge, you evade damage for the next 2 seconds from any attack that isn’t a locked-in channeled attack.
- Channeled Attacks: Certain attacks, such as Dark Barrage from Rakkhat in Maw of Lorkhaj or Nocturnal’s Favour from Z’Maja in Cloudrest, are fixed on you and cannot be avoided by roll dodging.
When to Use Roll Dodge:
- Majority of Attacks: Most attacks in the game are not locked onto you and can be evaded with a roll dodge.
- Critical Situations: Use roll dodge in critical situations, such as after taking a big hit or when overwhelmed, to evade damage and buy time to heal or escape.
- Instant Reaction: Develop the habit of instantly reacting with a roll dodge to evade damage for a few seconds, ensuring your survival.
By incorporating roll dodging into your defensive tactics, you can effectively avoid damage and improve your chances of survival in challenging encounters.
ESO Tank Sustain
Sustain is one of the hardest aspects of tanking in ESO. If you cannot sustain, you cannot block, use skills, or perform your tank duties effectively.
Common Sustain Issues:
- Lack of Stamina: Running out of stamina means you cannot block, leading to increased damage intake and potential death.
- Magicka Burnout: Using many magicka-based skills without proper recovery leads to being unable to heal or use defensive abilities after taking a big hit.
- Cooldown Management: Refreshing skills too early uses resources unnecessarily when the skill and its effect are still active, leading to wasted resources.
Impact of Sustain Failure:
- Tank Death: The main reason tanks die is due to sustain issues. It might appear that more healing is needed or a mechanic was mishandled, but often the root cause is running out of resources, leading to an inability to block or heal effectively.
By focusing on these sustain strategies, you can ensure you remain effective in your role as a tank, maintaining your ability to block, use skills, and support your group throughout encounters.
Tank Sustaining Guide
Sustain Methods:
- Heavy After a Heavy: Heavy Attacking is crucial for sustain. Always time your Heavy Attack immediately after a boss’s Heavy Attack as bosses rarely ever perform back-to-back heavy attacks. Use this window of opportunity to help regenerate resources.
- Block LESS: Blocking constantly drains stamina. Learn fights to know when it’s safe to drop block. Having high resistances, damage mitigation, AoE self healing and healing support from a healer can make this easier.
- Use Potions: Use potions frequently for resource recovery.
- Use Synergies: Utilize synergies for resource boosts. The Undaunted Command passive provides resources from every synergy used. Focus on Orb and Shard synergies for significant resource boosts.
- Lower Your Block Cost: Use Bracing Enchants, use Tireless Guardian CP, and wear some Medium Armor pieces to reduce the stamina cost for blocking, easing overall sustain.
- Skills and Passives: Many skills and passives aid in sustain. Refer to specific tank builds for comprehensive lists of useful skills and passives.
- Don’t Overcast Abilities: Avoid recasting abilities too soon; let them run their full duration to conserve resources.
- Increase Magicka Recovery: Higher magicka recovery helps sustain most tank abilities.
- Using Your Ultimate (Dragonknight): Frequently use Warhorn in group content to boost group DPS and restore your resources.
- Use Sustain Gear: Start with sustain-focused gear while learning. The Engine Guardian set is highly recommended.
- Jewellery Traits: Harmony jewellery greatly improves sustain in synergy-rich groups. If Harmony isn’t viable, Infused is the next best option.
- Jewellery Enchants: Use Magicka Recovery enchants for improved sustain or Tri-Cost Reduction enchants if you use frequent stamina abilities. Ensure you have enough recovery to support cost reduction.
- Gear Traits: Divines gear buffs your Mundus Stone (usually The Atronach) for extra recovery.
- Food & Drink: Use food and drinks with recovery, especially magicka recovery. Note that this may lower max stamina and magicka stats.
- Buffs: Utilize skills providing Minor Intellect, Fortitude, and Endurance. Potions can offer the major versions of these buffs.
- Slottable Sustain: Slot any Support skills (especially Barrier) with the Magicka Aid passive for a huge magicka recovery boost. Arcanists can use Gibbering Shield for an additional recovery benefit of the Wellspring of the Abyss passive.
- Scribing: All classes can use a “spammable” magicka skill that returns stamina. For example, Wield Soul with Signature Script Druid’s Resurgence restores 1000 magicka and 1000 stamina. Stack magicka recovery and use Wield Soul to sustain blocking more easily.
By implementing these strategies and tips, you can maintain optimal resource sustain, ensuring you can perform all necessary tank duties effectively.
Heavy After A Heavy
Heavy Attacking is a tool for sustain. Follow these guidelines for effective use:
- Always perform a Heavy Attack immediately after a boss has Heavy Attacked you. Bosses are extremely unlikely to perform back-to-back Heavy Attacks.
- Consistently practice this timing throughout entire fights, not just when you’re low on resources.
- Heavy Attacking with a One Hand and Shield restores 2293 Stamina as a base value.
- Heavy Attacking with an Ice Staff restores 2425 Magicka.
- The recovery amount is amplified by 4% per piece of Heavy Armor worn, thanks to the Revitalize passive.
By mastering the “Heavy After a Heavy” tactic, you can significantly improve your resource sustain, ensuring you have the stamina and magicka needed to perform your tanking duties effectively.
ESO Tank Buffs and Debuffs
Buffing and debuffing are among the most critical responsibilities you’ll have as a tank. Once you’re comfortable with maintaining aggro, positioning, sustaining, and surviving, you can start focusing on these advanced techniques. Effective use of buffs and debuffs can provide significant boosts to your group and make you an invaluable tank.
Pre-Buffing
Before engaging in combat, always pre-buff with abilities like Major & Minor Resolve to increase resistances and mitigate initial hits. Precast Blood Altar for area healing for the group if you use it. For delayed spawning bosses, set up Elemental Blockade, Razor Caltrops and other AoE abilities in the spawn area to start applying effects immediately once the fight begins.
Major/Minor Breach:
- Skill: Pierce Armor (morph of Puncture).
- Effect: Inflicts Major and Minor Breach, reducing the enemy’s resistances by 5948 and 2974 respectively.
- Duration: Recast every 15 seconds (ideally every 13-14 seconds to avoid downtime).
- Purpose: Makes the enemy easier to kill by lowering their resistances while maintaining your taunt.
Major Resolve (and Minor Resolve):
- Skill: Hardened Armor (for Dragonknights) or similar skills for other classes.
- Effect: Increases your resistances by 5948, reducing damage taken.
- Duration: Recast every 20 seconds.
- Note: Useful up to the resistance cap of 33,000.
Major & Minor Maim:
- Skill: Destructive Clench (Frost Clench) with an Ice Staff.
- Effect: Taunts the enemy, applies Major Maim for 5 seconds, and procs the Chilled effect, which provides Minor Maim and Minor Brittle.
- Benefit: Reduces enemy damage by 15% and increases their received critical damage by 10%.
Crusher Enchantment:
- Weapon: Infused Ice Staff with a Crusher enchantment.
- Effect: Reduces enemy resistances by 2108 for 4 seconds.
- Application: Maintain by casting Elemental Blockade every 15 seconds, ensuring the enemy stands at the starting point of the Blockade.
- Combined Debuffs: With Major and Minor Breach from Pierce Armor, you can reduce a total of 11,030 resistances from the enemy.
Maintaining Buffs and Debuffs:
- Pierce Armor every 15 seconds for Major and Minor Breach.
- Hardened Armor or equivalent skill every 20 seconds for Major Resolve.
- Frost Clench every 5-15 seconds for Major and Minor Maim and Minor Brittle.
- Elemental Blockade every 15 seconds to maintain Crusher debuff.
Additional Tips:
- Practice: Consistently practice maintaining these buffs and debuffs until it becomes second nature.
- Timing: Make sure you time the recasts appropriately to avoid downtime and ensure continuous application of buffs and debuffs.
- Positioning: Position yourself and the enemy correctly to maximize the effectiveness of your debuffs.
By mastering these buffs and debuffs, you can significantly enhance your group’s effectiveness and make challenging encounters more manageable.
- Major Aegis – Decreases Damage Taken in Dungeons & Trials by 10%.
- Minor Aegis – Decreases Damage Taken in Dungeons & Trials by 5%.
- Major Courage – Increases Weapon Damage and Spell Damage by 430
- Minor Courage – Increases Weapon Damage and Spell Damage by 215.
- Major Endurance – Increases your Stamina Recovery by 30%.
- Minor Endurance – Increases your Stamina Recovery by 15%
- Major Evasion – Reduces damage taken from Area of Effect attacks by 20%.
- Minor Evasion – Reduces damage taken from Area of Effect attacks by 10%
- Major Expedition – Increases Movement Speed by 30%.
- Minor Expedition – Increases Movement Speed by 15%
- Major Fortitude – Increases Health Recovery by 30%.
- Minor Fortitude – Increases Health Recovery by 15%
- Major Heroism – Grants 3 Ultimate every 1.5 seconds
- Minor Heroism – Grants 1 Ultimate every 1.5 seconds
- Major Intellect – Increases your Magicka Recovery by 30%
- Minor Intellect – Increases your Magicka Recovery by 15%
- Minor Lifesteal – Heals 600 Health every second for you and allies who damage the target
- Minor Magickasteal – Restores 168 Magicka every second to you and allies who damage the target
- Major Mending – Increases Healing Done by 16%
- Minor Mending – Increases Healing Done by 8%
- Major Protection – Reduces damage taken by 10%
- Minor Protection – Reduces damage taken by 5%
- Major Resolve – Increases Physical Resistance and Spell Resistance by 5948
- Minor Resolve – Increases Physical Resistance and Spell Resistance by 2974
- Minor Toughness – Increases Maximum Health by 10%
- Major Vitality – Increases Healing Received by 16%
- Major Breach – Reduces Physical and Spell Resistance by 5948.
- Minor Breach – Reduces Physical and Spell Resistance by 2974.
- Minor Brittle – Increases Critical Damage taken by 10%.
- Major Cowardice – Reduces Weapon Damage and Spell Damage by 430.
- Minor Cowardice – Reduces Weapon Damage and Spell Damage by 215.
- Major Maim – Reduces damage done by 10%.
- Minor Maim – Reduces damage done by 5%.
- Minor Mangle – Reduces Maximum Health by 10%.
- Major Vulnerability – Increases Damage Taken by 10%.
- Minor Vulnerability – Increases Damage Taken by 5%.
- Stagger – Increases damage taken by 65 per stack for 5 seconds.
- Infused Crusher – Reduces the target’s Physical and Spell Resistance by 2108.
- Engulfing Flames – Affected enemies take more damage from all Flame Damage attacks based on your Weapon and Spell Damage, with a maximum of 6% bonus damage taken.
- Alkosh Armor Shred – Reduces the Physical and Spell Resistance of any enemy hit by the amount of your Weapon Damage for the duration, up to a maximum of 6000.
- Crimson Oath Armor Shred – Reduces the Armor of nearby enemies within 12 meters by 3541 for 15 seconds.
- Tremorscale Armor Shred – Dealing Physical damage to all enemies within 4 meters and reducing their Armor for 15 seconds.
Class Specific Buffs and Debuffs
Every class has their own specific buff / debuff that can be required for optimal group performance depending on your composition:
- Runic Sunder – 2200 Armor Penetration & Minor Maim
- Fatewoven Armor – AoE Minor Breach
- Runic Defense – Group Minor Resolve
- Rune of the Colorless Pool – Minor Brittle & Minor Vulnerability
- Circumvented Fate – Group Minor Evasion
- Arcanist’s Domain – Minor Courage, Minor Fortitude, Minor Intellect & Minor Endurance
- Vitalizing Glyphic – Group Heal & 200 Weapon + Spell Damage
- Glyphic of the Tides – Group Major Protection (+Vitalizing Glyphic effects)
- Chakram Shields – Group damage shield
- Stone Giant – Stagger/DPS Buff
- Mountain’s Blessing – Minor Brutality
- Igneous Weapons – Major Sorcery & Major Brutality
- Igneous Shield – 6-person group shield
- Engulfing Flames – 0-5% Increased Flame Damage taken by enemies
- Choking Talons – AoE Minor Maim
- Magma Shell – Group Damage Shield
- Cinder Storm – AoE heal over time
- Deep Breath – AoE Interrupt
- Colossus – Major Vulnerability
- Empowering Grasp – Empower
- Agony Totem – AoE Minor Vulnerability, Minor Protection & Group Synergy
- Unnerving Boneyard – AoE Major Breach & Group Synergy
- Ruinous Scythe – Off Balance
- Reanimate – Resurrect 3 allies
- Hemorrhage – Minor Savagery
- Lotus Fan – AoE Minor Vulnerability
- Refreshing Path – AoE Major Expedition, Minor Endurance & Minor Intellect
- Mass Hysteria – AoE Major Cowardice
- Power Extraction – AoE Minor Cowardice
- Dark Shade – AoE Minor Maim
- Soul Siphon – Group Major Vitality
- Bolstering Darkness – Group Major Protection
- Exploitation – Minor Prophecy
- Storm Atronach Ultimate – Group Major Berserk synergy
- Regenerative Ward– Minor Intellect & Minor Endurance
- Crystal Weapon – 1000 armor pen
- Lightning Splash – Conduit synergy, Concussion/Minor Vulnerability
- Boundless Storm – Concussion/Minor Vulnerability
- Illuminate – Group Minor Sorcery
- Power of the Light – Minor Breach
- Radiant Aura – Group Minor Endurance, Minor Fortitude, and Minor Intellect
- Extended Ritual – Group Purge/Synergy
- Hasty Prayer – Minor Endurance
- Repentance – 3000 group heal per corpse
- Light Weaver – 2 Ultimate to group members
- Luminous Shards – Alkosh/sustain synergy
- Swarm – Minor Vulnerability
- Expansive Frost Cloak – Group Major Resolve
- Maturation – Group Minor Toughness
- Enchanted Growth – Group Minor Intellect & Minor Endurance
- Corrupting Pollen – Major Defile & Minor Cowardice
- Dive – Off Balance
- Deep Fissure – AoE Major Breach & Minor Breach
- Leeching Vines – Minor Lifesteal
- Frozen Device – Major Maim
How To Tank Add Pulls
In The Elder Scrolls Online, AoE Taunting isn’t an option, so the main focus during add pulls is on Crowd Controlling rather than taunting. Understanding how different effects interact is crucial for effective add management. Add pulls typically consist of regular enemies that can be pulled or chained together and then controlled with snares and immobilizations. Using the Void Bash Set (Vateshran One Hand & Shield) can significantly improve this process, pulling enemies within 12 meters with one button press, leaving only a few to be manually chained.
Key Points:
- Chaining and Pulling: Skills like chains or pulls gather enemies into one spot.
- Snaring: Reduces enemy movement speed.
- Immobilizing: Holds enemies in place for a period.
- Stun and Fear: Ineffective on recently chained/pulled enemies.
- Scribing System: Provides immobilization for classes without built-in options.
The primary advantage of this method is its universality: it works for every class, though some may need specific skills or the scribing system for immobilization.
General Add Pull Rotation
- Scan for Elite Enemies: Identify any Elite enemies that need immediate taunting (especially 2-handed enemies).
- Initiate Combat: Start with Elemental Blockade to cause enemies to run towards you.
- Place Razor Caltrops: Place this on the ground in front of the enemies, in the path they will walk towards the group. This snares the enemies, slowing them down and debuffing them with Major Breach.
- Use Power Slam to Proc Void Bash or Chain/Pull Enemies: Gather enemies in a stack on top of the Caltrops/Blockade, Void Bash also applies Major Maim.
- Immobilize Enemies: Use your immobilization skill to keep enemies rooted in the stack.
- Apply Debuffs: Use Pulsar (Frost Staff) twice while enemies are inside the Blockade to apply Minor Breach, Minor Maim, Minor Brittle, Minor Protection, and Minor Mangle.
- Taunt Remaining Enemies: Taunt anything that isn’t dead.
By following this general rotation, you can effectively control and manage add pulls, making it easier for damage dealers to quickly eliminate grouped enemies while applying strong debuffs to them. This strategy enhances the overall efficiency and survivability of your group and can be executed by any class with the correct skills and scribing abilities..
How To Tank Boss Fights
Boss fights in ESO vary greatly, so it’s challenging to provide a one-size-fits-all strategy. However, understanding and adapting to general principles and specific mechanics will significantly improve your tanking performance. Here are some detailed guidelines to help you tank effectively during boss encounters:
General Rules:
- Taunt Management: Maintain taunt on the boss by reapplying every 14 seconds to ensure you hold aggro.
- Positioning: Turn bosses away from your group to prevent them from hitting allies with frontal attacks. Avoid moving bosses unnecessarily to maximize your group’s damage output.
- Fundamentals: Keep taunting, blocking, sustaining, and surviving as your top priorities.
- Boss Observation: Watch for interruptible attacks, channels, mechanics and effects.
- Damage Mitigation: Roll dodge heavy attacks or big hits to avoid taking damage. Roll dodging can also save you from follow-up attacks when you’re low on health.
Common Boss Mechanics
- Heavy Attacks: Block or dodge to avoid significant damage.
- Bosses with Adds: Chain in adds to the boss while maintaining control.
- Light Attacks: Can be blocked, absorbed with a shield, or sometimes ignored.
- AoE Attacks: Move out of these to avoid damage.
- DoT Attacks: Require healing over time and good mitigation.
- Projectile Attacks: Use a shield skill and block to mitigate damage.
- Interruptible Attacks: Bash the boss to interrupt these attacks.
- Negative Effects: Purge if possible or prepare for a heal check.
- Fear Mechanics: Avoid looking at the boss to prevent being feared.
- Persistent AoEs: Move out of these and reposition the boss if necessary.
- Hide Mechanics: Hide behind pillars or other objects as required.
- Kite Mechanics: Move around to avoid being hit.
- Multi-hit or Quick Swipes: Ensure you have enough stamina to block or dodge.
- Debuff Mechanics: Utilize survival techniques to mitigate increased damage.
- Avoid Group Members: Steer clear of allies affected by beams or AoEs to prevent spreading or causing additional damage.
- Heal Check Mechanics: Prepare for heavy damage in a short time requiring significant healing.
- Boss Swapping Mechanics (Trials Only): Coordinate with the off-tank to switch bosses as needed.
- Portal Mechanics (Trials Usually): Enter portals and handle mechanics inside, sometimes requiring a tank.
Testing Your Tanking Capabilities
To test and improve your tanking skills, consider the following methods:
Buff Maintenance Practice:
- Asylum Sanctorum Trial: Travel to the Asylum Sanctorum trial (Normal or Veteran). Head to the main boss, Saint Olms, and press the two buttons on the left and right to activate AS+2.
- Tip: Bring a friend to stand behind you to kite the lightning pools spat by Olms. Without a friend, the pools will land on you.
- Benefit: This setup allows you to practice maintaining your buffs and debuffs while dealing with boss mechanics in a challenging environment.
Sustain and Survival Practice:
- Trial Entrance: Run into any trial entrance with a lot of adds and enemies. Alternatively, try Blackrose Prison for a comprehensive challenge.
- Blackrose Prison: This environment requires various aspects of tanking, providing a good test of your sustain and survival abilities.
General Tips:
- Understand Fundamentals: Grasp the core principles of tanking, including aggro management, positioning, sustain, and survival.
- Learn Content Mechanics: Familiarize yourself with the mechanics of the content you’re tanking.
- Experience and Practice: Learn from your deaths and mistakes. Repeatedly running content helps build experience and understanding, making you a better tank over time.
By practicing in these environments and continuously improving your skills, you can enhance your tanking capabilities and become more effective in various challenging situations.
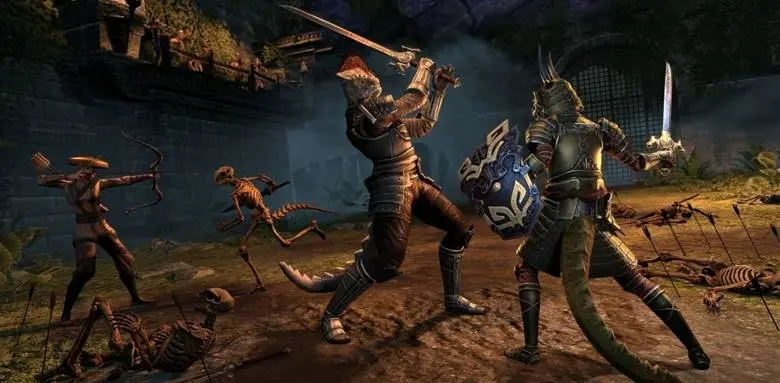
Tanking Content & Progression
With all the fundamental information provided, you now have the basics of tanking down. It’s time to dive into actual content and put your skills to the test. We’ve compiled a list of content for you to practice tanking, helping you build confidence and experience before tackling more challenging encounters.
Normal Dungeons / Random Normal Dungeons (Any level)
Start with normal dungeons, as these are easy enough to be completed without a dedicated tank. This makes them ideal for familiarizing yourself with dungeon layouts, your character, and basic tanking mechanics. While you won’t get the full tanking experience, use this opportunity to farm useful tank gear, focusing on the sets listed in our Tank Gear Guide.
Dungeons to look out for
Crypt of Hearts – Ebon Armory
Vaults of Madness – The Worm’s Raiment
Black Drake Villa (DLC) – Drake’s Rush
The Dread Cellar (DLC) – Crimson Oath’s Rive
Shipwright’s Regret (DLC) – Turning Tide
Graven Deep (DLC) – Pangrit Denmother
None-DLC Veteran Dungeons & Undaunted Pledges (CP 160+)
After mastering normal dungeons, you can move on to veteran dungeons, starting with the non-DLC ones. These dungeons are more challenging than their normal counterparts but still manageable, allowing you to practice proper tanking techniques and apply many concepts from this guide. The difficulty is slightly higher, providing a better tanking experience, and you will need to begin understanding and following mechanics, especially in boss fights. This helps build good habits and improves your tanking skills. There is plenty of room for error and recovery, offering a forgiving environment to learn. Completing veteran dungeons allows you to earn extra keys from the Undaunted Pledges, important for obtaining Shoulder pieces for Monster Sets. Additionally, you’ll earn useful Monster Helmets by completing veteran dungeons, essential for your tank build. Progressing through these veteran dungeons will enhance your tanking skills and prepare you for more challenging content.
Dungeons to look out for
Spindleclutch II – Bloodspawn
Darkshade Caverns II – Engine Guardian
Volenfell – Tremorscale
Black Drake Villa (DLC) – Encratis’s Behemoth
Shipwright’s Regret (DLC) – Nazaray
Earthern Root Enclave (DLC) – Archdruid Devyric
Dragonstar Arena (CP160+)
Dragonstar Arena (DSA) is a 4-player arena that, while incredibly easy on normal mode, is quite long. It’s worth completing to farm a valuable weapon set that enhances healing and survival, making it a great investment for many builds. Ideally, aim for the drop from the veteran version of the arena, as it provides additional benefits. If you’ve been successfully tanking veteran dungeons, you should be capable of handling veteran DSA.
Important Loot:
Puncturing Remedy Set / Master’s One Hand and Shield
Vateshran Hollows Solo Arena (CP160+)
Before tackling Veteran DLC Dungeons and harder content, it’s wise to collect the important Void Bash set from Vateshran Hollows. The downside is that this is a solo arena requiring you to do some damage, but the plus side is you can utilize the Armory, a free housing item from the Crown Store. Place the Armory in your house to switch your entire build to a damage-focused setup, allowing you to complete Vateshran Hollows on Normal. You need about 10k DPS to do this successfully. If you’re an Arcanist or Dragonknight, use our Hybrid Tank Builds for this content. The Void Bash set is one of the best for dungeon tanking, enabling you to pull in a whole stack of adds with one button while also debuffing them. This makes add pulls faster, easier, and more sustainable, benefiting both you and your group.
Important Loot:
Void Bash / Vateshran Hollows One Hand and Shield
Normal Trials (CP300+)
At this stage, your priority is to apply the fundamentals you have learned in trial settings. Starting with normal trials is generally fine, though newer trials can be more challenging due to complex mechanics. Many mechanics in normal trials can be ignored without severe consequences, unlike in veteran trials. This makes normal trials an excellent learning opportunity, in addition to reading guides or watching clips.
Joining guild runs is ideal for learning as they offer a supportive environment where you can ask questions and gather feedback without facing potential toxicity. Look for guilds that regularly organize trial runs. Guild runs provide a structured setting where you can gain valuable insights and advice from experienced players, which is crucial for your development as a tank.
If you opt for random trial runs, you can find groups by traveling to Craglorn, using text chat, or the social menu grouping tool. Be aware that random runs can be volatile and critical, with mistakes often met with criticism rather than support, as these runs are typically focused on gear farming. However, if you have some trial experience and knowledge, random runs can be a viable option. They can offer a variety of experiences and help you adapt to different group dynamics.
Not all trials require two tanks, but joining those that do can help you understand how to split the workload with another tank, reducing the risk to the group if you make a mistake. Learning to coordinate with another tank is essential for handling more complex mechanics and ensuring smooth progression. Pay attention to trial mechanics and try to pick up as much information as possible, as this is crucial for transitioning to veteran trials where ignoring mechanics can lead to failure.
Trials to look out for
Sunspire – Claw of Yolnahkriin
Lucent Citadel – Lucent Echoes
Dreadsail Reef – Pearlescent Ward
Rockgrove – Saxhleel Champion
Cloudrest – Vestment of Olorime
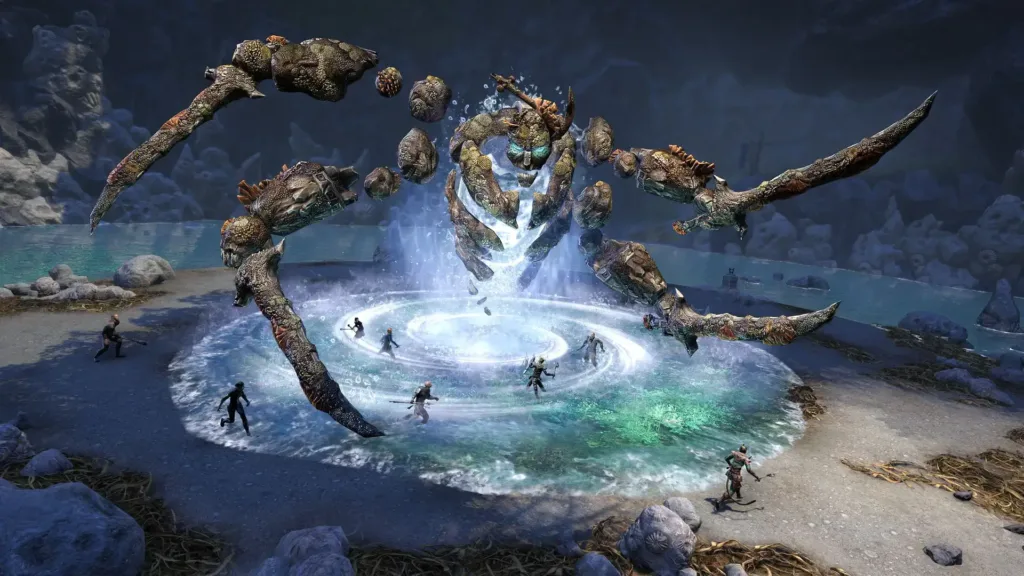
Tanking Endgame Content
There is no rush to reach the endgame of ESO. This content represents the hardest challenges in the game, often requiring weeks or months of progression and practice to complete. It can also take time to find a team willing to commit to these rigorous trials.
Endgame Content:
- Veteran Hardmode DLC Dungeons
- Veteran Trials
- Hardmode Trials
- Trifectas: Veteran dungeons and trials completed with No Death, Hardmode enabled, and within speed run time.
Reaching this level involves a long journey where you’ll need to complete each dungeon and trial initially on veteran mode, learning all the mechanics along the way. Ideally, you should do this with friends or guild members for better coordination and support.
Dungeon Content: Dungeon content is more accessible since it’s easier to find three other players interested in hardmodes and trifectas. Some DLC Dungeon Hardmodes are extremely challenging with high damage and multiple mechanics, making them excellent preparation for Veteran Hardmode Trials.
Veteran Hardmode Trials: When you are fully aware of all mechanics, comfortable with tanking, and have all the required gear and skills, you can start searching for groups recruiting a Tank for Hardmodes. Learning these mechanics in a supportive environment with a raid leader guiding you through tasks and differences helps you progress. Multiple attempts will likely be needed, providing valuable knowledge and practice.
Trifecta Tanking: Once you gain hardmode completions and experience, you can move onto Trifecta Tanking, where you are expected to know everything the Hardmode throws at you and execute it perfectly.
Advanced Requirements: Endgame content requires advanced knowledge and often necessitates carrying multiple gear sets, swapping gear and skills between fights, and fully optimizing your setup for specific trials, dungeons, and even specific bosses. You may also need to use alternative classes to fill any gaps the group needs to be optimal.
This level of content is challenging but extremely rewarding, requiring a lot of time, patience, and knowledge to master.
Imperial City Prison (ICP) | White-Gold Tower (WGT) | Cradle of Shadows (CoS) | Ruins of Mazzatun (RoM) | Falkreath Hold (FH) | The Cauldron | Black Drake Villa | Bloodroot Forge (BF) | Lair of Maarselok (LoM) | Scalecaller Peak (SP) | Icereach (IR)
Depths of Malatar | Fang Lair | Frostvault | | March of Sacrifices | Moon Hunter Keep | Moongrave Fane | Unhallowed Grave | Castle Thorn | Stone Garden | The Dread Cellar | Red Petal Bastion | The Coral Aerie | Shipwright’s Regret | Graven Deep | Earthern Root Enclave | Bedlam Veil | Oathsworn Pit | Bal Sunnar | Scrivener’s Hall
- Aetherian Archive (vAA)
- Hel Ra Citadel (vHRC)
- Sunspire (vSS)
- Sanctum Ophidia (vSO)
- Asylum Sanctorium (vAS)
- Maw of Lorkhaj (vMoL)
- Halls of Fabrications (vHoF)
- Kynes Aegis (vKA)
- Cloudrest (vCR)
- Sanity’s Edge (vSE)
- Lucent Citadel (vLC)
- Rockgrove (vRG)
- Dreadsail Reef (vDSR)
- Sanctum Ophidia (vSO HM)
- Aetherian Archive (vAA HM)
- Halls of Fabrications (vHoF HM)
- Hel Ra Citadel (vHRC HM)
- Maw of Lorkhaj (vMoL HM)
- Kynes Aegis (vKA HM)
- Asylum Sanctorium (vAS+2)
- Sunspire (vSS HM)
- Cloudrest (vCR+3)
- Sanity’s Edge (vSE HM)
- Lucent Citadel (vLC HM)
- Rockgrove (vRG HM)
- Dreadsail Reef (vDSR HM)
The End
Thank you for taking the time to read through this ESO Beginner Tank Guide.
Just remember that the Tank role is a difficult and pressured role to play. We all progress at a different speed, and you need to just develop as you gain experience and try your best. Play the game, play your class, learn the role, learn from your mistakes and gain as much experience as you can.
Learning fights and mechanics will make things so much easier and you can only do this by getting many hours of experience and talking and playing alongside other Tanks.
Enjoy the game, as stressful as Tanking can be you need to have fun and Tanking can become very fun and enjoyable!
- DD (Damage Dealer): The team members responsible for dealing damage.
- DPS (Damage Per Second): The amount of damage caused per second by an individual or group.
- Aggro: When you have an active taunt on an enemy target, causing them to focus on you.
- CC (Crowd Control): Techniques to manage groups of enemies, including chaining, pulling, rooting, immobilizing, snaring, and fearing.
- Snare: Slowing down the enemy’s movement.
- Pulling: Using skills like Unrelenting Grip, Silver Leash, or Frozen Device to pull a target to you.
- Stacking: Taunting, line-of-sighting, and crowd-controlling a group of enemies to gather them in one spot.
- LoS (Line of Sight): Positioning yourself to force enemies to move so they can see you.
- DoT (Damage over Time): Abilities that inflict damage on an enemy over a duration.
- HoT (Heal over Time): Healing that occurs in smaller amounts consistently over a duration.
- AoE (Area of Effect): Skills that affect multiple targets within a specified area.
- Cleave: Hitting multiple targets at once, usually with AoE skills.
- Proc: An event triggered by meeting certain conditions, such as using Yolnahkriin and taunting an enemy to “proc” Minor Courage.
- Range Tanking: Maintaining aggro on a ranged target and tanking them from a distance, requiring a specific setup.
- Face Tanking: Melee tanking targets by blocking and taking damage directly.
- Kite: Running away from an enemy with aggro so it can’t hit you, or moving away from mechanics aimed at you.
- Rez (Resurrecting/Resurrection): Abbreviation for reviving allies when they die.
- PotL (Power of the Light): A Templar skill.
- GDB (Green Dragon Blood): A Dragonknight healing skill.
- Orb (Mystic Orb) / Shard: A Templar skill providing a synergy that grants resources.
- Altar (Blood Altar): An Undaunted skill.
- PA (Powerful Assault): A gear set sometimes used by tanks.
- S&B (Sword and Board): Abbreviation for One Hand and Shield.


